
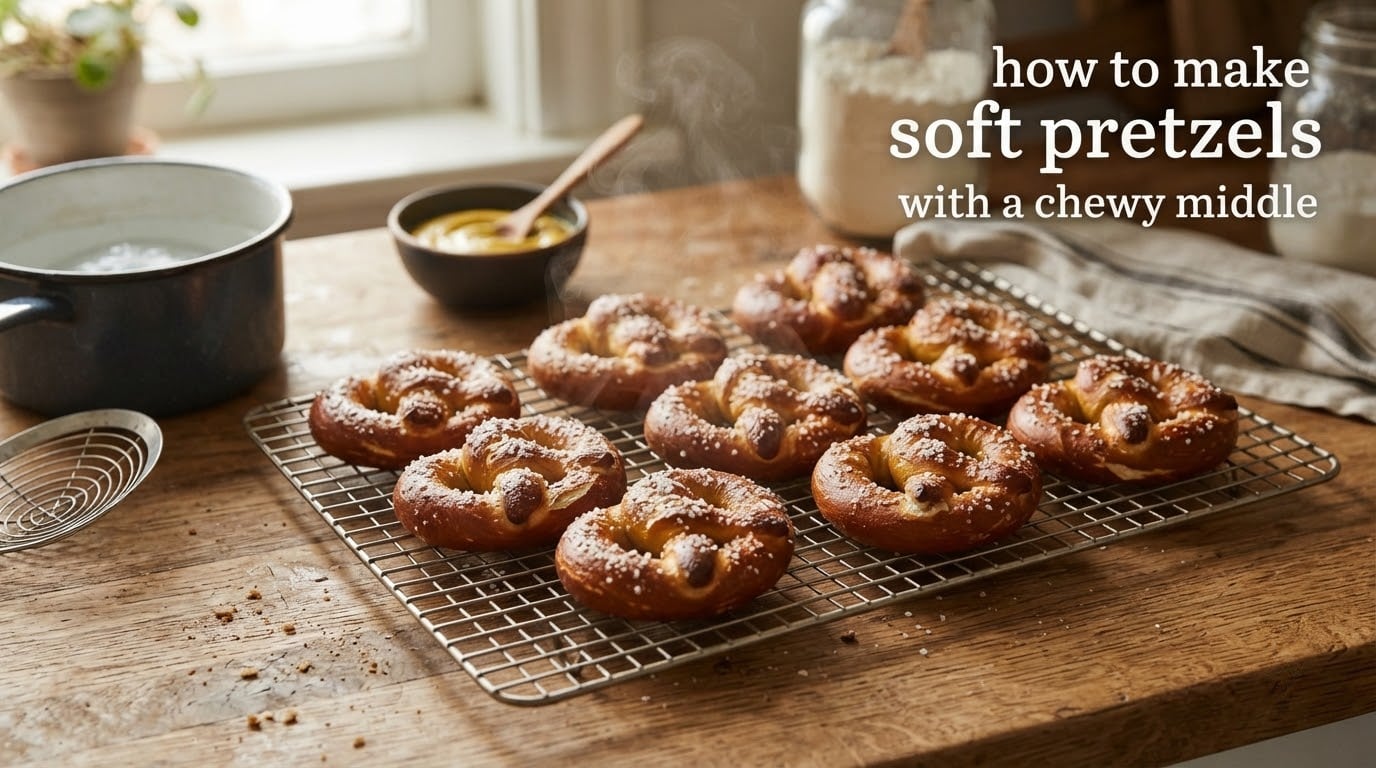
If you have ever wondered how to make soft pretzels with a chewy middle that rivals the mall bakery, the answer comes down to three things: a properly developed dough, a quick dip in an alkaline bath, and a hot oven. I have tested this recipe across six batches over the past two months, tweaking flour, hydration, and boil time until the crumb was pillowy soft and the crust snapped with that signature chew.
This guide walks you through every step, including the science that makes pretzels different from ordinary bread. You will learn which flour gives the best structure, why baking soda transforms the crust, and how to fix the sticky dough and pale color issues that trip up most home bakers. Whether you are prepping for game day, Oktoberfest, or a quiet Saturday project, this is the only soft pretzel recipe you will need in 2026.
Table of Contents
- What Makes a Pretzel Chewy? The Science Behind the Bite
- Ingredients and Equipment You Will Need
- Choosing the Right Flour: Bread vs All-Purpose
- How to Make Soft Pretzels With a Chewy Middle (Step-by-Step)
- The Baking Soda Bath: Why It Works and How to Nail It
- Shaping Perfect Pretzels (Visual Walk-Through)
- Baking: Temperature, Timing and Doneness Signs
- Troubleshooting: Fixing Common Pretzel Problems
- Make-Ahead, Storage and Reheating
- Flavor Variations and Topping Ideas
- Frequently Asked Questions
- Conclusion
What Makes a Pretzel Chewy? The Science Behind the Bite
The chewy middle of a soft pretzel is not an accident. It is the result of three chemical reactions working together during the boil and the bake. Once you understand them, every choice you make in the kitchen gets easier.
First, gluten development gives pretzel dough its structure. When you knead flour and water, two proteins (glutenin and gliadin) link into long elastic strands. Bread flour with around 12 percent protein creates more strands than all-purpose flour, which is why bread flour produces a chewier crumb. Second, starch gelatinization happens during the alkaline bath: the hot alkaline water swells the starch granules on the surface of the dough, creating a barrier that dries into the glossy, chewy skin you bite into.
Third, the Maillard reaction is what browns the crust. The alkaline bath raises the surface pH, which speeds up the reaction between amino acids and sugars during baking. Higher pH means faster browning at a lower temperature, which is why pretzels go from pale beige to deep mahogany in just 12 to 14 minutes. Without the bath, you would get a soft breadstick, not a pretzel.
Ingredients and Equipment You Will Need
Soft pretzels use a simple enriched dough. Most of these ingredients are pantry staples, and the equipment is basic enough that you do not need a stand mixer.
For the dough (makes 8 pretzels):
- 3 and 1/2 cups (420g) bread flour or high-protein all-purpose flour
- 1 and 1/2 teaspoons instant yeast or active dry yeast
- 1 and 1/4 cups (300ml) warm water (about 105°F)
- 2 tablespoons unsalted butter, melted
- 1 tablespoon brown sugar or barley malt syrup
- 1 and 1/2 teaspoons fine salt
For the alkaline bath:
- 1/2 cup (120g) baking soda
- 8 cups (2 liters) water
For finishing:
- 1 large egg beaten with 1 tablespoon water (egg wash)
- 2 to 3 tablespoons coarse pretzel salt or flaky sea salt
Equipment: a large mixing bowl, a stand mixer with dough hook (optional), a heavy pot at least 10 inches wide for the bath, a slotted spoon or spider, two sheet pans lined with parchment paper or silicone baking mats, and a kitchen scale if you have one. Reviewers on baking forums consistently report that silicone mats prevent sticking better than parchment or foil, which matters when you are sliding wet pretzels onto a hot pan.
Choosing the Right Flour: Bread vs All-Purpose
Flour choice has a bigger impact on pretzel texture than most recipes admit. Higher protein means more gluten, which means more chew. Bread flour typically runs 12 to 13 percent protein, while all-purpose flour usually sits between 9 and 11 percent. King Arthur all-purpose flour is the outlier at 11.7 percent, and bakers report it behaves like bread flour in pretzel dough.
If you want the chewiest possible middle and a sturdier rope for shaping, bread flour is the safer choice. If you want a slightly more tender pretzel with a softer bite, all-purpose flour works fine, but expect to handle the dough more gently during shaping because the weaker gluten network tears more easily. Avoid cake flour and pastry flour for pretzels. Their low protein content produces a delicate crumb that cannot hold the twist shape during boiling.
How to Make Soft Pretzels With a Chewy Middle (Step-by-Step)
This is the core method I have used to produce consistent pretzels across multiple test batches. Follow the steps in order, and you will get a glossy brown crust, a soft chewy interior, and a pretzel that tastes like it came from a German bakery.
Step 1: Mix the dough. Combine the warm water, yeast, and sugar in a large bowl and let it sit for 5 minutes until foamy. Add the flour, melted butter, and salt. Stir with a wooden spoon until a shaggy dough forms.
Step 2: Knead for 6 to 8 minutes. Turn the dough onto a lightly floured surface and knead by hand, or use a stand mixer with the dough hook on medium speed for 6 minutes. The dough is ready when it is smooth, slightly tacky, and springs back when poked. To check gluten development, perform the windowpane test: stretch a small piece of dough thin. If it stretches into a translucent membrane without tearing, the gluten is developed. If it tears immediately, knead for 2 more minutes and retest.
Step 3: First rise. Shape the dough into a ball, place it in a lightly oiled bowl, cover with plastic wrap or a damp towel, and let it rise in a warm spot for 45 to 60 minutes, until nearly doubled in size. For deeper flavor, you can cold-proof the dough in the refrigerator for 8 to 24 hours at this stage.
Step 4: Divide and pre-shape. Punch down the dough and turn it out onto a lightly floured surface. Divide into 8 equal pieces (about 85g each). Roll each piece into a smooth ball, then let them rest uncovered for 5 minutes so the gluten relaxes before shaping.
Step 5: Shape the pretzels. Roll each ball into a rope about 20 to 24 inches long. Taper the ends slightly by rolling them with your fingertips against the counter. Form a U-shape, cross the ends over each other twice in the middle, then flip the crossed ends down onto the bottom curve of the U. Press the ends gently into the dough to seal. See the detailed shaping section below for trouble spots.
Step 6: Prepare the baking soda bath. While the shaped pretzels rest for 10 minutes, bring 8 cups of water to a rolling boil in a wide pot. Slowly add 1/2 cup baking soda (it will foam vigorously). Reduce heat to a gentle boil. For an even stronger pretzel flavor and color, you can bake the baking soda first: spread it on a foil-lined sheet pan and bake at 250°F for 1 hour, which converts sodium bicarbonate to the more alkaline sodium carbonate.
Step 7: Boil each pretzel for 30 seconds per side. Lower one or two pretzels at a time into the bath using a slotted spoon. Boil for 30 seconds, flip, and boil another 30 seconds. Lift them out, let excess water drip back into the pot, and place on the prepared sheet pans. The surface should look slightly wrinkled and dull.
Step 8: Egg wash and salt. Brush each pretzel generously with the beaten egg. Sprinkle with coarse pretzel salt while the surface is still wet so the salt adheres.
Step 9: Bake. Bake at 450°F (230°C) for 12 to 14 minutes, until the pretzels are deep golden brown. If you want an extra-crisp crust, brush with a second coat of egg wash at the 8-minute mark and return to the oven for the remaining time.
Step 10: Cool briefly and serve. Let the pretzels rest on the pan for 3 minutes, then transfer to a wire rack. Serve warm with mustard, cheese sauce, or butter.
The Baking Soda Bath: Why It Works and How to Nail It
The 60-second dip in boiling baking soda water is the single most important step for that chewy, glossy, deeply browned pretzel crust. Skipping it or shortening the dip is the most common mistake home bakers make, and it is the reason most homemade pretzels look and taste like breadsticks.
When baking soda dissolves in water, it forms a mildly alkaline solution with a pH of around 8 to 9. That alkalinity partially hydrolyzes the proteins and starches on the dough surface, creating the leathery skin that defines a true pretzel. The bath also pre-gelatinizes the starch, which locks in moisture and produces the chewy bite. Without the bath, the crust bakes up soft and pale.
For a stronger effect, you have three options. Plain baking soda in water is the easiest and works well. Baked baking soda (heated at 250°F for an hour) converts to sodium carbonate, raising the pH closer to 11 and producing a darker, more authentic Bavarian crust. Food-grade lye (sodium hydroxide) is the traditional choice and produces the deepest color and strongest pretzel flavor, but it requires gloves, eye protection, and careful handling. Baked baking soda gets you about 90 percent of the lye result with none of the safety risk, which is why I use it whenever I want that malt-shop look.
Boil each pretzel for 30 seconds per side, totaling about 60 seconds. Longer than 90 seconds total and the dough loses too much surface starch, leaving you with a soapy or metallic taste. Shorter than 30 seconds per side and the crust will not develop the chewy skin.
Shaping Perfect Pretzels (Visual Walk-Through)
Shaping is the step that intimidates most first-time pretzel makers, but the technique is forgiving once your fingers learn the motion. The key is to keep the rope evenly thick and to give the dough a brief rest so it does not snap back.
Start by rolling each dough ball into a rope about 20 to 24 inches long. Use both hands, palms flat, and roll from the center outward to keep the thickness even. If the rope shrinks back as you roll, cover it with a kitchen towel for 3 minutes and try again. Taper the ends by rolling them firmly against the counter; thicker ends will not stick during boiling and they bake unevenly.
To form the pretzel, hold the rope in a U-shape with the curved bottom facing you. Cross the two ends over each other once, then again, creating a small twist in the middle. Lift the crossed ends, fold them down toward the curved bottom of the U, and press the tips firmly into the dough about 1 inch below the twist to seal. If the ends pop off during boiling, dab a little water on them before pressing.
Baking: Temperature, Timing and Doneness Signs
Pretzels want intense heat for a short time. A 450°F oven sets the crust quickly so the interior stays soft and steamy. Bake for 12 to 14 minutes, rotating the pans halfway through so the pretzels brown evenly.
The doneness signs are visual. You want a deep mahogany brown across the entire surface, including the underside where the dough touches the pan. If the tops are golden but the bottoms are still pale, drop the rack one position lower for the last 3 minutes. The crust should look dry and slightly cracked, not soft or doughy. Tap the bottom of a pretzel with your knuckle; a hollow sound means the crumb is set.
For an even glossier, salt-friendly crust, use the double egg wash method. Brush once before the bath, and again at the 8-minute mark during baking. The protein from the second coat crisps up under the high heat and creates a lacquered finish that holds coarse salt beautifully.
Troubleshooting: Fixing Common Pretzel Problems
Every home baker runs into pretzel trouble at some point. Here are the most common issues, the likely cause, and the fix that solves them.
| Problem | Likely Cause | Fix |
|---|---|---|
| Dough is too sticky to knead | High humidity or under-kneaded gluten | Knead in 1 tablespoon flour at a time until smooth; aim for windowpane test |
| Dough ropes snap back when rolling | Gluten too tight; not enough rest | Cover dough balls with a towel for 5 to 10 minutes, then re-roll |
| Pretzels pale instead of deep brown | Skipped or shortened baking soda bath, or oven too cool | Use baked baking soda; boil full 30 seconds per side; verify oven temp with thermometer |
| Crust tastes soapy or metallic | Bath too long, or too much baking soda in water | Reduce boil to 20 seconds per side; keep bath ratio at 1/2 cup soda per 8 cups water |
| Pretzels dense and heavy, not fluffy | Insufficient rise or under-kneaded dough | Let dough double in size; perform windowpane test before shaping |
| Ends of pretzel pop off during boiling | Dry seal, dough too cold, or rope ends too thick | Dab water on ends before pressing; keep pretzels warm while waiting to boil |
| Salt melts into pretzels during storage | Sweat from warm pretzels sealed in container | Cool pretzels completely on rack before storing; use airtight container only after cooled |
Make-Ahead, Storage and Reheating
Pretzels are at their peak within an hour of baking, but with the right method you can extend that window from a few hours to several months. Pick the option that matches your timeline.
Same day (up to 8 hours): Cool completely on a wire rack, then store in a paper bag inside a loose-fitting plastic bag. The paper absorbs excess moisture and keeps the crust from going soft.
Overnight (refrigerated shaped pretzels): Shape the pretzels, place them on a parchment-lined sheet, cover tightly with plastic wrap, and refrigerate for up to 24 hours. When ready to bake, dip them directly from the fridge into the boiling bath. Add about 10 seconds per side since they will be cold.
Freeze the dough (up to 3 months): After the first rise, divide and shape the dough into balls, wrap each tightly in plastic, and freeze in a zip-top bag. Thaw overnight in the refrigerator, then shape, boil, and bake as usual.
Freeze baked pretzels (up to 3 months): Cool completely, wrap individually in plastic wrap, then place in a freezer bag. To reheat, bake straight from the freezer at 350°F for 8 to 10 minutes. Skip the microwave, which turns the crust rubbery.
To reheat room-temperature pretzels, spritz them lightly with water and bake at 350°F for 4 to 5 minutes. The steam restores the soft middle and crisps the crust back up.
Flavor Variations and Topping Ideas
Once you have the base method down, you can riff on it. The dough recipe stays the same; only the topping and any mix-in changes.
Cinnamon sugar: Brush the boiled pretzels with melted butter, then toss in a mixture of 1/2 cup sugar and 2 teaspoons cinnamon while still warm.
Everything bagel: Replace the pretzel salt with a mixture of poppy seeds, sesame seeds, dried garlic, dried onion, and flaky salt.
Jalapeño cheddar: Knead 1 cup shredded sharp cheddar and 2 chopped pickled jalapeños into the dough after the first rise. Use coarse salt on top.
Honey oat: Brush with egg wash and press rolled oats into the surface before baking. Drizzle warm honey over the finished pretzel.
Frequently Asked Questions
What is the secret to chewy soft pretzels?
Three things produce the chewy middle: bread flour (or high-protein all-purpose flour) for strong gluten, a full 60-second dip in a boiling baking soda bath to gelatinize the surface starch, and a hot 450°F oven to set the crust quickly while the interior stays soft and steamy.
Why do you boil soft pretzels before baking?
Boiling in an alkaline baking soda bath raises the surface pH, which partially breaks down the starches and proteins on the dough. That creates the glossy, chewy skin and triggers the deep browning that distinguishes pretzels from regular bread.
What are the most common mistakes when making homemade pretzels?
The biggest mistakes are skipping or shortening the baking soda bath, under-kneading the dough so gluten never fully develops, baking at too low a temperature, and boiling the pretzels too long which leaves a soapy taste. Measure flour by weight and always perform the windowpane test before shaping.
How do they make pretzels soft and fluffy?
Softness comes from a properly developed gluten network that traps gas during the rise, an enriched dough with butter and a small amount of sugar, and a short, high-heat bake that sets the crust before the interior dries out. Use bread flour for the best fluffy structure.
Can I make pretzels without a baking soda bath?
You can skip the bath, but the result will taste and look like a soft breadstick rather than a pretzel. If you cannot do the wet bath, brush the shaped dough with a concentrated baking soda slurry (2 tablespoons soda mixed with 1 tablespoon water) just before baking as a compromise.
Conclusion
Now you know exactly how to make soft pretzels with a chewy middle from scratch. The whole process takes about 90 minutes of active time plus resting, and most of that is hands-off. The three habits that deliver consistent results every time are measuring your flour by weight, performing the windowpane test before shaping, and giving each pretzel a full 60-second dip in the boiling baking soda bath.
Start with the classic salted version for your first batch so you can taste the baseline. Once you have the technique down, branch out into cinnamon sugar, everything bagel, or jalapeño cheddar. Bake a double batch on a Saturday morning and freeze half for an easy snack all week. Pretzel-making is one of those rare baking projects that looks harder than it actually is, and once you have made a fresh, chewy, mall-quality pretzel at home, you will never go back to the packaged kind.