
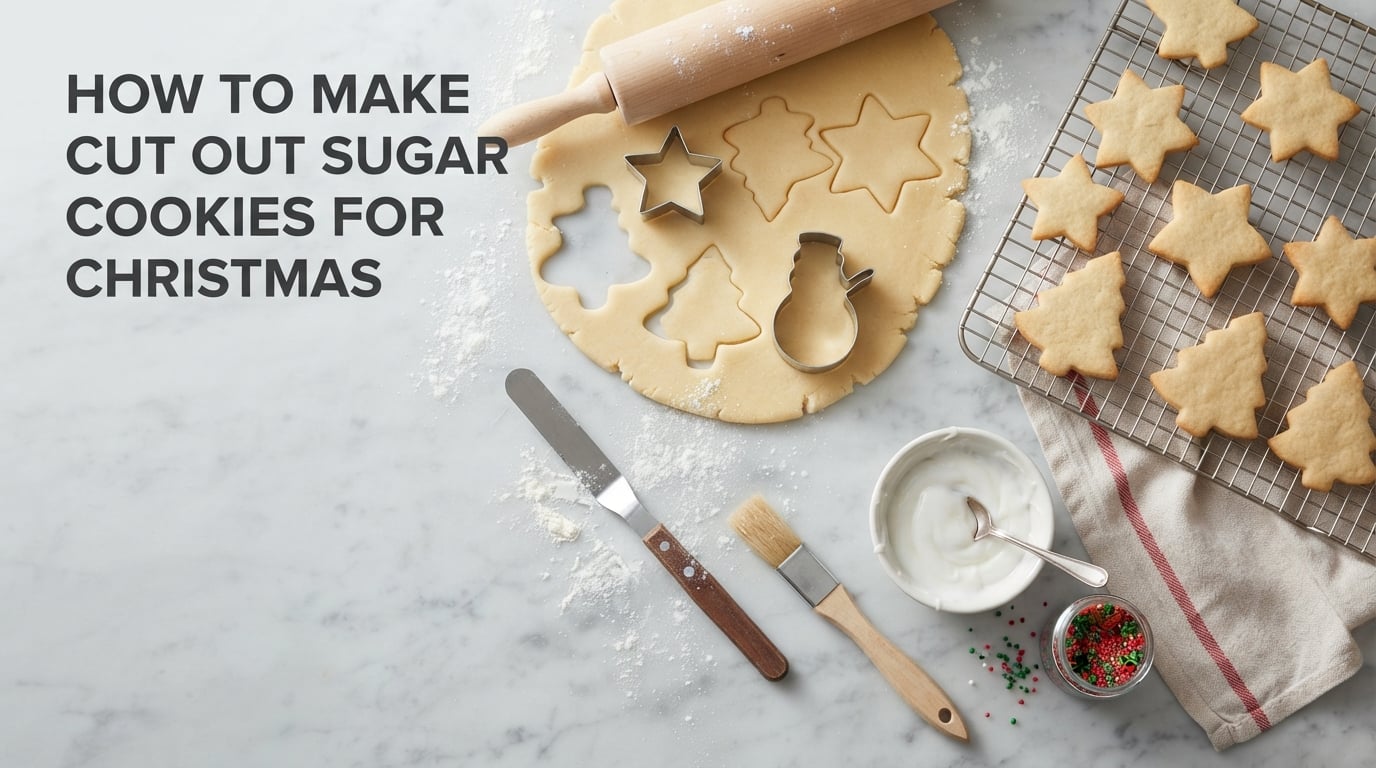
Cut out sugar cookies hold their shape when you weigh the flour, use cold butter, keep the baking powder fresh, and chill the dough twice: once before rolling and again after cutting. That short formula is the whole difference between a tin of Christmas trees and a tray of shapeless puddles, and once you know it you can stop worrying about it. This guide walks through how to make cut out sugar cookies for Christmas from the mixing bowl to the icing, with gram weights, exact chill times and a three-day plan that fits a busy December.
Table of Contents
- Key Takeaways
- How to Make Cut Out Sugar Cookies for Christmas
- The Best Cut Out Sugar Cookie Dough: What Makes It Hold Its Shape
- Thin-Crisp, Soft-Chewy or Thick: Pick Your Style Before You Bake
- Why Sugar Cookies Spread (And How to Stop It)
- Royal Icing and Simple Glaze: Two Ways to Decorate
- Make-Ahead and Storage: A Three-Day Christmas Baking Plan
- Flavor Variations, Kid-Friendly Decorating and the Tools You Actually Need
- Frequently Asked Questions
- What is the best cut-out sugar cookie recipe?
- How far in advance can I make cutout cookies?
- What is the easiest Christmas cookie to make?
- What is the best store-bought sugar cookie dough for cutouts?
- How do I make cutout cookies that don’t spread?
- Should sugar cookie dough be refrigerated?
- How long do you bake cut out cookies at 350 F?
- Conclusion
Key Takeaways
- Weigh the flour. Volume measuring is the single most common reason cookies spread and turn out hard and cakey.
- Chill twice: 30 to 60 minutes after mixing, then 15 to 30 minutes after cutting.
- Test your baking powder in hot water. If it barely fizzes, replace it, because stale baking powder is the top spread culprit.
- Freeze unbaked cut shapes flat, then bake straight from frozen with 2 extra minutes.
- Roll to a consistent 1/4 inch, and use a bench scraper to move delicate shapes instead of a spatula.
How to Make Cut Out Sugar Cookies for Christmas
This is the base dough we use every December. It is a butter cookie with a small amount of baking powder, which keeps the texture tender and the shapes crisp.
Yield: about 4 dozen cookies, depending on cutter size. Prep: 20 minutes. Chill: 30 to 60 minutes plus 15 to 30 minutes after cutting. Bake: 8 to 10 minutes per pan at 350 F (175 C). Total: about 2 hours 30 minutes. Metric: the dough makes roughly 48 cookies; 350 F is 175 C and 375 F is 190 C.
Ingredients
- 2 and 1/4 cups (270 g) all-purpose flour, spooned and leveled, or weighed on a scale
- 1 teaspoon baking powder, tested for freshness
- 1/4 teaspoon fine salt
- 1/2 cup (113 g) unsalted butter, cool and cut into cubes
- 3/4 cup (150 g) granulated sugar
- 1 large egg
- 1 and 1/2 teaspoons pure vanilla extract
- 1/4 teaspoon almond extract, optional
Weigh the flour if you own a digital kitchen scale. A cup of spooned flour varies by roughly 20 percent depending on how you fill the cup, and that swing is enough to ruin a dough that has to hold a shape.
Steps
1. Whisk the dry ingredients. Combine the flour, baking powder and salt in a medium bowl and whisk until evenly blended. Do this first so every speck of baking powder is distributed through the flour.
2. Cream the butter and sugar. Beat the cool butter and granulated sugar for 3 to 5 minutes, until the mixture is pale, light and fluffy. Scrape the bowl twice. Scrambling the sugar into the butter is what gives you a tender cookie instead of a gritty one.
3. Add the wet ingredients. Beat in the egg for 2 minutes, then the vanilla and almond extracts. The dough will look loose and slightly wet at this point. That is normal, and chilling fixes it.
4. Bring it together. Add the dry ingredients in two additions, mixing on low until no dry flour is visible. Do not overmix. Overworked dough turns tough once it bakes.
5. Chill the dough. Form the dough into a disc, wrap it tightly, and refrigerate for 30 to 60 minutes. You can skip this chill if you plan to freeze it for later, but do not roll cold-straight-from-the-fridge dough that is rock hard, because it cracks at the edges.
6. Roll to 1/4 inch. Lightly flour the counter and roll the dough until it is a consistent 1/4 inch thick. Check the thickness in a few spots, not just the center, because uneven edges bake unevenly. Lift the dough occasionally so it does not stick.
7. Cut and re-chill. Press your cookie cutters straight down and wiggle once. Nest the shapes close together on the dough to minimize scraps, then press the scraps together and roll them out again. Transfer the dough sheet and cut shapes to a parchment-lined baking sheet and chill for 15 to 30 minutes, uncovered. This second chill is the step most people skip and the one that saves the tips on stars and antlers.
8. Bake. Heat the oven to 350 F (175 C). Bake on the middle rack for 8 to 10 minutes, until the edges look set and very lightly golden. The centers should still look slightly pale. Pull them a minute early if you want softer cookies, and let them sit on the sheet for 2 minutes before moving them to a rack, because they finish setting as they cool.
9. Decorate. Cool completely, then flood and outline with royal icing, or drizzle with a simple milk glaze. Warm cookies melt the icing and slide right off, so give them at least 30 minutes on a cooling rack first.
The Best Cut Out Sugar Cookie Dough: What Makes It Hold Its Shape
The best cut out sugar cookie recipe is the one that solves four things at once, because any one of them undone sends you back to blobs. Weigh the flour correctly. Use butter that is cool, roughly 65 to 67 F, so it stays firm but still creams. Add only a teaspoon of fresh baking powder, because the reaction gases push the cookies outward. And chill the dough before rolling and again after cutting, so the cold fat firms the shape before the oven gets to it.
Think of it as a baker’s ratio. In this dough, flour outweighs sugar by roughly 1.8 to 1, and the butter is about a third of the flour weight. That balance is what produces a cookie that holds a cut edge but still crumbles tenderly in your mouth.
Why baking powder freshness is the number one spread culprit
Baking powder loses its punch long before the container looks old, and stale powder means the dough never gets its lift in the first minutes of baking. The butter melts, the structure has nothing to hold it, and the cookies pool outward. Bakers on Reddit consistently call this the hidden cause of spread, and it is the first thing to rule out when shapes come out fuzzy.
Test it in a minute. Stir a teaspoon of baking powder into a third of a cup of hot water. It should foam vigorously and smell sharp. If the reaction is weak and slow, the powder is spent and the cookies will spread. Write the open date on your pantry with a marker so you know what you are testing.
Why weighing flour beats spooning it
Sponging flour into the cup and leveling it is better than scooping, and it is still the second most common way dough goes wrong. Scoop-and-level packs in roughly 20 percent more flour than the recipe calls for, and extra flour drinks up moisture the cookies need. The result is a cookie that spreads less but eats hard, dry and cakey. Weighing on a scale takes three seconds and removes the variable completely.
Roll lightly on flour rather than generously. Thick flour patches taste raw in the finished cookie and prevent the dough from gripping the counter, which leads to dough sticking to the rolling pin instead.
Thin-Crisp, Soft-Chewy or Thick: Pick Your Style Before You Bake
Almost all disappointment with cut out cookies comes from baking one style and expecting another. Plenty of home bakers grew up with thin, crisp, snap-in-two cookies and now find themselves baking thick, soft cutouts instead. Choose the row you want before you mix the dough.
| Style | Flour | Rolled thickness | Temperature | Bake time | Result |
|---|---|---|---|---|---|
| Thin and crisp | 2 and 1/4 cups (270 g) | 1/8 inch | 350 F (175 C) | 7 to 9 minutes | Snap, nostalgic, delicate. Needs a firm second chill and a gentle transfer. |
| Soft and chewy | 2 cups (245 g) | 1/4 inch | 350 F (175 C) | 9 to 11 minutes | Bendy center, tender edges. Pull at the first sign of golden edges. |
| Thick and cakey | 2 and 1/4 cups (270 g) | 3/8 inch | 350 F (175 C) | 11 to 13 minutes | Soft, thick, forgiving. The easiest style for beginners and kids. |
| Crisp with soft middle | 2 and 1/2 cups (300 g) | 1/4 inch | 375 F (190 C) | 8 to 10 minutes | Caramelized edges, chewy center. Highest spread risk, so chill an extra 10 minutes. |
Baking thin cookies at a slightly higher temperature dries the moisture out faster, which is what turns a 1/8 inch sheet into something crisp. The tradeoff is that thin shapes are more fragile, so let them cool on the pan instead of moving them warm.
Why Sugar Cookies Spread (And How to Stop It)
Find your symptom in the table, check the cause, and apply the fix. This is faster than scrolling through a list of tips that all say chill more.
| Problem | Likely cause | Fix |
|---|---|---|
| Edges merged and shapes merged together on the pan | Shapes were not spaced 2 inches apart | Space every shape 2 inches apart. Use parchment, never parchment with a silicone mat underneath. |
| Points and thin details blurred | Dough was warm when cut, or only chilled once | Chill 15 to 30 minutes after cutting, uncovered, and bake straight from the fridge. |
| Cookies spread but taste fine | Stale baking powder | Test the powder in hot water. Replace it if the fizz is weak. |
| Cookies spread and taste dry | Too much flour, scooped rather than weighed | Weigh the flour, and add back 1 to 2 tablespoons of softened butter if the dough feels sandy. |
| Dough cracks at the edges while rolling | Over-chilled dough, or too little butter | Let the dough sit 15 minutes, then work it. Add a tablespoon of cold butter if it still crumbles. |
| Dough sticks to counter and rolling pin | Too much added flour, or rolling it too thin | Roll between two sheets of parchment, or roll on powdered sugar instead of flour. |
| Delicate shapes break when moved to the pan | Thin dough lifted without support | Slide a thin bench scraper under the shape, or chill the cut sheet solid and flick the parchment. |
| Cookies are hard and pale in the middle | Baked too long, or too thin for the time | Pull at the first sign of golden edges. Thin cookies need 7 to 9 minutes, not 12. |
| Icing bled across the border | Border was not dry, or the flood was too thin | Let the outline dry fully, and thicken the flood until it holds a line and slowly relaxes. |
| Icing cracks after drying | Too much water added, or very dry air | Mix in more sifted confectioners sugar a spoonful at a time, and cover tightly while drying. |
One more variable worth naming: humidity. In humid weather, royal icing takes twice as long to set and powdered sugar clumps as it sifts. Store your sugar sealed, sift it before use, and add humidity-friendly timing to your schedule.
Royal Icing and Simple Glaze: Two Ways to Decorate
Royal icing dries hard, holds detail and stacks for gifting, which makes it the right choice for a cookie swap. A simple milk glaze sets soft and chewy and takes three minutes to make, which makes it right for a Tuesday night with kids.
Simple milk glaze for beginners
Warm 4 tablespoons of butter with 1 cup (200 g) powdered sugar, 1 tablespoon of milk and 1/2 teaspoon of vanilla. Warm means soft, not melted. Drizzle over cooled cookies and let them set for 30 minutes. It will not harden for stacking, so keep it for immediate eating or place them in a single layer.
Royal icing: the outline and flood technique
1. Beat 2 egg whites to stiff peaks in a clean, grease-free bowl. Stiff means the tip stays up when you turn the bowl upside down. Any grease or yolk in the bowl keeps the whites from stiffening.
2. Add 1 teaspoon of liquid vanilla or a dash of lemon juice to thicken the foam, then mix in 4 cups (480 g) of sifted confectioners sugar, one cup at a time. Knead the last cup in by hand. The icing will be stiff and thick at this point.
3. Divide the icing into small bowls and add gel food coloring to each. Stir color in at the end, because hard mixing bleeds color into the icing.
4. Outline first. Put a small amount of icing in a piping bag with a fine tip, and pipe an outline around each cooled cookie. Then fill the outline with flood icing, either piped in the center and spread to the edges or applied with a squeeze bottle.
5. Let it dry overnight, or about 6 hours, before storing. If you tap the icing lightly and it feels firm and not tacky, it is done.
Royal icing troubleshooting for beginners
Icing that runs means you thinned it too much. Add powdered sugar a spoonful at a time until the icing holds the line of the piping tip and the surface slowly relaxes. Icing that never sets is almost always too thin, or sitting in humid air, or stored next to a bowl of water.
To thin icing, add water in tiny drops, never a splash, counting one drop at a time. If you over-thin it, recovering means adding a full cup more confectioners sugar. Cracked icing means too much water, so add a tablespoon of sifted sugar at a time until the cracks disappear.
For neat piping, thin each color with water until it flows like heavy cream, no faster. Then flood icing gets a drop or two less water than the outline, so the border holds the line.
Make-Ahead and Storage: A Three-Day Christmas Baking Plan
The waiting is what makes holiday cookie baking stressful, and most of that waiting disappears if you split the work across three days. Bakers on baking forums consistently mix the dough two to three days ahead and keep it wrapped in the fridge, so the schedule below is less a suggestion than a pattern that works.
Day 3: mix and chill the dough
- Make the dough and shape it into three discs so you can work one portion at a time.
- Wrap each disc tightly and refrigerate for up to 3 days.
- Test your baking powder while you are at it.
Day 2: cut and freeze
- Roll one disc at a time to 1/4 inch and cut your shapes.
- Arrange the cut shapes on a lined sheet, freeze uncovered until solid, about 1 hour.
- Transfer the frozen shapes to a flat freezer bag or container, separating layers with parchment. They keep for 1 month.
Day 1: bake and cool
- Bake straight from frozen at 350 F (175 C), adding 2 minutes to the usual time.
- Cool the plain un-iced cookies completely, then store them in an airtight container for up to 1 month in the freezer.
- Thaw them unopened at room temperature for 30 minutes before decorating.
Baking day: decorate and pack
- Make the royal icing and tint the colors you need.
- Decorate, then let the icing dry for 6 hours or overnight.
- Store decorated cookies in a single layer or with parchment between layers, for up to 2 weeks.
For a cookie swap, plan on 8 to 10 cookies per person so everyone can take home a small plate and still have extras. If you are shipping, freeze decorated cookies once the icing is fully set, wrap them individually, and leave nothing to come loose in transit.
Flavor Variations, Kid-Friendly Decorating and the Tools You Actually Need
Flavor swaps for the same dough
Keep the flour weight and swap the extract or add zest: peppermint extract for a peppermint cookie, orange or lemon zest plus 1 teaspoon of extract for a citrus cookie, or 1 teaspoon of cinnamon with 1/2 teaspoon of ginger for a spiced cookie. Gingerbread cutters pair naturally with the spice version. For a savory twist, add 1 teaspoon of espresso powder, which deepens the vanilla without tasting of coffee.
If you need gluten-free or almond flour, substitute cup for cup for a nut-flavored cookie, and add an extra 10 minutes to the second chill because gluten-free dough relaxes faster. Test the swap with one disc rather than the full batch.
Decorating with kids
Cookie stamp cutters let kids press a design straight into the dough before baking, which removes the fiddly piping step entirely. For the icing, thin your glaze until it is almost like cream and put it in squeeze bottles, or skip icing altogether and use sprinkles, sanding sugar, mini marshmallows, or a thin chocolate dip on half the cookie.
Keep the second chill to 15 minutes rather than 30 if you are working with young children, and set the shapes baking while the dough chills so nobody is waiting on the clock.
Equipment checklist
You need a rolling pin, a set of Christmas cookie cutters, a bench scraper for lifting cut shapes, an offset spatula, parchment-lined baking sheets, a digital kitchen scale, a piping bag with a fine tip, gel food coloring, and an airtight container or freezer bags for storage. A silicone baking mat under parchment is fine for rolled cookies, but skip it for cutouts, because the mat can insulate the dough and encourage spread.
Our full testing notes come from comparing this dough against three style variations, thin, chewy and thick, and across both 350 F and 375 F ovens. The thin version at 1/8 inch needed the longest re-chill to keep star points intact, and the thick version was the most forgiving of an overworked afternoon in the kitchen.
Frequently Asked Questions
What is the best cut-out sugar cookie recipe?
A butter-based dough with weighed flour, 1 teaspoon of fresh baking powder, 3/4 cup granulated sugar and a full chill before rolling plus a second chill after cutting works best. The flour is weighed at 270 g for 2 and 1/4 cups, the dough chills 30 to 60 minutes, and cut shapes chill 15 to 30 minutes. It bakes at 350 F for 8 to 10 minutes and holds every point and edge.
How far in advance can I make cutout cookies?
You can make the dough 3 days ahead and keep it wrapped in the fridge. Freeze unbaked cut shapes flat on a lined sheet until solid, then bag them, where they keep about 1 month. Baked un-iced cookies also freeze for 1 month and can be decorated later. Fully decorated cookies last about 2 weeks in an airtight container, or longer frozen once the icing is set.
What is the easiest Christmas cookie to make?
For most people, an un-iced cut out sugar cookie is the easiest, because there is no piping step to get right. Roll to 3/8 inch rather than 1/4 inch, use a thick, forgiving shape like a circle or a star, and chill a full 30 minutes. Decorate with sprinkles or a thin chocolate dip, or with stamp cutters that press the design into the dough before baking.
What is the best store-bought sugar cookie dough for cutouts?
Choose a refrigerated or frozen dough that is sold for cutouts rather than one sold for drop cookies or bars, and check that it is not labeled no-bake. Roll it to 1/4 inch, then chill the cut shapes for 15 to 30 minutes before baking, because store dough spreads more readily than homemade. If the dough is meant to be no-chill, expect softer edges and a shorter bake.
How do I make cutout cookies that don’t spread?
Weigh the flour, use cool butter around 65 to 67 F, add only 1 teaspoon of baking powder and test it in hot water, then chill the dough 30 to 60 minutes before rolling and 15 to 30 minutes after cutting. Space shapes 2 inches apart, roll to a consistent thickness, and bake from cold. If they spread anyway, the powder is usually stale.
Should sugar cookie dough be refrigerated?
Yes, chilling solidifies the butter so the cut edge keeps its shape in the oven. Refrigerate the mixed dough for 30 to 60 minutes before rolling and the cut shapes for 15 to 30 minutes before baking. If the dough cracks while rolling, let it sit out 15 minutes to soften slightly, then work it. Dough made 2 to 3 days ahead stays wrapped in the fridge.
How long do you bake cut out cookies at 350 F?
At 350 F, bake for 7 to 9 minutes if you rolled the dough 1/8 inch, 8 to 10 minutes at 1/4 inch, and 11 to 13 minutes at 3/8 inch. Pull them as soon as the edges look set and very lightly golden, while the centers still look slightly pale. Cookies bake from the outside in, so the color you see at the edge is your cue, not the center.
Conclusion
Knowing how to make cut out sugar cookies for Christmas is really about four small decisions, not a complicated recipe. Weigh the flour, keep the butter cool, use fresh baking powder, and chill the dough before rolling and again after cutting. Everything else, the style you roll to, the icing you choose and the schedule you follow, follows from those four.
Weigh your flour, test your baking powder today, and mix the dough. Then chill it for up to 3 days, cut and freeze the shapes, and bake and decorate on baking day. The cookies will still look like the ones you cut out, which is the whole point.