
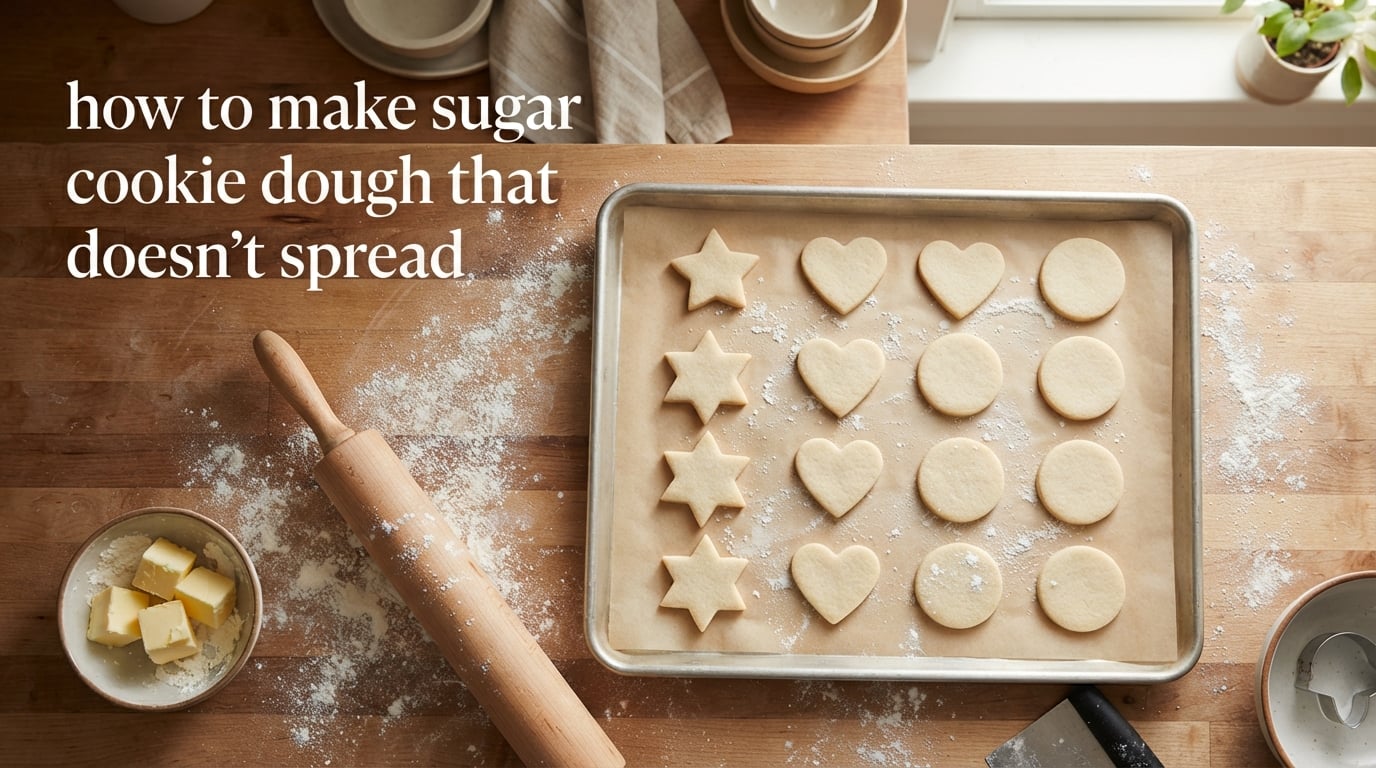
Flat, blob-like sugar cookies ruin holiday trays and waste hours of decorating effort. After testing every variable from butter temperature to oven calibration, I can tell you exactly how to make sugar cookie dough that doesn’t spread — and the answer is rarely just “chill it longer.”
This guide combines food science with kitchen testing to give you a complete system: the reasons cookies spread, the ten most reliable fixes ranked by impact, and a step-by-step process you can use the very next time you bake. Whether you’re baking Christmas cutouts, royal icing practice rounds, or wedding favor shapes, these techniques hold edges and surfaces clean.
You’ll learn the butter indent test, why a $20 food scale transforms results, how fridge versus freezer timing changes cookie shape, and what to do mid-bake if spreading starts anyway. Let’s get to it.
Table of Contents
- Why Sugar Cookies Spread: The Science Behind Flat Cookies
- The #1 Rule for No-Spread Cookies: Get Your Butter Temperature Right
- Chill the Dough: Fridge vs Freezer Timing That Actually Works
- Weigh Your Flour: Why Measuring Cups Are Ruining Your Cookies
- Don’t Overmix: The Creaming Limit Most Bakers Exceed
- Baking Surface Matters: Parchment, Silicone, and Mesh Mats Compared
- Oven Temperature Strategy: Lower and Longer Beats Hot and Fast
- Recipe Adjustments: Cutting Baking Powder and Balancing Flour Ratio
- The Complete No-Spread Sugar Cookie Process (Step-by-Step)
- Rescue Your Cookies: Mid-Bake Fixes When Spreading Starts
- Equipment Priority List: What to Buy First for No-Spread Cookies
- High Altitude, Make-Ahead Storage, and Shape-Specific Tips
- Frequently Asked Questions
- The Bottom Line: How to Make Sugar Cookie Dough That Doesn’t Spread
Why Sugar Cookies Spread: The Science Behind Flat Cookies
Sugar cookies spread because fat melts faster than the flour-egg structure can set. When butter hits oven heat, it liquefies before gluten and starch have time to firm up. The melted fat then acts like a slippery slide, dragging the dough outward in every direction. That’s why your star-shaped cutter becomes a star-shaped blob within eight minutes of baking.
Three scientific factors drive this. First, fat crystallization: butter contains water and milk solids suspended in fat crystals. At room temperature, those crystals are soft and unstable. When chilled, the crystals reorganize into a tighter network that melts slower — which is why a chilled cookie sheet spreads less than one slid in straight from the counter.
Second, gluten development. Flour proteins (glutenin and gliadin) link together when mixed with liquid and agitated. Overmixing creates a stretchy dough that can hold shape, but it also creates a more elastic network that may slump under heat instead of holding clean lines. Undermixing leaves too much flour unhydrated, weakening structure.
Third, leavening agents. Baking powder releases carbon dioxide gas when wet, then again when heated. That gas pushes the dough outward before the structure sets. Baking soda reacts faster and at lower temperatures, which is why recipes heavy in baking soda tend to spread more. Reducing the leavener, or using only baking powder in small amounts, tightens the spread.
Sugar plays its own role. Sugar is hygroscopic — it absorbs and holds moisture. During baking, that moisture releases and steams the dough from inside, contributing to spread. A small amount of sugar helps with browning and tenderness; too much creates a thin, runny batter that loses shape. The classic sugar cookie ratio balances granulated sugar at about 0.75 to 1 cup per 2.5 cups of flour.
Finally, oven temperature matters more than most bakers realize. A too-hot oven melts the fat before the structure can firm up. A too-cool oven spreads cookies because the dough has more time to relax and slump before setting. The sweet spot sits between 325°F and 350°F for most no-spread recipes.
The #1 Rule for No-Spread Cookies: Get Your Butter Temperature Right
Butter temperature is the single most controllable variable for cookie spread. Too cold and the dough clumps, won’t cream properly, and bakes with tunnels and cracks. Too warm and the fat melts before the structure sets, sliding your cutouts into shapeless puddles. Cool room temperature — about 65°F to 67°F — is the goldilocks zone.
Use the indent test. Press a clean finger into the stick of butter. It should leave a clear dent without sliding or collapsing. The butter should feel cool, pliable, and slightly firm at the edges. If your finger punches through to liquid fat, the butter is too soft — return it to the fridge for 10 to 15 minutes. If the butter resists your finger entirely, it’s too cold — leave it on the counter for another 5 minutes.
I keep a kitchen thermometer near my butter dish during cold months. Our kitchen sits around 62°F in winter, and butter straight off the counter can be too firm at that temperature. In summer, butter warms up fast on the counter and hits the danger zone within 30 minutes. Plan around your environment.
Cut the butter into tablespoon-sized pieces at the start of creaming. Smaller pieces warm faster and cream more evenly with the sugar. This step matters most in cool kitchens where a whole stick won’t soften enough before you need to mix.
One warning from real testing: if you cube butter and leave it on the counter for an hour while you measure dry ingredients, it can be 10°F warmer than you planned. Set a timer. Beat the butter and sugar the moment it passes the indent test, not a minute later.
Chill the Dough: Fridge vs Freezer Timing That Actually Works
Chilling solidifies fat, hydrates flour, and slows leavening — all of which reduce spread. But the timing and method change the result. Most recipes call for 1 hour in the fridge, which is the bare minimum for noticeable effect. Two hours produces a better grip on shape. Overnight (8 to 12 hours) deepens flavor and gives the cleanest edges.
Freezer timing is faster and just as effective. Twenty minutes in the freezer firms the dough enough to roll without sticking. One hour gives you a dough that’s nearly playdoh consistency — perfect for cutting intricate shapes. Some bakers freeze rolled sheets of dough between parchment rounds for up to a month, then thaw briefly before cutting.
Freeze cutout shapes before baking. This is the most underused spread prevention trick in home baking. After cutting your shapes, line them up on a parchment-covered sheet and freeze for 10 to 15 minutes. The frozen cookies go into the oven still cold, which means the fat takes longer to melt. The result: sharp edges that hold through the full bake time.
Skip chilling when the dough is already very stiff. If you’ve made a low-fat or low-sugar dough that feels like clay, extra chilling won’t help and may dry the dough out. Test by pressing a fingertip in — if the dough springs back firmly without sticking, chill it. If it’s already firm and slightly tacky, go straight to rolling.
When chilling rolled sheets, slide the parchment directly onto a baking sheet and into the fridge. The sheet acts as a flat support. Without it, the dough sags in the middle, and your rolled thickness varies — which means some cookies bake thin and others thick. Rolling pin guide rings (1/4 inch or 3/8 inch) eliminate this problem entirely.
Weigh Your Flour: Why Measuring Cups Are Ruining Your Cookies
One cup of flour can weigh anywhere from 120 to 160 grams depending on how tightly it’s packed, how humid the air is, and whether you scooped directly from the bag or spooned loosely. That 40-gram range — a 25% variance — is enough to swing your cookies from perfect to puffy or from tender to tough. This is why weighing flour is the single biggest upgrade for consistent no-spread results.
Use a kitchen scale that reads in grams. Set a bowl on the scale, tare to zero, and add flour until you hit the target weight. For most sugar cookie recipes, 1 cup of all-purpose flour equals about 125 grams. If the recipe calls for 2.5 cups, weigh out 312 grams. You’ll get the same flour every single batch.
If you don’t have a scale, use the spoon and level method. Stir the flour in the bag to aerate it, then spoon it lightly into a dry measuring cup. Don’t shake or tap the cup. Level the top with the back of a butter knife. This gives you roughly 120 grams per cup — on the lower end, but closer to standard than scooping directly.
Never pack flour down. Pressing flour into the cup with your hand or tapping the cup on the counter compacts it, which means more flour per cup and a drier, denser cookie that resists spread but also tastes chalky. The spoon method is slower but worth the extra minute.
High-protein bread flour creates more gluten and gives cookies that hold shape more aggressively, but the texture turns tougher. All-purpose flour (10 to 12% protein) is the right balance for sugar cookies that need clean edges and a tender bite. King Arthur and Bob’s Red Mill both make consistent all-purpose flours that work well.
Don’t Overmix: The Creaming Limit Most Bakers Exceed
Creaming butter and sugar too long incorporates too much air, which expands in the oven and lifts cookies before they set, then collapses into wider, flatter shapes. The right window is 3 to 5 minutes on medium speed — long enough to dissolve the sugar and aerate the butter, short enough to leave structure intact.
Watch for color and texture changes. Properly creamed butter and sugar goes from yellow to pale ivory, and the texture shifts from grainy to light and fluffy. If you see distinct white streaks of butter still visible, keep creaming. If the mixture looks like whipped cream and holds stiff peaks, you’ve gone too far — the air pockets will collapse in the oven.
Once you add the dry ingredients, mix on low speed only until they disappear. Flour streaks should be gone within 30 to 60 seconds of mixing. Any longer develops gluten, which toughens the dough and changes how it spreads. I count the seconds out loud to keep myself honest.
The egg gets mixed in just until combined. Eggs add moisture and binding but also tenderness. Beat them in lightly — 10 to 15 seconds at most after adding. Once the yolk disappears into the batter, stop the mixer.
A stand mixer with a paddle attachment is ideal. Hand mixing with a wooden spoon works but takes longer and creates uneven creaming. If you’re using a hand mixer, use medium speed and scrape down the bowl every minute to keep everything evenly mixed without overworking any single section.
Baking Surface Matters: Parchment, Silicone, and Mesh Mats Compared
The baking surface affects how much the dough can slide before it sets. Bare metal pans have a smooth, slick finish that lets dough spread freely. Parchment paper adds slight friction. Silicone mats grip the dough better. Mesh mats offer the most airflow and least spread of any common surface.
Parchment paper is the standard. It releases cookies easily, prevents sticking, and adds just enough grip to slow spread by a few millimeters. Use unbleached parchment if you’re watching for off-flavors at high heat. Bleached parchment works fine at temperatures below 400°F, which covers all sugar cookie bakes.
Silicone baking mats grip the dough’s bottom surface, which reduces spread noticeably. Cookies baked on silicone tend to bake with sharper, cleaner edges than the same dough on parchment. The downside: silicone doesn’t allow airflow underneath, so cookies can brown unevenly on the bottom. For light-gold cookies, parchment or mesh wins.
Mesh baking mats (also called silicone mesh or airflow mats) lift the dough slightly off the pan surface, allowing hot air to circulate underneath. This produces the most even browning and the least spread. The Bearfoot Baker and Cookie Countess both recommend mesh mats for cutout cookies that need to hold intricate shapes.
Never grease the pan. Butter or oil on the sheet pan creates a layer of lubrication that lets dough slide outward freely. Even nonstick pans should be lined with parchment for sugar cookies. A small swipe of grease on the parchment (just a thin film) is acceptable but not necessary.
Rotate baking sheets between batches. A sheet fresh from the oven retains heat for several minutes. Placing cookie dough on a hot sheet melts the bottom fat instantly and accelerates spread. Run the sheet under cold water or let it cool on a wire rack for at least 10 minutes between batches.
Oven Temperature Strategy: Lower and Longer Beats Hot and Fast
Most home ovens run 10°F to 25°F off the temperature you set. That means your “350°F” dial could be delivering anywhere from 325°F to 375°F of actual heat. This single issue accounts for more spread variation than any other factor. An oven thermometer solves it in five minutes.
Place an oven thermometer in the center of your oven. Bake a test batch and check what temperature the thermometer reads when the oven beeps. If it reads 335°F when you set 350°F, you now know to bake at 365°F to hit a true 350°F. Adjust every recipe accordingly.
For no-spread cookies, 325°F to 350°F is the right range. At 375°F and above, the fat melts before the structure sets and cookies spread aggressively. At 300°F, cookies bake slowly and may dry out before browning. The sweet spot is 350°F for 10 to 13 minutes — long enough to set the structure, short enough to keep the centers tender.
The Kenji Lopez-Alt method (cited by Food52) suggests starting cookies at 300°F for the first half of the bake, then turning the oven up to 350°F for the final 3 minutes. The lower start sets the structure slowly; the higher finish adds browning. This works but adds complexity. For most home bakers, baking at a steady 325°F to 350°F is simpler and nearly as effective.
Bake on the middle rack. Heat rises, so the top rack runs hotter than the bottom. The middle rack gives the most even heat distribution. If you must bake two sheets at once, place them on the upper-middle and lower-middle positions and rotate them halfway through baking — but this two-sheet method usually produces less consistent results than baking one sheet at a time.
Avoid opening the oven door in the first 8 minutes of baking. Each door opening drops the oven temperature by 25°F or more. Cookies set their structure during those first 8 minutes. Letting heat escape extends bake time and increases spread. Use the oven window and interior light to check progress instead.
Recipe Adjustments: Cutting Baking Powder and Balancing Flour Ratio
Standard sugar cookie recipes call for 1 to 1.5 teaspoons of baking powder per batch. Cutting that to 1/2 teaspoon — or omitting it entirely — reduces spread dramatically. The trade-off: less rise, which means a flatter, denser cookie. For decorated cookies, that’s an advantage, not a problem. Flat surfaces are easier to ice.
For recipes calling for both baking powder and baking soda, swap the soda for additional powder (in equal parts) or reduce the soda to 1/4 teaspoon. Baking soda reacts immediately with acidic ingredients (buttermilk, brown sugar, molasses) and produces more spread than baking powder. If your recipe has no acid, drop the soda entirely.
The flour-to-fat ratio controls structure. A higher flour ratio gives more gluten and less spread, but can make cookies tough. A lower flour ratio gives tender cookies that spread more. The standard sugar cookie ratio is roughly 2.5 cups flour to 1 cup butter — this balance produces cookies that hold shape without becoming cakey.
Add 1 to 2 tablespoons of cornstarch to the flour. Cornstarch is pure starch with no protein, so it softens gluten development. Cookies made with a cornstarch blend spread less and have a finer, more delicate crumb. The trade-off is slightly less structure for very large or intricate shapes. For holiday cutouts, 1 tablespoon per 2.5 cups of flour is a safe starting point.
If you prefer softer cookies, increase the sugar slightly (to 1.25 cups per 2.5 cups flour) and add 1 tablespoon of cream cheese to the dough. Cream cheese adds tang and moisture without the spread that butter alone produces. Sugared Sentiments uses this technique for cookies that hold shape but stay soft.
The Complete No-Spread Sugar Cookie Process (Step-by-Step)
Step 1: Cream butter and sugar. Beat 1 cup cool butter with 3/4 to 1 cup granulated sugar on medium speed for 3 to 5 minutes, until pale and fluffy. Scrape down the bowl halfway through.
Step 2: Add egg and vanilla. Beat in 1 large egg and 1 to 2 teaspoons of vanilla extract just until combined, about 15 seconds. Overbeating eggs adds air that increases spread.
Step 3: Mix dry ingredients separately. Whisk together 2.5 cups (312 grams) all-purpose flour, 1/2 teaspoon baking powder, 1/2 teaspoon salt, and 1 tablespoon cornstarch. Whisking distributes the leavening evenly.
Step 4: Combine wet and dry. Add the dry mixture to the butter mixture in two additions, mixing on low speed just until the flour disappears. Stop the mixer the moment you see no streaks.
Step 5: Roll between parchment. Place half the dough between two sheets of parchment. Roll from the center outward to 1/4 inch thickness using a rolling pin with guide rings. Repeat with the remaining dough.
Step 6: Chill rolled sheets. Slide the parchment with rolled dough onto a baking sheet and refrigerate for at least 2 hours, or freeze for 30 minutes. The dough should feel firm and cool to the touch.
Step 7: Cut shapes. Peel off the top parchment. Dip cutters in flour and press straight down — don’t twist. Twisting seals the edges and creates a slight lip that spreads more in the oven.
Step 8: Freeze cutouts. Transfer cutouts to a parchment-lined baking sheet using a thin offset spatula. Freeze for 10 to 15 minutes. The frozen cookies hold edges better during baking.
Step 9: Bake. Preheat oven to 350°F (verify with a thermometer). Bake cutouts on the middle rack for 10 to 12 minutes, until edges are just barely starting to turn gold. Centers should still look slightly underdone.
Step 10: Flatten optional. For perfectly flat cookies, press a fondant smoother gently on top of each hot cookie within 30 seconds of pulling from the oven. The cookies flatten as they cool and dry flat.
Rescue Your Cookies: Mid-Bake Fixes When Spreading Starts
The spoon reshape method (Sally’s Baking Addiction) works mid-bake. If you peek at 6 minutes and see cookies starting to lose shape, pull the tray out. Use the back of a teaspoon to gently push the spreading edges back into shape. Return the tray to the oven within 30 seconds. This works because the cookies haven’t fully set yet and the dough is still pliable.
The fondant smoother technique (Sugared Sentiments) is more reliable. Press a clean, flat fondant smoother or the bottom of a measuring cup onto each hot cookie as soon as it comes out of the oven. The cookies compress slightly and dry flat, giving you a perfectly even surface for royal icing. Wait more than 60 seconds and the cookies firm up too much to reshape.
The muffin tin hack (Food52) is the nuclear option. Place shaped dough balls directly into ungreased muffin tin cups. The cups hold the dough in shape during baking, producing perfectly round, contained cookies that can’t spread outward. This only works for round or near-round shapes.
If cookies have already spread and cooled, don’t throw them out. Use them for ice cream sandwiches, crumble them over ice cream, or layer them into trifles. Slightly over-spread cookies still taste great — they just don’t look decorated.
For future batches, identify which factor you skipped. Was the butter too warm? Did you skip the freezer step on cutouts? Did the oven run hot? Tracking your method against the result helps you pinpoint the cause within two or three batches.
Equipment Priority List: What to Buy First for No-Spread Cookies
Priority 1: Digital kitchen scale (around $20). Weighing flour and sugar removes guesswork. This single tool eliminates 70% of the spread variation caused by inconsistent measuring. Look for a scale that reads in 1-gram increments and has a tare function.
Priority 2: Oven thermometer (around $10). Most home ovens run 10°F to 25°F off the set temperature. An oven thermometer reveals the truth. Place it in the center of your oven and adjust your recipes based on what it reads.
Priority 3: Rolling pin with guide rings (around $25). Guide rings ensure consistent dough thickness, which means consistent bake times and even shapes. Even thickness across the entire batch is essential for no-spread results.
Priority 4: Mesh or silicone baking mat (around $15 to $25). A silicone mat grips dough and reduces spread. A mesh mat adds airflow for even browning. Either one replaces disposable parchment and lasts for years.
Priority 5: Heavy-gauge aluminum baking sheets (around $20 for a 2-pack). Half-sheet pans with a light-colored finish reflect heat and prevent over-browning on the bottom. Warped or dark pans create hot spots and uneven bakes. USA Pan half sheets are a reliable choice.
Priority 6: Fondant smoother (around $8). A plastic fondant smoother presses hot cookies flat and smooths out air bubbles. It’s not essential, but it’s the easiest way to get professional-looking flat tops for royal icing.
Total investment for priorities 1 through 5: roughly $90. That’s less than the cost of two batches of failed cookies and the frustration that comes with them. Start with the scale and thermometer — those two tools alone will dramatically improve your results.
High Altitude, Make-Ahead Storage, and Shape-Specific Tips
At altitudes above 3,000 feet, lower air pressure causes leavening to act faster and moisture to evaporate quicker. Cookies spread more, dry out faster, and brown unevenly. Sugared Sentiments (based at 6,660 feet) recommends increasing flour by 1 to 2 tablespoons per batch to add structure, and reducing baking powder by 1/4 teaspoon to slow leavening.
High altitude bakers should also reduce sugar by 1 tablespoon per cup. Sugar is hygroscopic and pulls moisture out of the dough at altitude, contributing to spread. A slightly less sweet cookie holds shape better at high elevation. Add a tablespoon of liquid (milk or water) to compensate if the dough feels dry.
Make-ahead storage timelines matter for holiday baking. Dough in the fridge stays workable for 3 to 5 days. Wrap rolled sheets tightly in plastic wrap. Cutouts on a parchment-lined sheet freeze well for up to 3 months — transfer the frozen cutouts to a zip-top bag for long-term storage. Baked cookies (undecorated) keep in an airtight container at room temperature for 1 week, or in the freezer for 3 months.
For intricate cookie cutters with thin details, freeze the cutouts longer — 20 to 30 minutes instead of 10 to 15. Thin points and small details melt fastest in the oven. Freezing firms them up so they hold their shape through the full bake. Some decorators also chill the cutouts a second time halfway through baking, though this is rarely necessary.
Large cookies (over 3 inches across) need more attention. They take longer to bake through, which means more time for the fat to melt and the dough to spread. Reduce the oven temperature to 325°F for large cookies and bake 14 to 16 minutes. Press the fondant smoother on top at the 10-minute mark to flatten any spreading.
For square or rectangular cutters, press the cutter firmly and rock it slightly side to side to ensure clean cuts. Twisting the cutter seals the dough and creates a lip that spreads more. Dipping the cutter in flour before each cut prevents sticking and gives you cleaner edges.
Frequently Asked Questions
How do I keep sugar cookies from spreading?
Chill the dough for at least 2 hours, freeze cutouts for 10 to 15 minutes before baking, use cool room temperature butter, weigh flour by grams instead of cups, and bake at 325 to 350 degrees F on parchment or a silicone mat.
Why do my sugar cookies spread even after chilling?
Common causes include butter that was too warm before mixing, oven temperature running hotter than the dial setting, a hot baking sheet from a previous batch, or not freezing the cutouts themselves before baking. Verify your oven with a thermometer and freeze cutouts for 10 to 15 minutes before baking.
Does chilling cookie dough really prevent spreading?
Yes. Chilling solidifies the fat so it melts slower in the oven, gives the flour time to fully hydrate, and lets the dough relax so cut edges hold their shape. Fridge for 2 hours minimum, freezer for 20 to 30 minutes, or freeze cutouts for 10 to 15 minutes before baking.
Do cookies spread more at 350 or 375?
Cookies spread more at 375 degrees F because the fat melts faster than the structure can set. Baking at 325 to 350 degrees F gives the structure time to firm up before the fat fully melts, producing cookies with cleaner edges and less spread.
Can I make sugar cookies without baking powder?
Yes. Skip the baking powder entirely or reduce it to 1/4 teaspoon per batch. Cookies without baking powder spread less but bake flatter and denser, which is ideal for decorated cutout cookies that need a flat surface for royal icing.
How do I fix cookies that have already spread?
While still warm, use the back of a teaspoon to gently push the edges back into shape and return to the oven briefly. For baked cookies, press a fondant smoother onto the hot cookie within 30 seconds of pulling from the oven to flatten the top.
The Bottom Line: How to Make Sugar Cookie Dough That Doesn’t Spread
Sugar cookies spread when fat melts before the structure sets. The fix is a system: cool room temperature butter passed the indent test, weighed flour at 125 grams per cup, dough chilled for at least 2 hours, cutouts frozen for 10 to 15 minutes, oven verified at 325°F to 350°F with a thermometer, and a parchment or silicone mat lining the pan. Layer those six steps and your cutouts hold clean edges through the full bake.
Start with the scale and thermometer — those two tools cost around $30 combined and eliminate the two biggest variables in cookie spread. Add weighing, freezing cutouts, and rotating sheets between batches, and you’ll produce decorating-ready cookies on your very next try. For more baking guides, browse our baking tips for related techniques.