
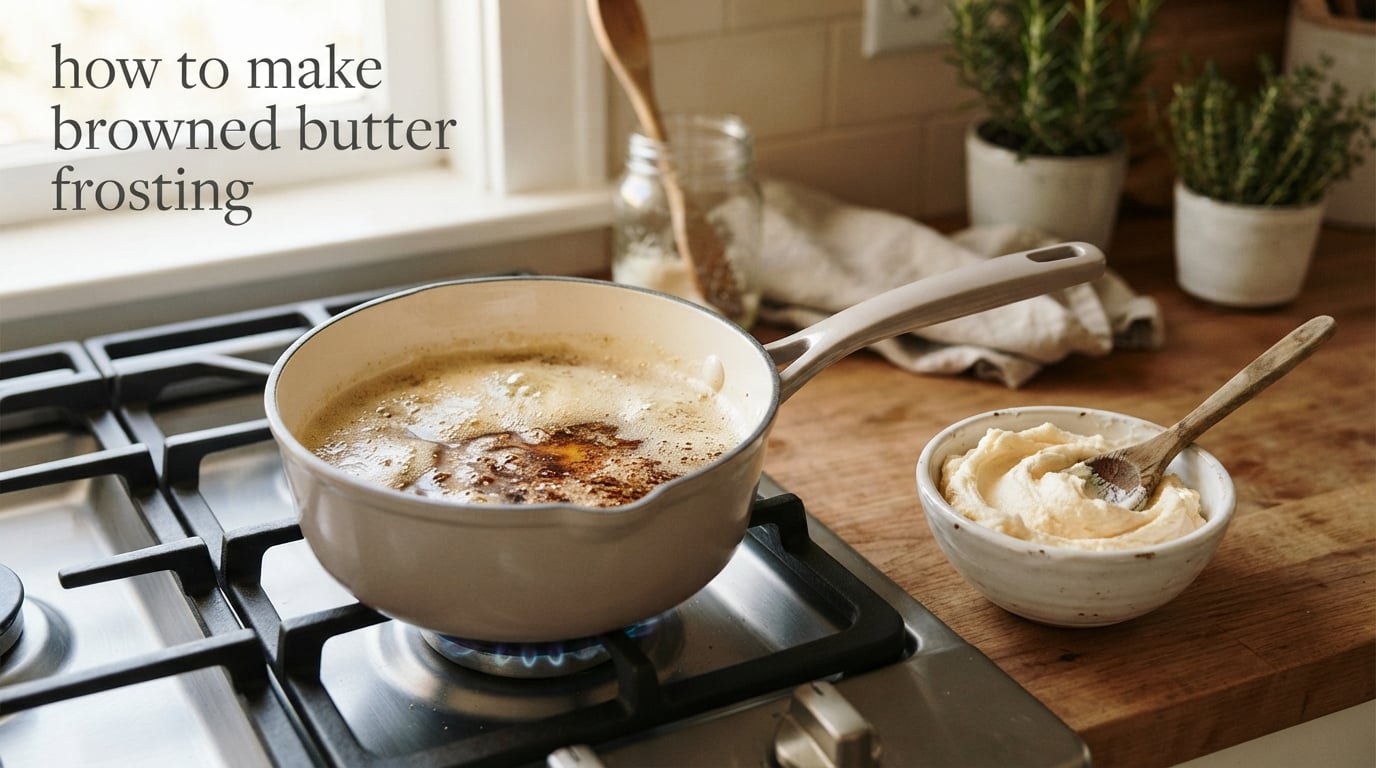
Browned butter frosting is a buttercream made by cooking butter until its milk solids turn golden brown and nutty, then whipping that browned butter with powdered sugar and a splash of milk until smooth and spreadable. You only need 4 ingredients and about 10 minutes of active time, and the payoff is a frosting that tastes like caramelized toffee.
If you have ever avoided brown butter because it goes “from golden to black in seconds,” you are not alone. I burned my first three pans before I stopped trusting a timer and started trusting my nose. This guide walks you through the 5 sensory cues that tell you when the butter is perfectly browned (and when it is ruined), plus a troubleshooting table for every common frosting failure.
Table of Contents
- What Is Browned Butter (and Why It Makes Frosting Taste Better)
- Ingredients
- Step 1 – Brown the Butter
- Step 2 – Cool the Browned Butter (Do Not Skip)
- Step 3 – Whip the Frosting
- Step 4 – Adjust the Consistency
- Troubleshooting: Fixes for Every Common Mistake
- How to Store Browned Butter Frosting
- Browning Mistakes to Avoid
- Variations and Flavor Pairings
- How Much Frosting Do I Need?
- Frequently Asked Questions
- How do I make perfect browned butter?
- How can I brown butter without burning it?
- What is the trick to browning butter?
- What temperature should you brown butter at?
- How do I tell if I burned my brown butter?
- Why is my butter not browning?
- Is brown butter buttercream hard to make?
- Can I make brown butter frosting with cream cheese?
- Conclusion
What Is Browned Butter (and Why It Makes Frosting Taste Better)
Browned butter is regular butter that has been heated until its water evaporates and its milk solids toast. Those tiny brown specks are where all the flavor lives.
When you heat butter gently, the milk solids (mostly proteins and sugars) undergo the Maillard reaction, the same process that browns bread and sears steak. The result is a deep, nutty, toasty flavor with caramel-like notes you cannot get from plain melted butter. Whisking those brown specks into powdered sugar gives the frosting a roasted, almost-butterscotch taste while keeping the sweetness balanced.
Ingredients
You only need 4 core ingredients, plus a pinch of salt. I include both US cup measures and grams because weighing your sugar gives a smoother frosting every time.
- 1/2 cup (113 g) unsalted butter
- 3 to 4 cups (360 to 480 g) powdered sugar (also called confectioners’ sugar), sifted if lumpy
- 1 to 2 tablespoons milk or heavy cream
- 1 teaspoon pure vanilla extract
- Pinch of fine salt (skip if using salted butter)
Equipment you will need:
- Light-colored skillet or saucepan (a dark pan hides the milk solids)
- Heatproof spatula or whisk
- Stand mixer with paddle attachment or a hand mixer
- Fine mesh strainer (optional, only if your powdered sugar is lumpy)
- Clean kitchen towel (to drape over the mixer and stop the sugar cloud)
Step 1 – Brown the Butter
Brown the butter over medium heat, watching for the 5 named stages of browning: melt, foam, amber milk solids, dark specks, and done.
The browning takes 5 to 8 minutes on most stovetops. Rather than setting a timer, use these five sensory cues in order. The whole progression happens fast once the foam quiets down, so stay at the stove the entire time.
- Melt: Cut the butter into even pieces so it melts quickly and evenly. Swirl the pan as it goes from solid to liquid.
- Foam: The butter will bubble and foam. This is just water boiling off. The color underneath the foam has not changed yet.
- Amber milk solids: Lift the foam with your spatula. The liquid underneath will look pale gold. The foam may “crackle and pop” as it shrinks.
- Dark specks: Small brown flecks appear on the bottom of the pan. Swirl constantly and scrape those specks up so they do not burn.
- Done: The butter smells nutty and toasted, like toasted hazelnuts or shortbread. The color is a deep amber, never dark brown. Pull the pan off the heat the moment you smell the toasting notes.
Warning: Browned butter goes from perfect to burnt in seconds. Once the color passes deep amber and the specks look almost black, you have gone too far. If the butter smells acrid or “sharper” than toasted nuts, toss it and start over.
Pro tip: If your stovetop runs hot, lower the heat to medium-low and extend the time. The published 5 to 8 minute range exists because gas, electric, and induction heat differently. Trust the smell and color, not the clock.
Step 2 – Cool the Browned Butter (Do Not Skip)
Cool the browned butter to room temperature before whipping, or you will melt the powdered sugar and end up with a runny glaze.
Hot browned butter melts the fat in the powdered sugar mixture, which means the frosting will not hold air or shape. Two cooling paths work, and the path you choose depends on the frosting you want.
- For a glaze or pourable icing: Let the butter cool until just warm (about 10 minutes), then whip. The result will be thin and silky.
- For a spreadable or pipeable buttercream: Cool the butter until it is soft-set but still pourable, around 65 to 70 F (15 to 20 minutes at room temperature). If it solidifies, re-melt briefly and let it cool again.
If you are in a hurry, spread the browned butter in a shallow bowl and pop it in the fridge for 8 to 10 minutes, checking every 2 minutes. Do not let it go fully solid, or it will lump when whipped.
Step 3 – Whip the Frosting
Whip the cooled browned butter with powdered sugar on low speed first, then medium, until the frosting is fluffy and light, about 3 to 4 minutes total.
If you are using the half-and-half ratio (combining browned butter with softened butter for a richer, easier-to-handle frosting), whip the softened butter alone for 1 minute first to break it up, then drizzle in the cooled browned butter.
- Transfer the cooled browned butter to the mixer bowl. Beat on medium for 30 seconds to smooth it.
- Drape a clean kitchen towel over the mixer to contain the dust cloud. With the mixer on low, add the powdered sugar one cup at a time, waiting for each to incorporate before adding more.
- Once all the sugar is in, scrape down the bowl. Add the vanilla, salt, and 1 tablespoon of milk.
- Increase to medium speed and beat for 2 minutes until the frosting is fluffy and almost doubles in volume. Add more milk 1 teaspoon at a time if it is too thick.
Taste before adding the milk, then add. Salt balances the sweetness and brings up the nutty flavor; do not skip it if you used unsalted butter.
Step 4 – Adjust the Consistency
Adjust the consistency with three knobs: more powdered sugar for stiffer frosting, more milk for thinner frosting, and cooler browned butter for pipeable peaks.
This is the part most recipes skip, and it is the part that decides whether you end up with a glaze, a spreadable frosting, or a pipeable buttercream. All three come from the same recipe; you just nudge different knobs.
- Glaze (pourable): Use 3 cups powdered sugar and 2 tablespoons milk. Whip on medium for 1 minute only. Drizzle over pound cake or banana bread.
- Spreadable (frosting layer): Use 3.5 cups powdered sugar and 1 tablespoon milk. This is the middle setting for sheet cakes and cupcakes.
- Pipeable (buttercream): Use 4 cups powdered sugar and just 1 teaspoon of milk. Make sure the browned butter has cooled to about 65 F before whipping. Holds swirls and roses.
Browned Butter vs. Browned Butter Cream Cheese Frosting
Browned butter frosting and browned butter cream cheese frosting are two different frostings. The first is American buttercream (butter + powdered sugar + liquid), and the second adds cream cheese for tang. If a recipe says “cream cheese brown butter frosting,” plan to stir in 4 oz (113 g) of softened cream cheese per stick of butter. The flavor is tangier and less sweet.
Troubleshooting: Fixes for Every Common Mistake
Use this table to diagnose and fix the seven most common browned butter frosting problems. Match your symptom to the cause, then apply the fix.
| Symptom | Likely Cause | How to Fix |
|---|---|---|
| Grainy or sandy texture | Powdered sugar was not sifted, or butter was too cold when whipped | Sift the powdered sugar next time; beat 2 more minutes on medium to smooth the current batch |
| Runny or soupy | Browned butter was still too warm when whipped | Chill the bowl 15 minutes, re-whip; for future batches, cool butter to 65 to 70 F |
| Too stiff, hard to spread | Too much powdered sugar or not enough milk | Add milk 1 tsp at a time and beat on medium until spreadable |
| Oily or separated | Butter was too cold and did not emulsify with the sugar | Warm the bowl 10 seconds with a hair dryer or set over a warm water bath for 1 minute, then re-whip aggressively |
| Split (looks curdled) | Browned butter and room-temp butter were different temperatures | Warm the whole bowl slightly and beat on high for 2 minutes; the emulsion will re-form |
| Bitter, acrid taste | Butter was burnt, not browned | Toss it. There is no rescue for burnt butter. Start over with a clean pan and lower heat. |
| Too sweet | Sugar ratio is high and salt is missing | Add another pinch of salt and 1 tsp lemon juice; this rebalances without thinning |
How to Store Browned Butter Frosting
Store browned butter frosting in an airtight container at room temperature for up to 2 days, refrigerated for up to 2 weeks, or frozen for up to 3 months.
The fat in the frosting firms up in the fridge, so always re-whip cold frosting before using. Let it sit on the counter for 10 to 15 minutes, then beat on medium for 1 minute to restore the fluffy texture.
- Room temperature: Up to 2 days in an airtight container. Cover the surface with plastic wrap pressed directly onto the frosting to prevent a skin.
- Fridge: Up to 2 weeks. The flavor deepens after day one as the browned butter notes settle.
- Freezer: Up to 3 months in a freezer-safe container. Thaw overnight in the fridge, then bring to room temperature before re-whipping.
Browning Mistakes to Avoid
The most common brown butter mistakes all come down to rushing the pan or ignoring what your senses are telling you. Here is the list I wish I had on my first try.
- Walking away from the stove. Browned butter needs your full attention once the foam quiets. Stepping away for “just a sec” is how butter burns.
- Heat too high. High heat scorches the milk solids before the water can evaporate. Stick to medium or medium-low.
- Using a dark pan. A black cast-iron skillet hides the color of the milk solids, so you cannot tell when they have browned. Use a light-colored stainless steel or white saucepan.
- Skipping the scrape. The browned specks stuck to the bottom are the flavor. If you strain them out, you lose the best part.
- Pouring hot browned butter onto cold powdered sugar. The temperature shock causes the frosting to split and look curdled.
- Pulling the pan too early. If the butter only smells “buttery” and not nutty, the milk solids have not toasted yet. Keep going.
- Tasting for color only. Black or burnt butter still looks melted and golden in the first 10 seconds after burning. The smell is your real signal.
Variations and Flavor Pairings
Browned butter frosting is the base for several flavor twists, and it pairs especially well with fall and winter baking.
- Cream cheese brown butter frosting: Beat in 4 oz (113 g) softened cream cheese per stick of butter. Tangier and less sweet; ideal for carrot cake and red velvet.
- Maple brown butter frosting: Replace the vanilla with 1 tablespoon pure maple syrup and add a pinch of cinnamon.
- Chocolate brown butter frosting: Sift in 1/4 cup unsweetened cocoa powder with the powdered sugar.
- Brown sugar brown butter frosting: Replace half the powdered sugar with light brown sugar (sieved to remove lumps) for deeper molasses notes.
Best pairings: pumpkin cake, banana bars, carrot cake, apple cake, gingerbread, spice cake, brown butter chocolate chip cookies, cinnamon rolls, and brownies. The nutty flavor cuts through sweet spices the same way toasted nuts do.
How Much Frosting Do I Need?
This recipe makes about 2 cups of frosting, which is enough to frost a 9×13 sheet cake, a two-layer 8-inch cake, or 24 cupcakes (knife-frosted, not swirled).
| Cake or Bake | Amount Needed |
|---|---|
| Two-layer 8-inch cake | 2 cups (this full recipe) |
| 9×13 sheet cake | 2 cups (this full recipe) |
| 24 cupcakes, knife-frosted | 2 cups (this full recipe) |
| 24 cupcakes, piped swirls | 3 cups (1.5x recipe) |
| Three-layer 8-inch cake | 3.5 cups (1.75x recipe) |
To scale up, brown butter in two pans rather than one crowded pan. Crowded pans hold too much water vapor and steam the milk solids instead of toasting them, which is the most common cause of pale, weak-tasting frosting when baking in bulk.
Frequently Asked Questions
How do I make perfect browned butter?
Heat 1/2 cup (113 g) unsalted butter in a light-colored skillet over medium heat, swirling often, until it melts, foams, and the milk solids on the bottom turn deep amber with a nutty smell. This takes 5 to 8 minutes on most stovetops. Pull the pan off the heat the moment the butter smells like toasted hazelnuts, because it goes from perfect to burnt in seconds.
How can I brown butter without burning it?
Use medium (or medium-low) heat, stay at the stove the entire time, and trust the smell more than the clock. The butter is ready when it smells nutty and toasty and the milk solids on the bottom are deep amber. If the smell turns sharp or acrid, the butter is burnt and cannot be saved.
What is the trick to browning butter?
Use a light-colored pan so you can see the milk solids change color, and swirl the pan almost constantly once the foam quiets down. The 5 stages to watch for are melt, foam, amber milk solids, dark specks, and done. The trick is to stop the moment you smell toasted nuts, before the specks turn black.
What temperature should you brown butter at?
Brown butter over medium heat, which on most stovetops is around 300 to 350 F in the pan. If your stovetop runs hot, drop to medium-low. The exact temperature is less important than staying attentive; the cues that matter are color (deep amber), smell (nutty, not acrid), and sound (the foam quiets down before the milk solids brown).
How do I tell if I burned my brown butter?
Burnt butter smells sharp, acrid, or like charred popcorn instead of toasted nuts. The specks will look almost black rather than deep amber. Burnt butter cannot be rescued; the bitter compounds have soaked into the fat. Discard it and start over with a fresh pan and lower heat.
Why is my butter not browning?
Common reasons include heat that is too low (the water never fully evaporates and the milk solids stay pale), butter with no milk solids such as clarified butter or vegan margarine, or a pan that is too dark to see the color change. Use medium heat, regular unsalted butter, and a light-colored pan so you can watch the milk solids turn amber.
Is brown butter buttercream hard to make?
No, brown butter buttercream is one of the easier frostings to make. The two things that trip people up are browning the butter without burning it and cooling it to the right temperature before whipping. Once you learn the 5 browning stages and cool the butter to about 65 to 70 F, the rest is just standard American buttercream technique.
Can I make brown butter frosting with cream cheese?
Yes. Beat 4 oz (113 g) of softened cream cheese into the cooled browned butter before adding the powdered sugar. This gives you browned butter cream cheese frosting, which is tangier and less sweet than the standard version. It is especially good on carrot cake, banana bars, and spice cake.
Conclusion
Browned butter frosting is one of the easiest frostings to learn and one of the hardest to stop making. Once you trust your nose over the timer and cool the butter to the right temperature before whipping, you will have a nutty, toasty buttercream that makes even a simple chocolate cake taste bakery-quality.
Pin this guide for fall and winter baking, and try it first on a banana cake or pumpkin cupcake where the caramel-like notes really sing. Once you have the 5 browning stages down, you can riff on the base forever: maple, brown sugar, chocolate, or cream cheese.