
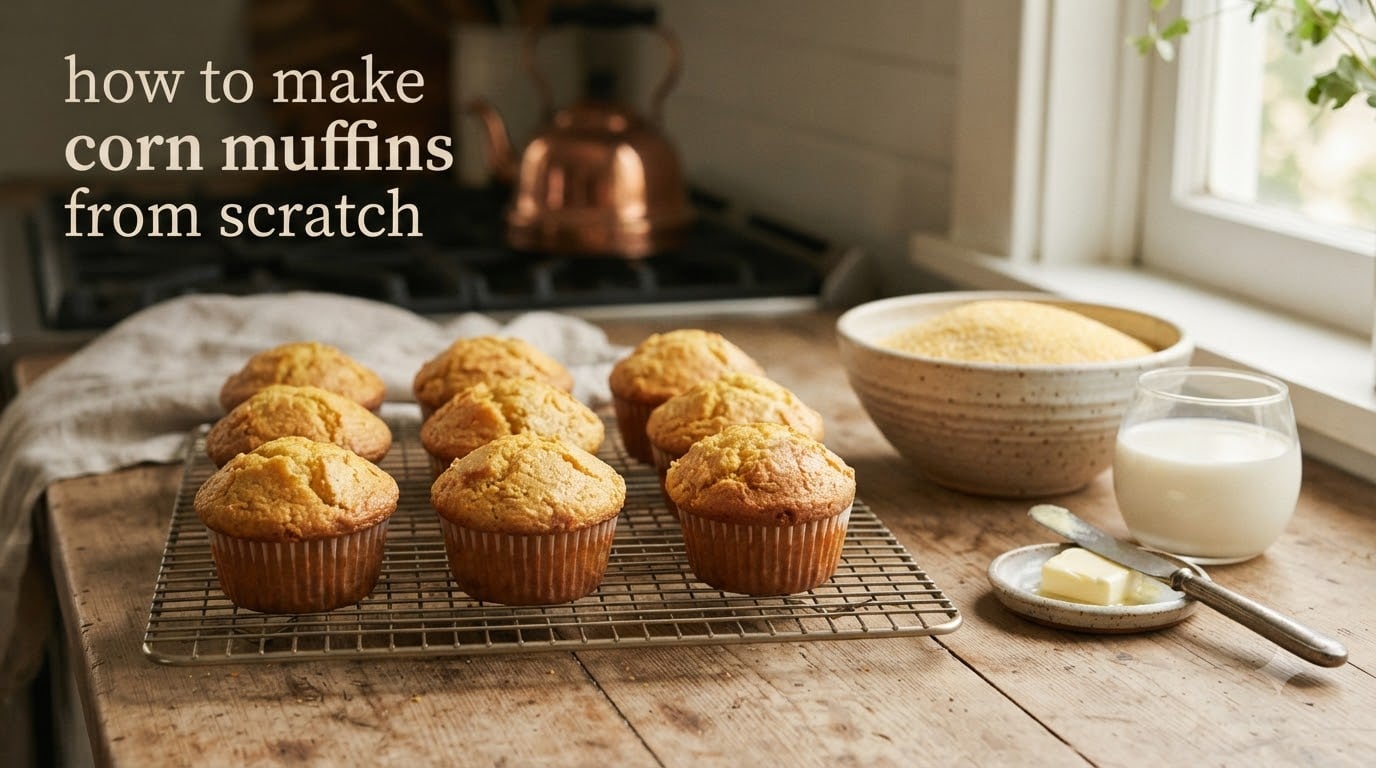
Learning how to make corn muffins from scratch is one of the highest-return kitchen skills you can pick up, because the whole recipe comes together in a single bowl in under ten minutes. The muffins bake in about twenty minutes and turn a bowl of chili, a bowl of soup, or a slow Sunday breakfast into something that tastes like it came from a bakery. This guide walks through the complete method, then explains the science behind every ingredient so you can fix problems instead of guessing.
We baked this recipe many times while writing it, adjusting the temperature curve, the fill level, and the mixing method until the muffins came out consistently tall, moist, and slightly crumbly. The version below is the one we would hand to a friend who has never baked a quick bread before. It works with a standard 12-cup muffin tin and nothing else exotic.
Table of Contents
- Quick Summary Before You Start
- Ingredients and Equipment You Need
- How to Make Corn Muffins From Scratch
- Why This Recipe Works: The Science Behind Every Ingredient
- How to Tell When Corn Muffins Are Done
- Buttermilk Substitutes and Dairy Swaps
- Choosing the Right Cornmeal
- Corn Muffins vs Cornbread: What Is the Difference
- Add-Ins and Variations
- Scaling for Mini, Standard, and Jumbo Muffins
- Troubleshooting: Why Corn Muffins Go Wrong
- How to Store and Freeze Corn Muffins
- Dietary Adaptations: Gluten-Free, Dairy-Free, and Vegan
- Frequently Asked Questions
- What is the secret to making good cornbread?
- What is the secret to moist cornbread?
- What do you put in cornbread to keep it from falling apart?
- What is the difference between cornbread and corn muffins?
- What are some common mistakes when making cornbread muffins?
- Can you make corn muffins without buttermilk?
- How long do corn muffins bake at 350°F?
- Why are my corn muffins dry and crumbly?
- How do I stop corn muffins sticking to their paper liners?
- Can you freeze corn muffins?
- Conclusion
Quick Summary Before You Start
The secret to bakery-style corn muffins is a high-heat start, a full tin, and a light touch. Bake at 425°F for five minutes, drop the oven to 350°F, and finish the bake. Fill the cups to the top edge instead of halfway. Stir the batter just until the flour disappears, lumps and all.
- Prep time: 10 minutes
- Bake time: 18 to 22 minutes at 350°F, plus 5 minutes at 425°F
- Total time: roughly 35 minutes
- Yield: 12 standard muffins
- Key technique: 425°F start, then 350°F for the remainder
- Most common failure: overmixing the batter
If you only remember three things, remember these. Use room temperature ingredients so the batter emulsifies properly. Measure flour by spooning it into the cup and leveling it off, never by scooping. And pull the muffins the moment the toothpick comes out clean, because cornmeal keeps setting as the muffin cools.
Ingredients and Equipment You Need
This is a balanced quick bread. Most of it should already be in your pantry, and nothing needs to be special or hard to find. Both US and metric amounts are given because volume measures drift and grams do not.
Dry Ingredients
- 1 and 1/2 cups (180g) yellow cornmeal, fine or medium grind
- 1 cup (120g) all-purpose flour
- 1/3 cup (67g) granulated sugar
- 1 tablespoon baking powder
- 1/2 teaspoon baking soda
- 1/2 teaspoon fine salt
Wet Ingredients
- 1 cup (240ml) buttermilk, at room temperature
- 2 large eggs, room temperature
- 1/2 cup (113g) unsalted butter, melted and cooled slightly, plus more for the tin
- 1/3 cup (80ml) neutral oil, such as canola or vegetable
Equipment
- 12-cup standard muffin tin
- 12 paper muffin liners, or a tin greased with softened butter and a dusting of cornmeal
- Large mixing bowl and a whisk
- Small bowl or measuring jug for wet ingredients
- Rubber spatula for folding
- Cooling rack
An ice cream scoop with a trigger release fills liners faster and more evenly than a spoon, and even fill matters more than most bakers expect. A digital scale is worth having too. A tablespoon of flour scooped straight from the bag can carry fifteen percent more flour than one leveled off with a spoon, and that surplus is a direct route to dry, crumbly muffins.
Buttermilk Substitutes at a Glance
| Substitute | Amount per 1 cup buttermilk needed | Notes |
|---|---|---|
| Milk plus white vinegar | 1 cup milk plus 1 tablespoon vinegar, rest 5 minutes | The standard stand-in; mildly tangy, works in any recipe |
| Milk plus lemon juice | 1 cup milk plus 1 tablespoon lemon juice, rest 5 minutes | Same ratio, slightly brighter acidity |
| Greek yogurt | 3/4 cup yogurt thinned with 1/4 cup milk | Adds protein and moisture; may reduce baking soda by 1/4 teaspoon |
| Sour cream | 1/2 cup sour cream thinned with 1/2 cup milk | Rich and tangy; tend to bake up slightly denser |
| Cultured buttermilk powder | 2 tablespoons powder plus 1 cup water | Best shelf-stable option, closest flavor to real buttermilk |
How to Make Corn Muffins From Scratch
Read through all ten steps once before you start, because two of them, the oven temperature change and the fill level, have to happen on a schedule. Everything else is forgiving.
- Heat the oven and prep the tin. Set the oven rack to the center position and preheat to 425°F (220°C). Set the rack to 350°F (175°C) about four minutes after the muffins go in, or use an oven thermometer to confirm the drop. Butter the muffin tin and set it in the oven while it heats so the cups are hot and already greased.
- Whisk the dry ingredients. Combine the cornmeal, flour, sugar, baking powder, baking soda, and salt in a large bowl. Whisk for 30 seconds to distribute the leavening evenly. Cornmeal can clump, so break up any yellow chunks with the whisk before moving on.
- Whisk the wet ingredients separately. In another bowl, whisk the buttermilk, eggs, melted butter, and oil together until smooth and uniform. If your eggs were cold, they will make streaks that never fully blend, which is why room temperature matters here.
- Rest the wet mixture for five minutes. This is optional but it lets the flour proteins in the cornmeal start hydrating, which means less mixing time in the next step and a more tender crumb.
- Make a well and add the wet mixture. Pour the wet mixture into a well in the center of the dry ingredients. Add a small bowl of the dry ingredients on top of the liquid before you stir, which helps stop dry pockets from forming in the middle of a muffin.
- Fold gently until barely combined. Use a spatula and count roughly ten strokes. Stop while lumps of cornmeal and flour are still visible. The batter will look under-mixed and slightly rough. That is exactly right.
- Rest the batter three minutes. Let the bowl sit on the counter so the flour hydrates fully. The batter will thicken noticeably and turn from soupy to scoopable. This short rest does more for tenderness than any single ingredient swap.
- Fill the liners all the way to the top. Use a scoop or a spoon. For tall domed muffins, fill past the top of the liner. Most home bakers underfill by about a third, and that is the single biggest reason their muffins have flat crowns instead of bakery height.
- Bake at 425°F for five minutes, then 350°F. Put the tin in the hot oven and set a timer for five minutes. Turn the oven down to 350°F and keep the muffin tin on the center rack. The initial blast of heat drives moisture into the air cells and lifts the top quickly, and the lower temperature finishes the crumb without burning the crown before the center sets.
- Test and cool. Start checking at 18 minutes with a toothpick. When it comes out clean, cool the tin on a rack for five minutes before removing the muffins, because the residual heat finishes the setting process and the liners will release far more easily.
Warning: The oven door is opened exactly once during this recipe, right at the five-minute mark. Every extra opening lets heat escape and can stall the rise. If you need to check early, use the oven light rather than opening the door.
Once the five minutes are up and the oven is at 350°F, the rest of the bake is gentle. Expect the total bake time to land between 23 and 27 minutes, depending on how hot your oven actually runs and how full your tin is. Fuller tins bake a little faster because there is more mass near the walls.
Why This Recipe Works: The Science Behind Every Ingredient
Bakers who understand cause and effect stop needing recipes that tell them what not to do. Here is what each component is actually doing, which is the part that turns a list of ingredients into a method you can adapt.
Baking powder and baking soda, and why you need both
Baking powder is a leavening agent that produces carbon dioxide when it meets liquid and heat, and it works twice, once on contact with moisture and again in the oven. Baking soda is plain sodium bicarbonate with no acid of its own, so it needs something already in the batter, in this case the lactic acid in buttermilk, to release gas. Buttermilk supplies that acid, which is precisely why the dough behaves differently when you swap in plain milk and skip the vinegar. Using both agents gives you lift from two independent mechanisms, which is what produces the high crown rather than a modest, squat rise.
Why oil and butter appear together
Oil coats the flour proteins and interrupts gluten formation, which produces a tender, moist crumb that stays soft for days. Butter does the same job while adding flavor, browning, and a firmer set, because milk fat solidifies when cool. Using only butter risks a dry, cakey crumb after a day or two. Using only oil leaves the muffin tasting flat and slightly greasy. The one-third cup oil in this recipe exists to keep these muffins tender on day three, which matters for a side dish that keeps getting reheated.
What buttermilk and eggs actually do
Buttermilk contributes acid, moisture, and a small amount of extra protein. The acid softens the gluten that forms during mixing, which is why an acidic batter needs less stirring and bakes into a more tender crumb. Eggs contribute structure, emulsify the fat into the batter so water and oil do not separate, and set the crumb during the first few minutes of baking. Eggs also thicken the mixture, which is a large part of what keeps cornmeal muffins from crumbling into sand on the plate.
Why sugar is not just sweetness
Sugar does three jobs in this batter. It sweetens, yes, but it also retains water, which fights the natural dryness of cornmeal, and it caramelizes on the crown during the high-heat start to create that crisp, slightly bitter golden top. Reducing the sugar to two tablespoons produces a noticeably more savory muffin suitable for chili, but the crown loses its crackle and the crumb dries out faster.
Cornmeal grind and why the flour is there
Cornmeal has no gluten at all, so it cannot form a structure on its own. The all-purpose flour supplies the gluten scaffolding that holds a muffin together, and the cornmeal supplies flavor, color, and a gritty texture. This is also why corn muffins are more fragile than wheat muffins and why they benefit from a fuller flour portion than a typical quick bread.
Overmixing, the mistake that ruins more muffins than anything
Overmixing is the single most common reason corn muffins come out tough, dense, or heavy. Flour contains two proteins, glutenin and gliadin, that link together into gluten when they are hydrated and worked. A few strokes develop the structure a muffin needs. Fifty strokes develop the structure of a bread that has to hold itself up unsupported, and the result bakes into a tight, chewy crumb that nobody wants to chew. Lumps in the batter are not a defect. They are the visible sign that you stopped in time.
How to Tell When Corn Muffins Are Done
Cornmeal keeps setting as a muffin cools, so you pull it a shade earlier than you would a wheat muffin. Three tests combined give the most reliable answer, and using more than one removes the guesswork.
Test 1: The toothpick test
Insert a plain toothpick into the center of a muffin, avoiding the sides. It should come out clean or with one or two moist crumbs clinging to it. Wet batter or a smear of wet batter means several more minutes. If the toothpick is spotless but the crumb feels loose, the muffin is overbaked.
Test 2: The press test
Press a fingertip gently on the top of a muffin, near the crown. The surface springs back immediately on a done muffin. If a dent stays, the center still needs time. Note that a very soft muffin top can leave a temporary dent, so compare two muffins pressed the same way.
Test 3: The shake test
Pick up the tin and shake it gently over the counter. A fully baked muffin is a solid, cohesive object that moves with the weight of the whole muffin. If you hear sloshing or feel liquid shifting, the center is still fluid and needs more time.
Internal temperature and carryover baking
Corn muffins are done at roughly 200°F to 205°F (93°C to 96°C) in the center, measured without touching the tin. The muffin continues to set for a few minutes after it leaves the oven, so aim for the lower end of that range if you like a softer, moister center. Pull the whole tin at once rather than testing each muffin individually, and use a pair of oven mitts because the tin is genuinely hot at this stage.
Buttermilk Substitutes and Dairy Swaps
You can make corn muffins without buttermilk and still get a tender crumb, as long as you replace the acid along with the liquid. What you cannot do is simply swap buttermilk for milk, because you lose the acidity that activates the baking soda and the batter bakes flat and dense with a soapy aftertaste.
The ratio that works
For every 1 cup of buttermilk, combine 1 cup of milk with 1 tablespoon of an acid. White vinegar and lemon juice are the two most reliable choices. Rest the mixture for five minutes at room temperature so the acid has time to curdle the milk slightly and thicken it, then use it exactly as you would real buttermilk. You can also stir 2 tablespoons of buttermilk powder into 1 cup of water for the closest flavor match when you want to keep the pantry stable.
Swapping in yogurt or sour cream
Greek yogurt works beautifully and adds moisture along with tang. Use three-quarters cup yogurt loosened with a quarter cup of milk, and cut the baking soda by a quarter teaspoon since yogurt is more acidic than buttermilk. Sour cream produces a richer, denser muffin with a deeper flavor. Use half sour cream and half milk, and do not skip the butter, or the crumb turns heavy.
Going dairy-free
Unsweetened plant milk plus a tablespoon of the same acid per cup substitutes cleanly for buttermilk. The crumb will be very slightly less tender because plant milk carries less protein, so compensate by resting the batter a full five minutes instead of three. Corn muffins are among the most forgiving quick breads for dairy-free baking because cornmeal and cornmeal flavor carry the recipe, not dairy richness.
Choosing the Right Cornmeal
Cornmeal is not interchangeable across grind and color, and the package you pick will change the result more than any other single decision you make.
| Type | Flavor | Effect on the muffin | Best for |
|---|---|---|---|
| Fine yellow cornmeal | Strong, sweet, classic cornbread flavor | Tender, even crumb; finer texture | The standard choice for sweet and savory corn muffins |
| Medium grind yellow cornmeal | Strong, slightly grassy | Noticeable grit, more rustic texture | Traditional, hearty corn muffins |
| Coarse grind (stone-ground) | Deep, nutty, roasted | Distinctly gritty crumb, stronger aroma | Skillet cornbread and crumbly old-fashioned muffins |
| White cornmeal | Milder, less sweet | Paler color, lighter flavor | Pairings where corn flavor should stay in the background |
| Blue cornmeal | Nutty, earthy | Deep blue-purple color | Visual contrast, especially with cheddar add-ins |
Yellow cornmeal carries noticeably more flavor than white, so white cornmeal is a poor substitute if the corn taste is the point of the muffin. If you want visible kernels and a coarser texture, add a half cup of fresh or frozen corn kernels to the batter rather than switching to a coarse grind, because coarse meal alone tends to make a gritty crumb that some people find unpleasant rather than rustic.
Corn Muffins vs Cornbread: What Is the Difference
The honest answer is that there is almost no difference in the batter. Corn muffins and cornbread are the same quick bread, and many recipes can be poured into either pan. The differences are in shape, sweetness, timing, and how the dough behaves in the pan.
| Corn muffins | Cornbread | |
|---|---|---|
| Pan | Individual muffin cups | One square or round skillet pan |
| Typical shape | Free-standing, domed, hand-held | Cut into squares or wedges |
| Fill level | Filled to the top for a high crown | Filled about two-thirds for rising room |
| Sweetness | Often noticeably sweet, dinner-roll style | Usually more savory, lower sugar |
| Bake time | 18 to 22 minutes at 350°F | 20 to 30 minutes at 350°F |
| Texture | Crumb is the same, but a short bake keeps it moist | Longer bake creates a drier, firmer crumb |
| Best served with | Chili, eggs, honey butter, brunch spreads | Soup, stews, barbecue, beans |
| Freezing | Excellent, reheat in 3 minutes | Good, but slices dry out faster |
What makes corn muffins rise higher is the fill level, not a different recipe. Because each portion has less mass and the cups are narrow, the heat reaches the sides fast and sets a tall dome. If you pour the same batter into a square pan, the center has further to travel before the heat arrives, so a lower, flatter top is expected.
If you want a cornbread that does not crumble when you slice it, the answer is more eggs and more starch. Adding a tablespoon of cornstarch, or raising the egg count by one, binds the crumb so pieces hold together on a fork. That matters more for a pan-style cornbread than for muffins, which are usually eaten with hands.
Add-Ins and Variations
The base recipe is a blank canvas for whatever you have on hand. Add-ins go in during the last fold, and each one needs a small adjustment to the base formula to keep the crumb right.
Cheese and jalapeño
Fold in one cup of sharp cheddar and two sliced jalapeños. Sharp cheddar melts into a savory backbone, and the jalapeño releases moisture as it bakes, so add one extra tablespoon of flour. Cheddar and corn are the most reliable combination in the entire category because the salt in the cheese seasons the cornmeal perfectly.
Fresh corn kernels
Three-quarters cup of fresh or frozen kernels, thawed and patted dry, adds sweetness and visible texture. Thaw frozen kernels and press them between paper towels first, because surface water makes the batter wet and leads to a dense center. Add them with a tablespoon of flour to absorb the extra liquid.
Bacon and scallions
Half a cup of cooked, crumbled bacon plus a quarter cup of sliced scallions turns these into a genuinely savory dinner bread. Reduce the salt by half a teaspoon if you are using salted bacon. Cook the bacon until it is properly crisp, since raw fat in the batter will make the muffins greasy and heavy.
Herbs and cheese, a brunch version
Chopped fresh rosemary or thyme with a half cup of goat cheese makes an excellent breakfast muffin. Add the herbs with the last fold of dry ingredients so they do not bruise. Fresh herbs hold up far better in this batter than dried ones, which tend to taste dusty at the small quantities used here.
Sweet variations
For a sweeter muffin, swap the granulated sugar for brown sugar and add a third cup of whole kernels plus a quarter cup of raisins. Cinnamon and a small amount of nutmeg suit the sweet version well, added with the dry ingredients at no more than one teaspoon of cinnamon. Keep the total sweetness in check, since the point of the sweet version is a corn-forward muffin rather than a cake.
A four-ingredient version
If you want the fastest possible cornbread, combine one cup of cornmeal mix, one cup of milk, one egg, and a third cup of melted butter. Mix, pour, and bake at 375°F for 18 to 20 minutes. It works, and it is a legitimate answer to the four-ingredient cornbread question, but it has no sugar, no added fat beyond the butter, and a drier crumb than the recipe above. Use it for weeknight chili, not for a brunch table.
Scaling for Mini, Standard, and Jumbo Muffins
One batch of batter is flexible across three common pan sizes, but the temperature and time do not scale linearly. A mini tin has far more surface area relative to its volume, so it browns faster and bakes drier.
| Pan size | Batter per cup | Total yield | Temperature | Bake time |
|---|---|---|---|---|
| Mini (about 36 cups) | 3 tablespoons (about 45g) | 36 mini muffins | 400°F, 5 minutes then 350°F | 8 to 11 minutes |
| Standard (12-cup tin) | 1/3 cup (about 60g), fill to the top | 12 muffins | 425°F, 5 minutes then 350°F | 18 to 22 minutes |
| Jumbo (6-cup tin) | 2/3 cup (about 120g), fill to the top | 6 muffins | 425°F, 5 minutes then 350°F | 26 to 32 minutes |
| Double batch | Same as standard | 24 muffins, two tins | 425°F, 5 minutes then 350°F | 18 to 22 minutes |
For a double batch, mix everything in one large bowl rather than making two separate bowls, because the batter only needs one rest. Bake two tins on separate racks, and swap and rotate them halfway if your oven has a hot spot, so both tins finish together. Do not try to bake a double batch in one tin with thinner batter, since a lower fill level produces short, flat muffins.
One important warning for jumbo muffins: the high-heat start matters more, not less. A jumbo cup has more batter sitting next to the tin wall, so without the five-minute blast at 425°F the outside sets before the center has risen, and you get a raw pocket in the middle with a burnt ring outside it.
Troubleshooting: Why Corn Muffins Go Wrong
Almost every disappointing corn muffin traces back to one of a short list of causes. Find your symptom in the table below, then work through the fixes in order.
| What you see | What caused it | How to fix it |
|---|---|---|
| Dry, crumbly, sandy texture | Overmixed batter, or flour scooped rather than spooned | Count ten fold strokes and stop. Weigh the flour, or spoon and level it. |
| Tough, chewy, dense crumb | Heavy mixing, or batter allowed to sit over an hour | Fold gently and bake within an hour of mixing. |
| Flat tops, no dome | Underfilled cups, or a cold tin | Fill to the top of the liner and bake the tin while it heats. |
| Burnt tops, raw center | Oven running hot, or no temperature reduction | Verify with an oven thermometer and always drop to 350°F at 5 minutes. |
| Muffins sunk in the middle | Underbaked, opened door too early, or unstable leavening | Do not open the door in the first 15 minutes and test with a toothpick. |
| Sticking to liners or pan | Greasing skipped, or removing too early | Grease with butter and cornmeal, or use liners, and cool 5 minutes in the tin. |
| Raw, wet batter at the bottom | Batter not adequately mixed, or the tin sits on a cold rack | Fold until no dry pockets remain and place the tin on a preheated sheet. |
| Muffins fall apart when eaten | Too much whole cornmeal, too few eggs, or a very long bake | Keep cornmeal under half the dry weight, use two eggs, and pull on time. |
| Pale, flat, no rise at all | Expired baking powder, or baking soda without acid | Test the leavening, and never swap buttermilk for plain milk without adding acid. |
| Tastes soapy or bitter | Baking soda reacting without enough acid, or overbaking | Use the proper buttermilk substitute ratio and pull the muffins 2 minutes early. |
The six mistakes to stop making
- Scooping flour from the bag. Spoon it in and level it, or use grams. This one change fixes more dry muffins than any other.
- Mixing until the batter looks smooth. Aim for visible lumps. Ten strokes, then stop.
- Filling the liners halfway. For a high dome, fill to the top and beyond.
- Skipping the high-heat start. Five minutes at 425°F is what produces the tall crown and crisp top.
- Opening the oven door repeatedly. One opening at the five-minute mark, none before that.
- Pulling the muffins too late. Cornmeal continues setting off the heat, so pull at clean-toothpick, not one minute past it.
On the question of why muffins stick to paper liners, there are two separate causes and they need different fixes. Sticking because the muffin is underbaked and still moist from the middle is a doneness problem. Sticking because the liner was pressed into the cup too tightly, or because the batter was poured with no dome height above the rim, is a preparation problem. If the muffin top sits below the liner edge it cannot grip the paper, so fill higher. If the whole muffin is pulling apart when you peel the liner, extend the bake by two minutes.
How to Store and Freeze Corn Muffins
Corn muffins keep well but they never improve after day two, so plan on freezing anything beyond that.
Room temperature, up to two days
Store in an airtight container or a sealed bag at room temperature. A piece of paper towel in the container absorbs the condensation that otherwise softens the crust and makes the tops tacky. Do not refrigerate, because refrigeration dries the crumb faster than leaving it on the counter.
Freezing, up to three months
- Let the muffins cool completely on a rack, at least an hour, so no trapped steam freezes into ice crystals.
- Wrap each muffin individually in plastic wrap or parchment paper.
- Place the wrapped muffins in a freezer bag or sealed container, removing as much air as possible.
- Label the bag with the date before it goes into the freezer.
Freezing baked muffins works noticeably better than freezing raw batter, because the crumb is already set and reheating only needs to restore moisture. To reheat, thaw at room temperature for 20 minutes or unwrapped in a 350°F oven for 8 to 10 minutes. A microwave works in 20 to 30 seconds, though the crust stays soft rather than crisp.
For a make-ahead plan, mix the dry ingredients and store them sealed for up to a month. Combine the wet ingredients separately and refrigerate them for up to two days. Then the night before baking, you only whisk the two together and portion the liners, which cuts the active time to about five minutes.
Dietary Adaptations: Gluten-Free, Dairy-Free, and Vegan
Corn muffins are unusually forgiving about substitutions because cornmeal is already gluten-free. The bigger challenge is fat, since butter supplies flavor that nothing else fully replaces.
| Diet | Substitutions | What to expect |
|---|---|---|
| Gluten-free | Replace all-purpose flour 1:1 with a cup-for-cup gluten-free flour blend containing xanthan gum | Works well, slightly more fragile crumb. Do not substitute almond or coconut flour at the same ratio. |
| Dairy-free | Plant milk plus acid for the buttermilk, melted coconut oil or vegan butter for the butter and tin grease | Very good results. Add a tablespoon of sugar for browning. |
| Egg-free | Replace each egg with 1/4 cup unsweetened applesauce plus 1 tablespoon ground flaxseed mixed with 3 tablespoons water | Moist and slightly denser. Reduce the bake by 1 to 2 minutes. |
| Vegan | Combine the dairy-free and egg-free swaps, and use 1/3 cup maple syrup in place of the sugar | Works, with a slightly cakier crumb. Expect a browner top from the maple sugar. |
| Whole wheat | Replace half the all-purpose flour with whole wheat flour | Nuttier and denser, with less rise. Do not go beyond half. |
| Lower sugar | Cut the sugar to 2 tablespoons and add an extra tablespoon of honey if you want sweetness | More savory and suitable for chili. The top will not crisp the same way. |
When you go gluten-free, buy a blend with xanthan gum rather than using a single-flour swap. Cornmeal provides no gluten structure on its own, so a blend without a binder produces a crumb that crumbles the moment you touch it. A quarter cup of instant pudding mix is a surprising but effective binder if that is all you have.
When you go egg-free, applesauce adds moisture, which means you should watch the bake more closely rather than assuming more time is needed. The muffin will feel done sooner than a standard one because the structure is looser, so use the press and shake tests alongside the toothpick.
Frequently Asked Questions
What is the secret to making good cornbread?
The three biggest factors are a high-heat start, a light hand with mixing, and enough fat. Begin at 425°F for 5 minutes then drop to 350°F, fold the batter only until the flour disappears, and use both butter and oil. Buttermilk adds the acid that keeps the crumb tender.
What is the secret to moist cornbread?
Moisture comes from fat and from not overbaking. A third cup of neutral oil alongside the butter keeps the crumb soft for days, since oil coats the flour proteins and limits gluten development. Pull the muffins at a clean toothpick rather than waiting for a dark top, because cornmeal continues to set as it cools.
What do you put in cornbread to keep it from falling apart?
More eggs, more flour relative to the cornmeal, and a little starch. Keep cornmeal under half the total dry weight, use two eggs rather than one, and add a tablespoon of cornstarch. A spoonful of instant pudding mix also works as a binder if you want to avoid extra cornstarch.
What is the difference between cornbread and corn muffins?
Almost nothing in the batter. The same mix can be poured into a muffin tin or a square pan. The difference is shape and handling: muffins are filled to the top for a high dome, bake in 18 to 22 minutes, and are usually a little sweeter, while pan cornbread is filled two-thirds full and bakes 20 to 30 minutes into a more savory, slightly firmer crumb.
What are some common mistakes when making cornbread muffins?
Scooping flour instead of spooning it, mixing the batter until smooth, filling the liners only halfway, skipping the high-heat start, and opening the oven door in the first 15 minutes. Those five account for most flat, dense, dry, and stuck muffins.
Can you make corn muffins without buttermilk?
Yes. Combine 1 cup of milk with 1 tablespoon of white vinegar or lemon juice, rest it 5 minutes, and use it in place of the buttermilk. Greek yogurt thinned with milk and cultured buttermilk powder mixed with water both work too. Do not substitute plain milk alone, because the baking soda needs acid to activate.
How long do corn muffins bake at 350°F?
About 18 to 22 minutes at 350°F after the initial 5 minutes at 425°F. Jumbo muffins need 26 to 32 minutes, and mini muffins need only 8 to 11 minutes. Start testing at the low end and use a toothpick, since corn muffins set faster than wheat muffins.
Why are my corn muffins dry and crumbly?
Almost always overmixing or an excess of flour. When flour is spooned rather than scooped, the batter can carry well over a hundred extra grams, and mixing develops gluten that tightens the crumb into sand. Measure by weight, count about ten fold strokes, and stop while lumps are still visible.
How do I stop corn muffins sticking to their paper liners?
Fill the batter to the top of the liner so the muffin has height to grip the paper, and cool the tin on a rack for 5 minutes before removing anything. If a whole muffin pulls apart when you peel the liner, it is underbaked, so give it two more minutes next time.
Can you freeze corn muffins?
Yes, for up to three months. Cool them completely, wrap each one individually, and freeze in a sealed bag. Reheat from frozen in a 350°F oven for 8 to 10 minutes or in a microwave for 20 to 30 seconds. Freezing baked muffins gives better results than freezing raw batter.
Conclusion
To make corn muffins from scratch with the results you want, three decisions do nearly all the work. Start the oven at 425°F and drop to 350°F after five minutes, fill the liners to the very top, and stop mixing while the batter still looks lumpy. Everything else, including the cornmeal grind, the buttermilk substitute, and the add-ins, is a variation on that core method.
We would start with the plain version, bake a batch this week in the 2026 season while fresh corn is still worth buying, and then pick one add-in to try on the second batch. Once you can read the batter, the troubleshooting table becomes a quick reference rather than a rescue plan, and you will never wonder again why a batch turned out dense. The recipe is written and tested for 2026, and it scales cleanly from a six-cup jumbo tin to a double batch of standard muffins.