
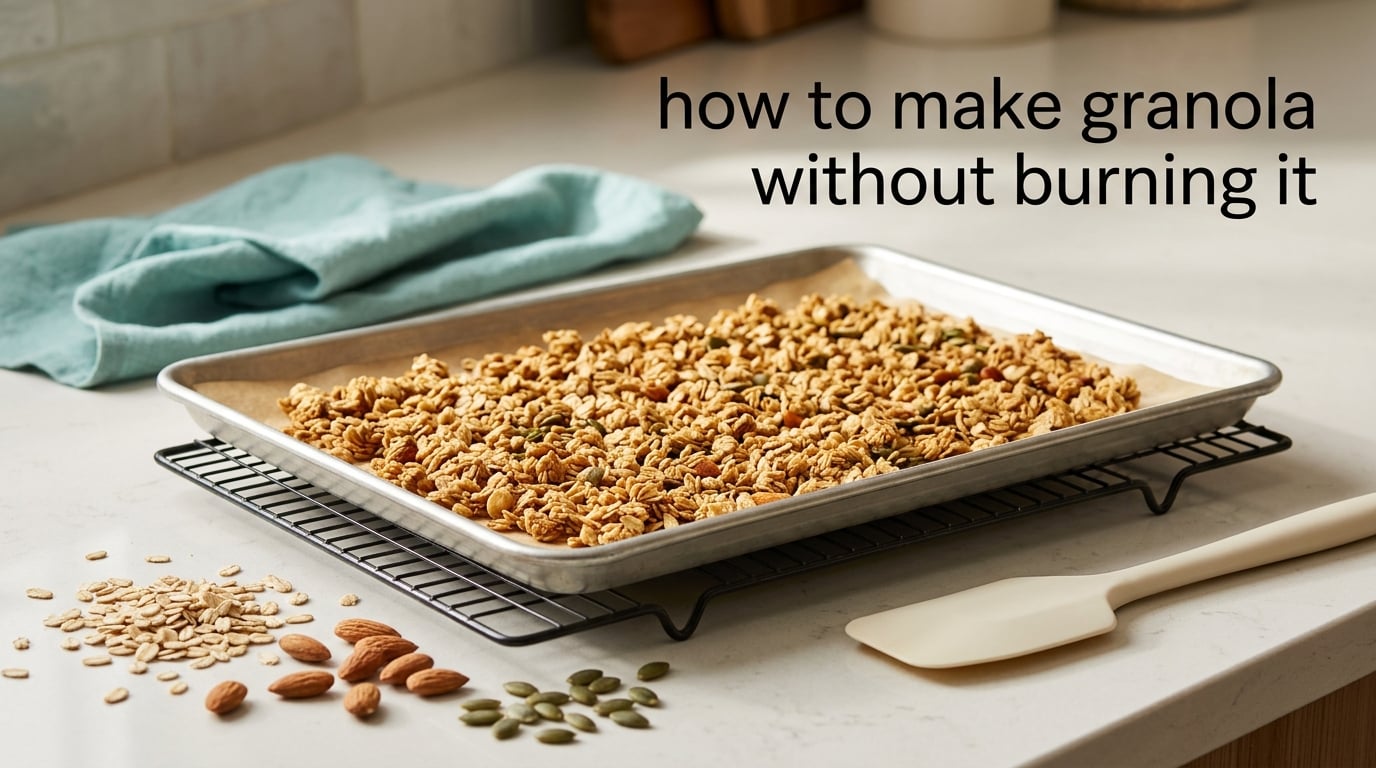
How to make granola without burning it comes down to four habits: bake at 300F (150C) rather than 350F, line the pan with parchment or a silicone mat, spread the mixture in one thin layer, and stir every 5 to 8 minutes so the toasted edges move back to the center. Pull the pan while the granola still looks pale and slightly soft. Most burnt batches come from high heat, a crowded pan, and trusting the clock instead of the color.
I wasted more granola batches to scorching than I care to admit before I stopped treating the oven as a set-and-forget appliance. A thin layer of oats, nuts, seeds, oil, and honey goes from pale to deep gold in a window of about four minutes. There is no un-burnt stage after that.
This guide is built around that four-minute window rather than a fixed recipe. You will get the temperature and time combinations that work, the color and smell cues that tell you when to stop, and a symptom-to-fix table for the batches you have already lost. I also include the stovetop method, which removes the oven from the equation entirely and is close to impossible to scorch.
If your granola is browning at the edges while the center is still soft, the cause is almost always uneven heat exposure rather than a bad recipe. That is a fixable problem, and it starts with the pan you are using.
Table of Contents
- Why Granola Burns in the First Place
- 7 Rules That Stop Granola From Burning
- Oven Temperature and Bake Time for Granola
- Convection Oven Granola: Drop 25F and Stir More Often
- Parchment Paper, a Silicone Mat, and a Single Thin Layer
- How to Tell When Granola Is Done Before It Burns
- Why Granola Keeps Darkening After You Pull It
- Oat Type, Sweetener, and Oil: What Burns Fastest
- Common Granola Mistakes and How to Fix Them
- How to Make Stovetop Granola Without Burning It
- What to Do If You Already Burnt a Batch
- Frequently Asked Questions
- What is the secret to making good granola?
- What are common granola making mistakes?
- What is the secret to making crunchy granola?
- Does homemade granola harden as it cools?
- What to do with burnt granola?
- How long should granola stay in the oven?
- Should granola be soft when it comes out of the oven?
- Do I need parchment paper to bake granola?
- Is it better to bake granola with or without convection?
- How do I bake granola at high altitude without burning it?
- Conclusion
Why Granola Burns in the First Place
Granola burns because it is a dry mixture baking with no moisture to slow things down. Two browning reactions run at once, and once the water is gone, neither one can be stopped from the outside.
The first is the Maillard reaction, a chemical reaction between amino acids and sugars that produces the nutty, roasted flavor and the brown color of toasted oats and nuts. The second is caramelization, the breakdown of sugars that produces deeper color and a more toasted flavor as the temperature climbs.
Caramelizing is what you want. Burning is what happens after it, and it is easy to confuse the two in a hot oven because the color moves so fast. The difference is smell and pace: caramelizing smells sweet and toasted, burning turns acrid and smoky, and from the moment you catch a smoky edge to a ruined tray takes only a couple of minutes.
Water is the buffer that normally slows all of this. Granola finishes drying out well before the timer ends, which is why the last third of the bake is where nearly every scorch happens. The edges and the pan-contact layer go first because they run drier and hotter than the middle of the pile.
Oil is the other variable. When oil is heated past its smoke point it degrades, tastes bitter, and turns the whole tray acrid before the sugars even scorch.
7 Rules That Stop Granola From Burning
Seven habits account for nearly every successful batch. The low temperature and the early pull matter more than anything else on this list.
- Bake at 300F (150C), not 350F. A lower temperature buys you a wider browning window, so the color changes slowly enough that you can react to it. It also dries the oats out evenly, which is what makes the batch crisp later.
- Line the sheet with parchment paper or a silicone baking mat. A bare pan carbonizes the sugar that touches it, and that residue is the burnt, bitter layer people describe as a scorched bottom.
- Spread the mix in a single thin layer and use a second tray when it will not fit. A thick pile scorches underneath while the top stays pale. Two thin trays beat one crowded tray every time.
- Stir every 5 to 8 minutes, edges to center. Use a spatula to scrape the outer ring inward, then push the middle back out. The edge is always the first and fastest casualty.
- Pull the pan while it still looks underdone. Carryover cooking finishes the job on the pan, so a tray that looks pale coming out of the oven usually lands at a proper deep gold as it cools.
- Check that your oven actually holds the temperature you set. A separate oven thermometer on the middle rack is the fastest way to find out whether your dial is telling the truth. A 25F discrepancy explains most mysterious burnings.
- Match your oats, sweetener, and oil to the bake. Quick oats and honey scorch sooner than old-fashioned rolled oats and maple syrup, so those combinations want a lower setting and a shorter time.
One user in an r/Appliances thread about a hot-running oven reported dropping their granola from 325F to 300F after repeated burnings, and that single change solved it. A commenter in a Facebook baking group put it more bluntly: the honey will cause it to burn easily. Both observations point at the same two rules: go cooler, and watch the sweetener.
Oven Temperature and Bake Time for Granola
Start at 300F (150C) on a conventional oven and adjust from there. Times below assume a thin, even layer on a lined sheet, stirred every 5 to 8 minutes, on the middle rack.
| Oven setting | Temperature | Bake time | Color when you pull it |
|---|---|---|---|
| Conventional, low and slow (recommended) | 300F / 150C | 25 to 30 minutes | Pale gold, edges just turning |
| Conventional, middle | 325F / 165C | 20 to 25 minutes | Light golden brown |
| Conventional, fast and risky | 350F / 175C | 15 to 20 minutes | Deep gold, check every 3 minutes |
| Convection, fan on | 275F / 140C | 20 to 25 minutes | Pale gold, dries faster |
| Convection, fan off first 10 minutes | 300F / 150C | 25 to 30 minutes | Pale gold, gentlest browning |
Times shift with the batch, so treat them as a starting range rather than a promise. A fuller tray, a higher fat ratio, or a humid kitchen all push the time up, and a thin scatter of oats can finish ten minutes sooner than a thick one.
At high altitude the arithmetic reverses. A cook posting from about 7,100 feet on a permies forum thread noted that 350F was the right preheat in their kitchen, because thinner air means the mixture reaches temperature less aggressively. General guidance for altitudes above 5,000 feet is to add 10 to 20F and expect a shorter bake, then watch color rather than time.
Rotating the sheet front to back at each stir helps when your oven has a hot spot. If one corner browns first every single time, that corner sits over the element or the fan is off-center, and moving the tray to a different rack for the second half of the bake is a reliable fix.
Convection Oven Granola: Drop 25F and Stir More Often
A convection oven makes granola easier to burn, not harder. The fan forces hot air across the food, which dries the surface faster and drives the browning reaction harder than still air would.
Drop the recipe temperature by 25F (15C), so a 300F conventional recipe becomes 275F (140C) with convection, and stir more frequently than the recipe states. For a very pale finish, run the fan off for the first 10 minutes at 300F, then turn it on to finish the drying.
Convection is the most common question I see about scorched granola, and it circulates in group threads without a settled answer. The consistent fix across those discussions is the same: lower temperature, shorter time, more attention.
Parchment Paper, a Silicone Mat, and a Single Thin Layer
You need a liner, and parchment paper is the stronger option. It lifts caramelized sugar off the metal completely, while a silicone mat tolerates more heat but can still pick up a sticky, scorched film after enough cycles.
A rimmed baking sheet works better than a flat cookie sheet because the raised lip gives you space to scrape and toss the mixture without it sliding off the edge. Skip the raised rim and you will lose a third of the batch to the floor at the first stir.
Layer depth is the second half of the problem. A single thin layer exposes every flake to the same heat. A crowded pan creates its own micro-environment: the top layer dries and toasts, the bottom layer sits in trapped moisture and then scorches once that moisture is gone, and the middle stays soft and chewy.
If your recipe fills more than one sheet, divide it. There is no time penalty worth comparing against a burnt bottom layer.
The stirring technique that matters most is edges to center. On a permies thread, one baker described it as the key part of the whole process: it toasts quickly at the edges, so use a spatula to bring the outside edges to the center and keep the edges as thick as possible to prevent burning. In practice that means scraping the perimeter, dumping it into the middle, then spreading that pile back out to the original thin layer.
Stirring also does something less obvious. It breaks up clumps that have bonded to themselves, which is how clusters form. If you want large clusters, press them flat with the back of the spatula after each stir and leave the pan alone for a few minutes between rounds.
Put the tray on the middle rack. The top rack puts the mix too close to the element, the bottom rack puts the underside too close to the fan and the metal floor, and both of those are direct causes of a burnt base.
How to Tell When Granola Is Done Before It Burns
Granola is done when it is a deep, even gold and smells fully toasted, and it should still look slightly soft and a little pale in the pan. The crisp finishes forming off the heat, so a tray that looks finished in the oven is usually overdone by the time it cools.
| Stage | Color | Smell | What to do |
|---|---|---|---|
| Underdone | Pale beige, raw oat color | Faint, almost no aroma | Keep baking, another 5 minutes |
| Approaching | Edges light gold, center still pale | Toasted, faintly sweet | Start stirring every 3 minutes |
| Ready to pull | Even deep gold, no black flecks | Full nutty toast, no smoke | Pull now and spread out |
| Pushing it | Dark reddish brown | Sweet, almost burnt sugar | Pull immediately, expect darker cooling |
| Past it | Black flecks, smoke | Acrid and sharp | Batch is lost, sort the good pieces |
Smell is faster and more reliable than color. The moment a batch goes from nutty to sweet-caramel to smoky, you are in the danger zone and the difference between a great batch and a lost one is about two minutes.
Look at the oats, not the nuts. Nuts and coconut brown well before the oats do, so a tray can look finished while the oats are still pale. If the flakes in the center of the pan are soft and bendable, give it more time.
Ask about time and most people repeat the recipe number. I would rather you check at 20 minutes than trust a number, because the same recipe runs 15 minutes apart in two different ovens.
Why Granola Keeps Darkening After You Pull It
Granola keeps browning on the pan because the tray holds heat and the mixture is still finishing the browning reactions after the oven is off. This is carryover cooking, and it is the reason so many people report pulling granola out in time and still finding it burnt an hour later.
One permies poster described pulling his batch at around the ten minute mark specifically because it continues to cook off the heat. That advice sounds wrong against a recipe that says 25 minutes, and it is right if you want to protect the color.
Three habits limit carryover cooking. Spread the granola across a second pan or a wire rack so no piece is buried in a warm pile, cool it on a surface with airflow, and do not cover it while it is still warm, since trapped steam softens the batch and can create condensation that keeps the sugars moving.
This is also why granola is soft when it comes out of the oven. That is the correct state, not a sign of underbaking.
Oat Type, Sweetener, and Oil: What Burns Fastest
Not every batch burns at the same rate, and the ingredients decide the pace. Thinner, wetter, and more sugary mixes scorch sooner.
| Oat type | Burning behavior | Result |
|---|---|---|
| Old-fashioned rolled oats | Slowest, most forgiving | Best texture, best clusters |
| Quick oats | Thin, drinks oil and sweetener fast | Can turn soft and mushy, scorches sooner |
| Instant oats | Pre-steamed, very thin | Crisps fast, needs the shortest bake |
| Steel-cut oats | Dense and slow | Toasts unevenly, needs more time |
A poster on the same permies thread noted that quick oats get too mushy and you lose the texture, which matches what you will see in your own pans. Old-fashioned rolled oats are the safest starting point when you are trying to stop burning.
| Sweetener | Burn rate | How it behaves |
|---|---|---|
| Honey | Fastest to scorch | Caramelizes hard and bitter at the edge of done |
| Maple syrup | Moderate | Stays fluid longer, browning is gentler |
| Brown sugar | Moderate to fast | Burns to a hard caramel shell, needs stirring |
| Coconut sugar | Moderate | Similar to brown sugar with less caramel depth |
Oil matters through smoke point, the temperature at which it starts breaking down and smoking. Coconut oil and refined oils tolerate a 350F bake comfortably. Olive oil works but its flavor fades above about 375F, so keep it to the lower settings. If your tray smells sharp and bitter before the color changes, the oil went past its limit.
A tighter ratio also helps. Reducing the sweetener and oil slightly slows browning, at the cost of clumping. A workable no-recipe starting ratio is about 3 parts oats to 1 part each of nuts and seeds, with oil and liquid sweetener added to coat rather than pool.
Common Granola Mistakes and How to Fix Them
Match what you see in the pan to the cause, then change one thing on the next batch. Several symptoms often trace back to the same root: heat that is too high or too unevenly distributed.
| Symptom | Cause | Fix |
|---|---|---|
| Burnt edges, pale center | Edges dry out first and sit on hot metal | Stir every 5 minutes, edges to center, drop 25F |
| Burnt bottom, soft top | No liner and a pan sitting too close to the element | Add parchment, move to the middle rack, use one thin layer |
| Uniformly too dark but not burnt | Oven runs hot, or batch pulled too late | Verify with a separate oven thermometer, pull 5 minutes earlier |
| Burnt on top, pale underneath | Upper element or broil too close | Drop the tray a rack, tent loosely with foil for the first 10 minutes |
| Soft and chewy in the middle | Layer too thick, tray overcrowded | Divide across two sheets, stir to break up clumps |
| Never crisps when cool | Not dried out enough before pulling | Add 5 minutes at 300F, spread on a rack to cool |
| Goes dark while cooling | Carryover cooking in a warm pile | Spread across a second pan, cool with airflow, uncover |
| Sticks and carbonizes to the pan | No liner, sugary mix | Parchment paper every time, silicone mat as a backup |
| Scorches before the oats are dry | Sweetener burning ahead of the oats | Swap honey for maple syrup, cut the sweetener, drop 25F |
| One corner always burns first | Hot spot in the oven | Rotate the sheet front to back, shift racks halfway |
A recurring surprise in forum threads is that some people blame the appliance rather than the recipe. That instinct is not wrong. Ovens vary by more than 25F between models and more than that between a calibrated one and one that has drifted, which is why rule six is a thermometer rather than a preference.
How to Make Stovetop Granola Without Burning It
The stovetop removes the oven from the equation, and with it the hot spots and the carryover browning. It takes about 10 to 15 minutes and gives you constant control, since you are standing next to the pan and can see every flake.
- Use a wide, heavy-bottomed skillet or a large pot. A heavy base holds a steady temperature instead of spiking when you add the cold oats. Give yourself more surface area than you think you need, because crowding is the stovetop version of the same problem.
- Toast the dry ingredients first. Set it over medium-low heat and add the oats, nuts, and seeds with a small amount of oil. Stir constantly for 4 to 5 minutes until the oats smell nutty and the nuts are fragrant, and pull them off the heat before they color.
- Add the sweetener off the heat. Take the skillet off the burner, drizzle in honey, maple syrup, or brown sugar, a splash of vanilla, and a pinch of sea salt, then stir until every flake is coated.
- Return to low heat for 2 to 3 minutes. This second phase is short and gentle. The goal is to dry the coating, not to brown it, so the color should barely change during this step.
- Spread it out immediately. Tip the mix onto a parchment-lined sheet pan rather than leaving it in the skillet, where it steams in its own heat and softens.
- Add dried fruit after it cools. Raisins and other dried fruit carry their own moisture and sugar and do not bake well, so fold them in once the granola is cool enough to handle.
Stovetop granola tends toward loose grains rather than clusters. If clusters matter to you, use a thicker sweetener such as honey or brown sugar syrup and press the mixture firmly onto the pan, then let it set undisturbed for 15 minutes before breaking it apart.
What to Do If You Already Burnt a Batch
You cannot reverse burning, because the bitter compounds stay in the granola no matter how long you bake it. You can cut your losses instead of throwing the whole tray out.
- Cool the pan completely. Hot granola is too soft to sort, and the darker color only settles as it cools.
- Sort it on a light surface. Pick out the black pieces and set those aside. Anything uniformly deep gold is still usable even if the edges are darker than you wanted.
- Re-toast the survivors at 300F for 5 to 7 minutes. A short, low re-toast drives off any dampness without adding much more color, which is exactly what granola that stayed soft in the middle needs.
- Turn the rest into granola butter. Blended dark, burnt-leaning granola makes an excellent spread on toast, and the roasting flavor suits the darker color in a way it never does in a bowl of cereal.
If the batch is badly bitter rather than just dark, the honest answer is to discard it. A handful of burnt flakes mixed into a bowl will taste off for weeks, and no amount of honey covers it.
Frequently Asked Questions
What is the secret to making good granola?
The secret is low heat and early pulling. Bake at 300F (150C) rather than 350F, spread the mixture in one thin layer on a lined pan, stir every 5 to 8 minutes, and pull the tray while it still looks pale and slightly soft. Carryover cooking finishes the browning on the pan, so a tray that looks underdone in the oven usually lands at a proper deep gold as it cools.
What are common granola making mistakes?
The most common mistakes are baking too hot, crowding a single pan, skipping a liner, and trusting the timer instead of the color. Sugar-heavy mixes scorch before the oats are dry, a thick pile burns underneath while the top stays pale, and granola left in a warm pile keeps darkening off the heat. A separate oven thermometer catches ovens that run hot.
What is the secret to making crunchy granola?
Crunch comes from drying the mixture all the way through at low heat, not from baking it darker. Give it 25 to 30 minutes at 300F (150C), stir so no clumps stay put, and let the batch cool spread out on a rack rather than in a pile. For clusters, press them flat with the back of a spatula after each stir and let the pan sit between rounds.
Does homemade granola harden as it cools?
Yes, and that is the correct behavior. Granola comes out of the oven soft and slightly chewy, then firms and crisps as the remaining moisture escapes on the pan. It also keeps browning during that time, which is why a tray that looked pale in the oven can turn too dark if you pile it up or leave it covered while warm.
What to do with burnt granola?
Cool the pan fully, then sort the batch on a light surface and remove every black piece. Spread the survivors thinly and re-toast at 300F (150C) for 5 to 7 minutes to fix any dampness. Blend the darker pieces into granola butter, which suits the roasted flavor. If the batch is genuinely bitter rather than just dark, discard it.
How long should granola stay in the oven?
At 300F (150C), expect 25 to 30 minutes in a conventional oven. At 325F (165C) it takes 20 to 25 minutes, and at 350F (175C) only 15 to 20 minutes. Pull it while the color is a pale to deep gold and it still feels soft, since it keeps cooking on the pan after the oven is off.
Should granola be soft when it comes out of the oven?
It should, and that softness is not a sign of underbaking. A finished batch looks evenly golden, smells fully toasted, and still feels slightly soft in the center of the pan. The crisp texture develops as it cools. If the flakes feel hard and dry in the oven, you have gone too far and risk burning the tray.
Do I need parchment paper to bake granola?
You need a liner, and parchment paper is the better choice. It lifts caramelized sugar off the metal completely, while a silicone baking mat tolerates more heat but can still pick up a sticky scorched film after enough cycles. A bare rimmed baking sheet will carbonize the sugar that touches it and leave a bitter crust.
Is it better to bake granola with or without convection?
Convection dries and browns granola faster, so a fan setting needs a lower temperature and more frequent stirring. Drop the recipe by 25F (15C), so 300F becomes 275F (140C), and expect a slightly shorter bake. For the gentlest browning, run the fan off for the first 10 minutes at 300F, then switch it on to finish drying.
How do I bake granola at high altitude without burning it?
Above 5,000 feet, add 10 to 20F to the recipe temperature and expect a shorter bake, since thinner air changes how quickly the mixture reaches temperature. One cook working at roughly 7,100 feet preheated to 350F successfully. The same habits still apply there: a lined sheet, a thin layer, and stirring every 5 minutes.
Conclusion
Knowing how to make granola without burning it comes down to heat control, surface protection, and attention rather than a specific recipe. Bake at 300F (150C), line the pan, keep one thin layer, stir edges to center every 5 to 8 minutes, and pull the tray while it still looks pale and soft.
Those five habits prevent nearly every burnt batch, and the troubleshooting table above will tell you which one to adjust on your next try. Update the guide for 2026 and keep that oven thermometer within reach.