
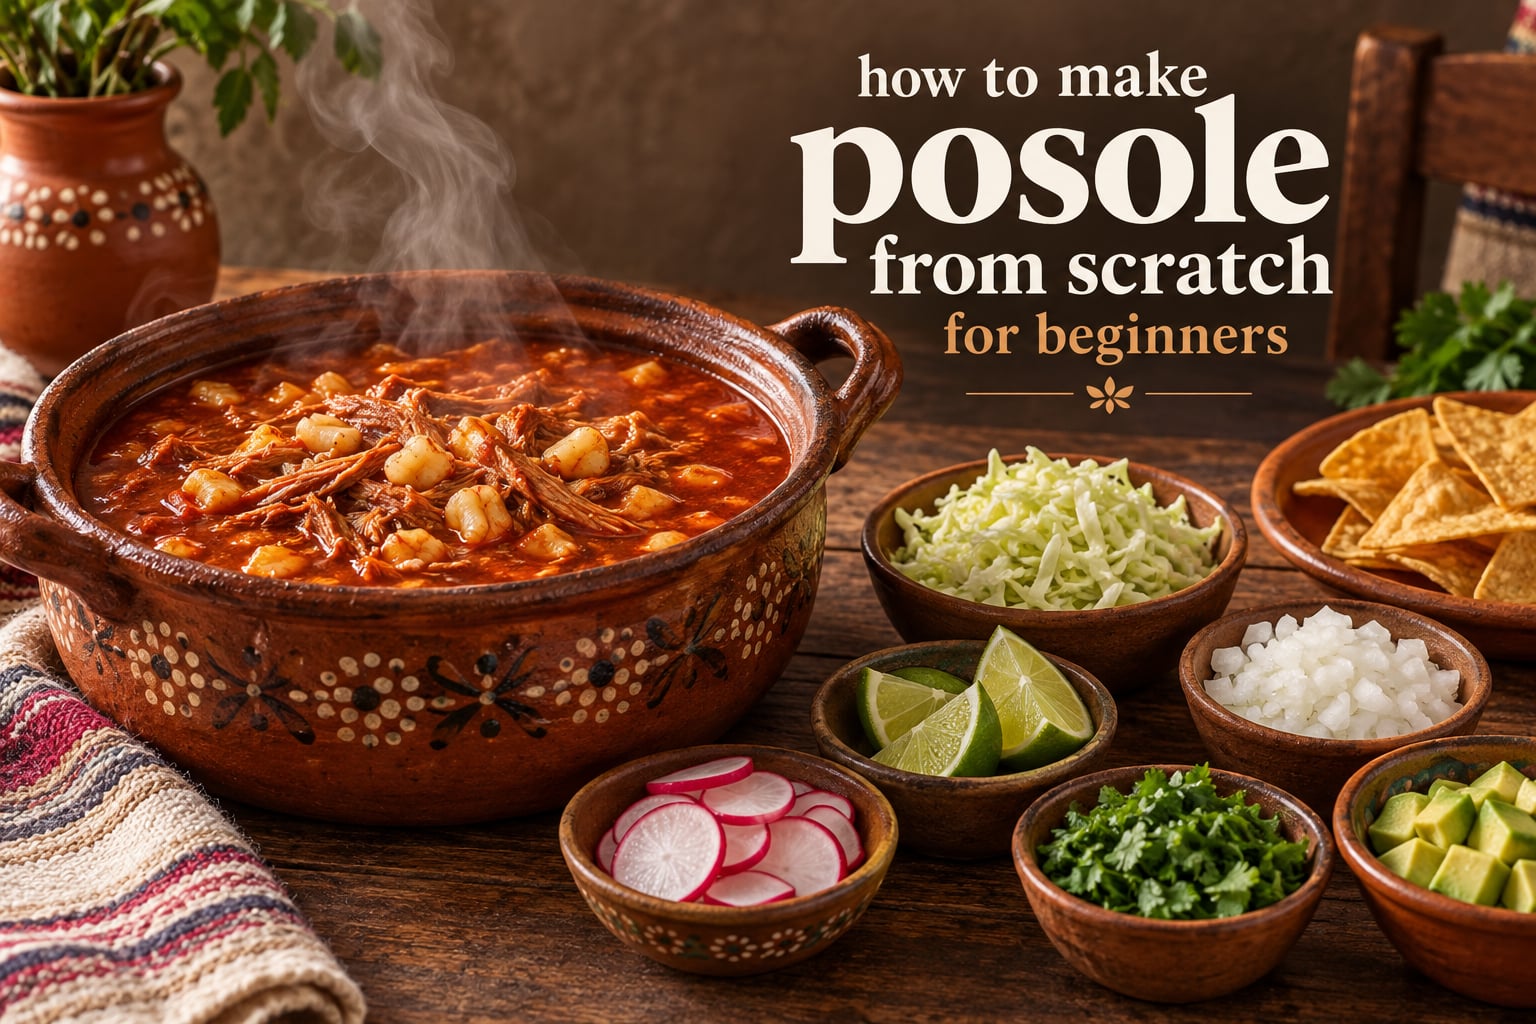
Posole is the kind of dish that looks like it demands a whole afternoon, a special pot, and a list of chiles you have never heard of. Learning how to make posole from scratch is actually much simpler than that reputation suggests. You brown some meat, toast a few dried chiles, simmer everything together, and finish the bowl with fresh lime and radish.
This guide walks through the whole process with exact timings, plain-language instructions, and a substitution path for every ingredient that gives beginners trouble. Everything here is built for a first attempt in a home kitchen with basic equipment.
Prep time: 30 minutes | Cook time: 2 hours 30 minutes | Total time: 3 hours
Yield: 6 to 8 servings | Difficulty: Beginner-friendly, with shortcuts marked throughout
The traditional version deserves the reputation it has, but you earn nothing by starting there. The version below is a genuine from-scratch posole rojo, meaning the chile sauce is made from real dried chiles rather than a jar or a packet of chili powder. Everything else is deliberately kept beginner-shaped.
Table of Contents
- Quick Answer: The Three Things That Matter Most
- What Is Posole? Pozole, Posole, Rojo, Verde, and Blanco Explained
- Posole Ingredients and Easy Substitutions
- Equipment: All You Need Is One Heavy Pot
- Canned vs Dried Hominy: Which Should You Use?
- Choosing Your Meat: Pork Shoulder, Pork Butt, or Chicken
- How to Make Posole from Scratch, Step by Step
- Step 1: Soak the chiles (15 minutes, hands-off)
- Step 2: Sear the meat (10 minutes)
- Step 3: Toast the chiles and aromatics (5 minutes)
- Step 4: Blend the chile sauce (5 minutes)
- Step 5: Build the broth base (5 minutes)
- Step 6: Simmer uncovered for 90 minutes
- Step 7: Add the hominy for the final 30 minutes
- Step 8: Finish off the heat (5 minutes)
- How to Make the Red Chile Sauce (And the Shortcut)
- Garnishes and How to Serve Posole
- Common Beginner Mistakes and How to Fix Them
- Making Posole Mild for Kids and Heat-Sensitive Eaters
- Make-Ahead, Freezing, and Reheating
- Posole Recipe Card and Timing Summary
- Frequently Asked Questions
- What ingredients do I need to make posole?
- What is the difference between pozole and posole?
- What is the secret to great pozole rojo?
- What kind of broth is used for pozole?
- Can I use dried hominy for pozole?
- Should I drain hominy before adding to pozole?
- When to add hominy to pozole?
- Is posole spicy?
- What is posole served with?
- How long does homemade posole last?
- Conclusion
Quick Answer: The Three Things That Matter Most
If you remember only three things before you start, remember these.
- Use canned white hominy if you are short on time. Rinse and drain it, then add it in the last 30 minutes of cooking so the kernels stay fluffy instead of dissolving into paste.
- Brown the meat before it goes in the pot. A hard sear on every surface is what gives the finished broth a deep, roasted backbone that simmering alone will not create.
- Add the lime juice, radish, onion, cabbage, and cilantro off the heat. These fresh, sharp garnishes are not decoration. They are what balances the rich, chile-heavy broth in every bowl.
Everything else in this guide is detail. If you are comfortable with those three, you already know how the recipe works.
What Is Posole? Pozole, Posole, Rojo, Verde, and Blanco Explained
Posole is a traditional Mexican stew built on nixtamalized white corn, simmered until the kernels are soft and fluffy, then cooked with meat in a broth flavored by chiles or tomatillos. There is no difference between the spellings pozole and posole. Both refer to the same dish, and most cooks in central Mexico write it with the z.
The three main color variants differ almost entirely in which chiles go into the broth.
| Variety | Flavor source | Color | Taste profile | Best for |
|---|---|---|---|---|
| Pozole rojo | Dried red chiles, usually guajillo and ancho | Deep brick red | Warm, smoky, mildly earthy with a low background heat | Beginners, because the ancho and guajillo are mild and build flavor without sharpness |
| Pozole verde | Tomatillos, green chiles, sometimes poblano | Green | Tart, bright, vegetal | Cooks who want a lighter, sharper bowl |
| Pozole blanco | No chiles, often garlic, onion, and peppercorns | White to pale gold | Delicate, savory, mildest of the three | Anyone avoiding chile entirely |
| Menudo | Red chiles plus tripe and other offal | Red | Broth-forward with a deeper, organ-meat weightiness | Experienced cooks; not a beginner project |
Menudo is the version most often confused with posole, since both are red and both use pork. The difference is the protein. Menudo is built around tripe, honeycomb, and other offal, and the long cooking time is what makes those cuts tender.
Since you are learning how to make posole from scratch for the first time, rojo is the right target. Its chile base is mild enough to be family-friendly, and the technique transfers directly to verde once you have the timing down.
Posole Ingredients and Easy Substitutions
You need about ten core items, and most grocery stores carry everything except the two dried chile varieties. Here is the full list, grouped the way you will actually cook it.
For the pork and the pot
- 3 pounds pork shoulder, or 3 pounds boneless pork butt
- 1 tablespoon neutral oil, plus more for the sear
- 1 large white onion, halved
- 8 cloves garlic, roughly crushed
- 5 dried bay leaves
- 1 tablespoon kosher salt
- 1 teaspoon dried Mexican oregano, crushed
- 1 teaspoon ground cumin
- 12 cups chicken broth, or water with a few bouillon cubes if you prefer
For the red chile sauce
- 6 dried guajillo chiles, stems and seeds removed
- 3 dried ancho chiles, stems and seeds removed
- 1 small white onion, quartered
- 2 cloves garlic
- 1 tablespoon neutral oil or lard
- 1 cup chicken broth for blending
- Piloncillo or a teaspoon of brown sugar, optional
For the hominy
- 2 cans (about 30 ounces each) white hominy, or 1 pound dried white hominy
For serving
- 1 lime, cut into wedges
- 1 bunch radishes, thinly sliced
- 1 small red cabbage or white cabbage, finely shredded
- 1 avocado, diced
- 1 bunch cilantro, roughly chopped
- 1 small white onion, finely diced
- Toasted tortilla chips, tostadas, or crackers
- Cotija cheese and Mexican crema, both optional
The substitution ladder for beginners
Dried chiles are the one barrier that stops people from starting. Here is a three-tier path, from most authentic to most available.
| Tier | What to use | What you get | How to use it |
|---|---|---|---|
| Ideal | 6 guajillo plus 3 ancho | Bright red color, smoky and earthy with genuine depth | Toast, soak, blend with the onion and garlic |
| Acceptable | 4 ancho plus 2 chipotle in adobo, deseeded | Darker, smokier, slightly sweeter | Toast and soak the anchos, add the chipotle during blending |
| Emergency | 3 tablespoons mild chili powder plus 1 tablespoon smoked paprika | A flatter, powder-forward broth with less aroma | Whisk into the broth after the meat goes in, skip the blending step entirely |
The emergency tier is the fastest route to a decent bowl, and it is worth knowing about. It is the technique the top-ranking 30-minute posole recipe uses, built from mild chili powder, cumin, garlic powder, and tomato paste.
A few more swaps that work well. If you have no Mexican oregano, use regular dried oregano and use a third less. If you only have chicken, use bone-in thighs and shorten the simmer by 40 minutes. If you want the posole gluten free, skip the flour thickener that some quick recipes use and let the hominy starch do the work, which is how it is done traditionally.
Equipment: All You Need Is One Heavy Pot
The only real equipment requirement is a heavy pot with a lid that holds about 8 quarts. A Dutch oven is ideal because it moves from stovetop to oven without a transfer, but a heavy-bottomed stockpot works exactly as well.
Everything else is optional. You need a blender for a smooth chile sauce, and a wide skillet for toasting chiles and searing meat. A second pot is useful for soaking the chiles at the same time the meat sears, but you can do it sequentially if you would rather wash fewer dishes.
A wire skimmer, a large spoon for skimming fat, and a Microplane or fine strainer for the blended sauce round out the list. Instant Pot and slow cooker users can adapt the method: sear the meat on the stove as written, then transfer everything to the cooker and set it for 90 minutes on high, adding the canned hominy for the final 30.
Canned vs Dried Hominy: Which Should You Use?
Use canned hominy if you want the bowl on the table within the cook time, and dried hominy if you want the most authentic texture. Both work, and neither is a compromise. The differences are time and texture.
| Form | Extra time needed | Texture in the finished bowl | Best for |
|---|---|---|---|
| Canned white hominy | None, added in the last 30 minutes | Firm, plump, holds its shape well | Beginners, weeknights, anyone cooking posole for the first time |
| Dried hominy, quick soak | 4 hours soaking plus 45 minutes simmering, done ahead of the posole | Fluffy with a slight chew and a fuller corn flavor | Cooks who plan a day ahead and want the traditional result |
| Dried hominy, no soak | 2 to 3 hours of gentle simmering in the broth | Softer and more absorbent of the chile broth | Cold-weather cooking, when the long simmer is not a problem |
| Nixtamalized corn cooked from scratch | 6 to 8 hours, mostly unattended, plus lime and calcium hydroxide | The classic pillowy, chalky-fresh nixtamal texture | The genuinely from-scratch path, done as a weekend project |
Yes, you can use dried hominy, and yes, you should drain canned hominy. Skipping the rinse leaves a cloudy, starchy brine in the broth and dulls the chile flavor. One can rinsed under cold water and drained well is all it takes.
As for when to add it, the answer depends on which form you chose. Canned hominy goes in for the last 30 minutes of simmering. Dried hominy that you pre-cooked goes in for the last 20 minutes so it warms through without breaking apart. Raw dried hominy goes in from the beginning, because it needs the full simmer to soften.
Watch the pot in the last half hour. Once the kernels start releasing starch, the broth thickens noticeably, and any hominy that was already delicate can go from fluffy to mush in the time it takes to fetch the garnishes.
Choosing Your Meat: Pork Shoulder, Pork Butt, or Chicken
Any well-made stew cut works, and the main difference is how long it needs. Pick a cut that fits the time you actually have, not the one that sounds most impressive.
| Cut | Simmer time | Character | Note for beginners |
|---|---|---|---|
| Pork shoulder | 2 hours 30 minutes | Rich, fatty, very forgiving | The best default. It will not overcook in the time the broth needs anyway |
| Pork butt | 2 hours | Leaner, more neutral, slightly firmer texture | Good choice if you prefer a cleaner-tasting broth |
| Bone-in pork chops or ribs | 1 hour 30 minutes | Deepest broth flavor from the bones | Serve with the bones, or remove them before adding hominy |
| Chicken thighs, bone-in | 1 hour | Lighter, milder base | Quickest path to a bowl; season later because chicken takes on chile quickly |
| Shredded pre-cooked chicken | 15 minutes | Neutral, fast | The fastest possible route, using a rotisserie or leftover meat |
Whichever cut you choose, cut it into large chunks about 2 inches across. Small pieces turn to shreds before the broth has finished developing, and you lose the satisfying texture that makes posole worth eating.
How to Make Posole from Scratch, Step by Step
This is the full method. Work through the steps in order, and read the doneness cues rather than relying on the clock alone.
Step 1: Soak the chiles (15 minutes, hands-off)
Remove the stems and the loose seeds from the guajillo and ancho chiles. If you want a milder bowl, shake out as many seeds as you can, because the seeds hold most of the heat. Cover the chiles with hot water in a bowl and set aside.
Step 2: Sear the meat (10 minutes)
Pat the pork dry and season it with the salt. Heat the oil in your heavy pot over medium-high heat until it shimmers. Place the meat in the pot and leave it alone for 3 to 4 minutes per side until deeply browned. Crowding the pot drops the temperature and steams the meat instead of browning it, so brown in batches if needed.
Step 3: Toast the chiles and aromatics (5 minutes)
While the meat sears, dry the soaked chiles and toast them in a dry skillet over medium heat for 30 to 45 seconds per side until they puff and smell toasty. Watch them closely, because they move from toasted to burnt in under a minute. Remove them to a plate. In the same skillet, toast the chile sauce onion, the 2 garlic cloves, the cumin, and the oregano until fragrant, about 2 minutes.
Step 4: Blend the chile sauce (5 minutes)
Add the toasted chiles, onion, and garlic to a blender with 1 cup of broth. Blend on high for a full minute, scraping down as needed, until completely smooth. If the mixture is too thick to blend, add broth a quarter cup at a time. Strain the sauce through a fine mesh strainer if you want a perfectly smooth broth.
Step 5: Build the broth base (5 minutes)
Lower the heat to medium. Toasted and crushed, stir the remaining 5 garlic cloves and the halved white onion into the pot with the browned meat, scraping up every browned bit from the bottom. Add the bay leaves, the blended chile sauce, and the remaining broth. Bring to a boil, then reduce to a bare simmer.
Step 6: Simmer uncovered for 90 minutes
Keep the pot at a low, steady simmer where you see one bubble every second or two, not a rolling boil. Skim the foam and any excess fat off the top during the first 20 minutes. This is the single most important stage for flavor, because the long gentle cook extracts gelatin from the meat and concentrates the broth.
Step 7: Add the hominy for the final 30 minutes
Stir the rinsed canned hominy into the pot and continue simmering. The broth will thicken as the kernels release starch, which is exactly what you want. Taste the broth now and season with salt.
Step 8: Finish off the heat (5 minutes)
Turn off the heat and let the posole sit for 10 minutes to settle. Stir in half of the chopped cilantro, then squeeze the juice of half the lime into the pot. Do not add all the lime juice now, because the pot keeps concentrating as it cools, and you can adjust each bowl at the table.
The finished posole should taste slightly too weak on its own. The lime and salt you add to each bowl are meant to close that gap.
How to Make the Red Chile Sauce (And the Shortcut)
The chile sauce is the part that separates a real pozole rojo from a pot of spicy broth, and it takes about fifteen minutes of mostly passive work. Toast, soak, blend, strain. That is the whole technique.
Toasting before soaking is what builds the smoky aroma. It also reduces the need for extra salt later, because it concentrates the chile flavor rather than just the chile heat.
Soaking does two jobs at once. It softens the flesh so the chiles blend smooth, and it pulls a portion of the capsaicin into the soaking water. Pour that water into the pot instead of discarding it for an extra layer of chile flavor.
If you would rather skip the blender entirely, the third tier of the substitution ladder gets you a respectable bowl. Whisk 3 tablespoons of mild chili powder with 1 tablespoon of smoked paprika into the broth at Step 5, along with 2 tablespoons of tomato paste for body and acidity. You lose the smoky depth, but you keep the color and the seasoning.
A jar of red enchilada sauce is the other common shortcut. It works, and it produces something closer to a weeknight enchilada soup than to posole, so use it when you need dinner in thirty minutes rather than when you are making the dish properly.
Garnishes and How to Serve Posole
Posole is served as a build-your-own bowl, and the garnishes are a required part of the dish rather than an optional extra. Set everything out in small bowls so people can add what they like.
- Finely diced white onion. Raw onion cuts through the fat of the pork and cleanses the palate between bites. This is the most important garnish in the bowl.
- Thinly sliced radishes. They add cold crunch and a peppery note, and they cool the chile heat as you eat.
- Shredded red or white cabbage. Raw cabbage contributes a similar cooling crunch, and a squeeze of lime over it softens the edge.
- Lime wedges. Acidity is the balance point of the whole dish. Offer plenty, and tell your guests to add it gradually rather than all at once.
- Chopped cilantro. Adds a bright, herbal note that lifts the whole broth.
- Diced avocado. A cool, creamy contrast to the chile heat, and it makes the broth feel richer without adding fat to the pot.
- Toasted tortilla chips or tostadas. They are how a bowl turns into a full meal, and they are technically required by tradition.
- Cotija and Mexican crema. Both optional, both welcome, especially as a cooling drizzle over the top.
Serve posole in wide, shallow bowls so the garnishes sit on the surface rather than sinking. Ladle the broth over the top after the guests have built their bowls, and let everyone season their own.
Common Beginner Mistakes and How to Fix Them
Almost every disappointing first bowl of posole comes down to one of a handful of mistakes, and all of them are recoverable. Here is what goes wrong and what to do about it.
- You skipped the sear. Grey steamed meat in a pot produces a thin, flat broth. If the meat was not browned, add a tablespoon of the chile paste or a small piece of a toasted chile directly to the pot and let the broth simmer longer, up to 30 extra minutes.
- You added the hominy too early. Canned hominy added at the start dissolves into paste. If it is already breaking down, add a can of rinsed hominy at the end of cooking to restore the texture. The broth will be thick, so thin it with broth or water.
- You simmered at a rolling boil. A hard boil emulsifies the fat into the broth and makes it cloudy and greasy. Let it cool slightly, skim the surface, and hold the rest at the barest simmer.
- You forgot the salt until the end. Posole needs salt earlier so the seasoning works into the meat and hominy. If the broth is bland, add salt a teaspoon at a time and wait a minute between additions, because the salt needs time to read as balanced rather than salty.
- You used hot chiles and no seeds control. If the bowl is too hot to eat, stir in a ladle of plain chicken broth and add more lime. For the next batch, use only ancho chiles and shake out all the seeds.
- You left out the lime. A pot that tastes flat before the lime almost always tastes correct after it. Fresh lime juice is not a garnish in this dish, it is an ingredient.
- You used old chiles. Dried chiles that have been sitting for years are brittle and taste dusty with no aroma. Buy from a store with turnover, and always toast before you judge them.
- You skipped the skim. A layer of rendered fat blocks the flavors below it. Skim during the first 20 minutes of simmering and the difference is immediate.
| Problem | Cause | Fix |
|---|---|---|
| Bland broth | Under-salted, or lime added too late | Add salt in small increments, then fresh lime juice off the heat |
| Too thick | Hominy cooked too long, or no broth added at the right time | Lift out some hominy, loosen with broth or water, and simmer two more minutes |
| Greasy surface | Simmering too hard, or fat not skimmed | Chill the pot briefly so the fat solidifies, then spoon off the solid layer |
| Too spicy | Chiles were not seeded, or too many hot varieties | Stir in unsalted broth and more lime, and serve avocado and crema alongside |
| Mushy hominy | Canned hominy added too early or cooked past 30 minutes | Add fresh rinsed hominy at the end to rebuild texture |
| Thin, watery broth | Not enough simmer time, or too much liquid | Reduce uncovered until it coats the back of a spoon, about 15 to 20 minutes |
Making Posole Mild for Kids and Heat-Sensitive Eaters
You can make pozole rojo family-friendly without switching to blanco. The heat lives almost entirely in the chile seeds, the chile skin, and the chiles de arbol that some recipes add.
Use ancho and guajillo only, shake out every seed, and skip any dried hot chiles entirely. Blended strained sauce is milder than whole chiles because much of the capsaicin stays behind in the pulp. Then serve the lime, radish, raw onion, avocado, and Mexican crema on the table so each person can cool their own bowl.
Do not reduce the salt to compensate for the chile, since salt is what makes the mild flavors read as flavor rather than as nothing.
Make-Ahead, Freezing, and Reheating
Posole improves the next day, which makes it a genuinely useful dish to cook ahead. Make it at least a day ahead whenever you can.
Hold it in the refrigerator for up to 3 days, in a covered container. Keep the lime juice separate and add it fresh when reheating, since acid dulls over time in storage. Keep the raw onion, radish, and cabbage separate as well, because they go soft and watery if they sit in the broth.
Posole freezes well for up to 3 months. Freeze it without the hominy if you can, since the kernels hold their shape better if they are reheated separately in a pot on the stovetop. If you freeze everything together, freeze in a container with headroom and expect the broth to be thicker after thawing.
To reheat, warm it gently on the stove over low heat for 20 to 30 minutes, stirring occasionally. A microwave works in three or four minute bursts at half power, but the stovetop is better because it lets you skim the fat that rises during reheating. Add the reserved hominy in the last 10 minutes. Taste for salt, then brighten each bowl with fresh lime at the table.
Posole Recipe Card and Timing Summary
Here is the full plan on one screen, so you can see the shape of the cook before you start.
| Stage | Time | Watch for |
|---|---|---|
| Prep chiles, aromatics, and garnishes | 30 minutes | Chiles stemmed and seeded |
| Soak chiles in hot water | 15 minutes, overlapping | Chiles softened and pliable |
| Sear the pork | 10 minutes | Deep brown on all sides |
| Toast chiles and aromatics, blend | 10 minutesChiles puff, mixture fully smooth | |
| Simmer the broth | 90 minutes | One bubble per second, fat skimmed |
| Add hominy and finish | 30 minutes | Broth coats a spoon, kernels still firm |
| Rest off heat | 10 minutes | Broth settles and thickens |
| Total | About 3 hours | Serves 6 to 8 |
One serving of this recipe is a large bowl with about 45 grams of protein and plenty of fiber from the hominy. Because the salt level varies widely with the broth you use and how much you season at the table, treat nutrition figures as a general guide rather than a precise count.
As of 2026, the standard flavor profile for this recipe still matches what experienced cooks have long described: fluffy hominy, a broth with real body from the meat, and a sharp acidic finish at the table.
Frequently Asked Questions
What ingredients do I need to make posole?
A basic pozole rojo needs pork shoulder, onion, garlic, bay leaves, oregano, cumin, chicken broth, white hominy, and a red chile sauce made from dried guajillo and ancho chiles. The sauce also calls for one onion, two garlic cloves, and a little broth for blending. To serve, you want lime wedges, radishes, shredded cabbage, diced white onion, cilantro, avocado, and tortilla chips. Every one of those has a simple substitution, so a missing item rarely stops the cook.
What is the difference between pozole and posole?
There is no difference. Pozole and posole are two spellings of the same traditional Mexican hominy stew from the central highlands, and they are used interchangeably in English-language recipes. The Mexican Spanish spelling is pozole, with a z, though many Mexican cooks also write posole. The real distinctions are between the color variants: rojo, verde, and blanco.
What is the secret to great pozole rojo?
The secret is a real chile sauce rather than a thin broth, plus enough time for the broth to develop. Toasting the dried chiles before soaking builds a smoky aroma, soaking softens them enough to blend smooth, and blending them with onion, garlic, and broth creates a sauce that thickens and coats the meat. Then simmer the broth gently for 90 minutes and skim the fat. Fresh lime juice added off the heat is the final balance.
What kind of broth is used for pozole?
Chicken broth is the most common everyday choice because its mild flavor lets the chiles lead, and home cooks use it in the majority of quick recipes. Pork stock produces a richer, deeper result if you have it. Using water with bouillon cubes works fine. Many traditional versions cook the meat directly in water, and the flavor comes entirely from the pork and the chiles rather than from a stock.
Can I use dried hominy for pozole?
Yes, and it is the more traditional choice. Dried hominy needs either a 4-hour soak followed by about 45 minutes of simmering, or 2 to 3 hours of gentle simmering straight in the posole broth with no soak. Pre-cook it separately so you can control the texture, then add it for the last 20 minutes. Canned hominy is the fast path and works well, but it is softer and holds its shape only if you add it late.
Should I drain hominy before adding to pozole?
Yes. Rinse canned hominy under cold running water and drain it well before it goes in the pot. The liquid in the can is starchy and salty, and leaving it behind makes the broth cloudy and dulls the chile flavor. Dried hominy that you have pre-cooked should be drained too, though a little of its cooking liquid can be poured into the pot for extra body.
When to add hominy to pozole?
Add canned hominy for the last 30 minutes of simmering, and pre-cooked dried hominy for the last 20 minutes so it just heats through. If you are starting with raw dried hominy, add it at the beginning because it needs the full simmer to soften. Adding canned hominy too early is the most common beginner mistake, and it is the reason the kernels turn to paste instead of staying fluffy.
Is posole spicy?
A traditional pozole rojo is more aromatic than it is hot. Guajillo and ancho chiles are mild dried varieties, and most of their heat is removed by seeding them before soaking. The heat also mellows during the 90-minute simmer. If you are sensitive to chile, seed the chiles thoroughly, skip any hot dried chiles, and serve lime, radish, avocado, and crema at the table.
What is posole served with?
Posole is served as a build-your-own bowl. The traditional table holds thinly sliced radishes, finely diced white onion, shredded red or white cabbage, lime wedges, chopped cilantro, diced avocado, and toasted tortilla chips or tostadas. Cotija cheese and Mexican crema are common optional additions. Ladle the hot broth over the assembled garnishes so the cold, crunchy toppings contrast with the rich stew.
How long does homemade posole last?
Kept covered in the refrigerator, homemade posole lasts up to 3 days and often tastes better on day two. For longer storage, freeze it for up to 3 months, ideally without the hominy so the kernels keep their shape. Hold the lime juice and the raw onion, radish, and cabbage separately, and add them fresh at the table after reheating.
Conclusion
Learning how to make posole from scratch comes down to technique rather than complexity. Brown the meat, toast and soak the chiles, blend them into a real sauce, simmer gently for 90 minutes, and add the hominy late so the kernels stay fluffy.
Start with the roasted pork shoulder version and the three-tier chile ladder. Once the first bowl is done, you already know 90 percent of what pozole verde and pozole blanco ask of you, and the rest is a swap of the chiles.
Make it a day early if you can, set out the radishes, onion, cabbage, lime, and cilantro, and let everyone build their own bowl.