
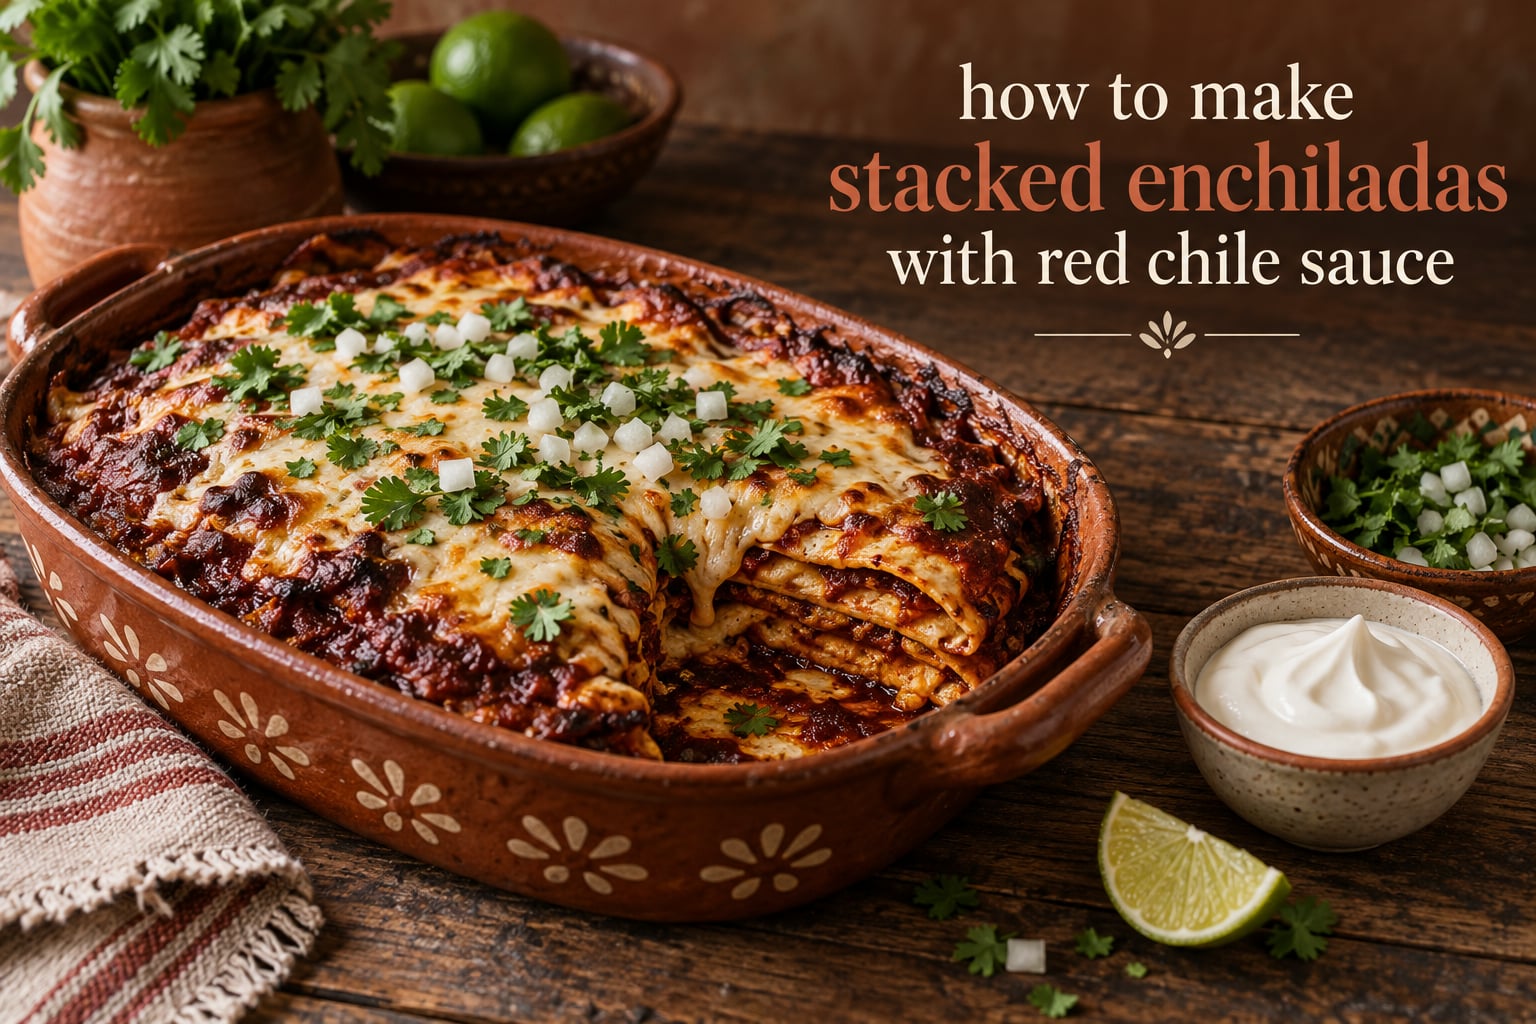
Stacked enchiladas are made by layering corn tortillas, cheese, onion, and filling in a casserole dish under a homemade red chile sauce, rather than rolling the tortillas and baking them on their side. The red chile sauce is the heart of the dish, so this guide builds it from dried New Mexican chile first, then stacks the tortillas and bakes everything at 350F until the cheese melts and the edges bubble. The whole thing assembles in about 30 minutes of hands-on work, which is the reason most cooks reach for it on a weeknight or when feeding a crowd.
I make this dish the New Mexican way, which means no rolled tortillas, no jar of enchilada sauce, and no beef buried in the middle where you never find it. The sauce soaks up from below and seeps down from above, so every bite of tortilla tastes like chile. Below is the method I cook, with the measurements, the heat controls, and the fixes for the things that go wrong most often.
Table of Contents
- What Makes Enchiladas Stacked?
- Red Chile Sauce vs. Canned Enchilada Sauce
- Red Chile Sauce Ingredients
- How to Make Red Chile Sauce From Scratch
- Stacked Enchiladas Ingredients
- How to Build the Stack, Step by Step
- How to Know When Stacked Enchiladas Are Done
- Choosing Your Chile Powder and Heat Level
- How Many Tortillas Do You Need?
- Troubleshooting Stacked Enchiladas
- Make-Ahead and Freezing Stacked Enchiladas
- What to Serve With Stacked Enchiladas
- Frequently Asked Questions
- Can red chile sauce be used for enchiladas?
- What makes enchiladas stacked?
- What is the difference between enchilada sauce and red chile sauce?
- What to add to red enchilada sauce to make it better?
- Do you fry the tortillas for stacked enchiladas?
- How long do you bake stacked enchiladas?
- How many tortillas do I need for stacked enchiladas?
- Can I make stacked enchiladas ahead of time?
- Conclusion
What Makes Enchiladas Stacked?
Stacked enchiladas are enchiladas that are layered instead of rolled. Corn tortillas go flat in an oiled casserole dish, then red chile sauce, shredded cheese, and diced white onion go on top, and the whole thing is repeated two or three times before a final layer of sauce and cheese seals the pan. Nothing is rolled, so the dish slices into clean squares like a lasagna and bakes faster than a tray of rolled enchiladas.
That format is the traditional New Mexican version, sometimes called enchiladas rojas when the red chile is the star. It also scales in a way rolled enchiladas do not: doubling the recipe means adding another pan rather than spending another hour rolling tortillas.
| Stacked enchiladas | Rolled enchiladas |
|---|---|
| Tortillas lie flat in a single layer | Each tortilla is rolled around filling |
| Assembled in about 30 minutes | Rolling takes 45 minutes or more |
| Sauce soaks through every layer | Sauce mostly stays in the pan |
| Scales by adding a pan | Scales by adding an hour of rolling |
| Cuts into firm squares | Slumps on the plate if underbaked |
Red Chile Sauce vs. Canned Enchilada Sauce
Red chile sauce and canned enchilada sauce are not the same thing, and the difference shows up in the first bite. Red chile sauce is built from dried New Mexican chiles bloomed in oil and thickened with a flour roux, so it tastes earthy, sweet, and slow-burning. Canned enchilada sauce is usually tomato-forward, thinner, and sharper with acid, which reads more like a marinara for tortillas than a chile dish.
If you want to use a store-bought jar, it can absolutely be used for enchiladas. Treat it as a base rather than a finished sauce and add the things a good red sauce has: a spoonful of a flour roux to give it body, dried Mexican oregano, cumin, a little garlic, and a pinch of sugar to take the edge off the acid. Simmer it for 15 minutes after those additions and it will taste considerably closer to from-scratch.
| Factor | Red chile sauce | Canned enchilada sauce |
|---|---|---|
| Base ingredient | Dried New Mexican red chile bloomed in oil | Tomato, chiles, salt, sometimes flour |
| Flavor profile | Earthy, sweet, deep chile flavor | Bright, acidic, tomato-forward |
| Heat | Buildable, from mild to smoky hot | Fixed once it leaves the can |
| Texture | Thick enough to coat a spoon | Usually thin and pourable |
| Prep time | 40 to 50 minutes, mostly simmering | Under 5 minutes |
Red Chile Sauce Ingredients
This makes roughly 3 cups of sauce, which is enough for a 2.2 quart casserole dish built in three layers. Use pure New Mexican ground red chile rather than a blend that includes cumin, ancho, or pasilla, since those shift the flavor away from the clean chile taste this dish is built on.
- 3 tablespoons lard or neutral oil
- 1/3 cup all-purpose flour for the roux
- 3 tablespoons pure New Mexican ground red chile powder
- 1 tablespoon chile Beetle sauce, chile habanero sauce, or a pinch of ground cayenne for heat
- 4 cups water, plus more if needed
- 1 teaspoon dried Mexican oregano, crushed in your palm
- 1 teaspoon ground cumin
- 1 teaspoon salt
- 2 cloves garlic, minced
- 1 tablespoon sugar, optional, to soften the chile bitterness
For a thicker, richer sauce, cook 3/4 pound of lean ground beef or pork in the lard until browned, drain the fat, and add the flour to the browned meat. That is the beef red chile sauce version, and it is what many northern New Mexico families serve at holiday meals.
How to Make Red Chile Sauce From Scratch
The whole sauce takes about 45 minutes, and most of that is unattended simmering, so it is a good thing to start before you preheat the oven. The single step that matters most is toasting the chile powder in fat before the water goes in.
- Bloom the chile powder in fat. Heat the lard or oil in a heavy pot over medium heat, add the ground red chile, and stir constantly for 60 to 90 seconds until the powder darkens and smells toasty. If it scorches, start over, because burned chile powder turns bitter and no amount of simmering fixes it.
- Add the garlic and spices. Stir in the minced garlic, the oregano you crushed by hand, and the cumin. Cook for another 30 seconds until fragrant.
- Whisk in the flour. Sprinkle the flour over the fat and chile and whisk until the mixture looks like wet sand with no dry patches. Keep whisking for a full minute, because the roux is what will thicken the sauce.
- Cook the roux. Stir steadily over medium heat for 3 to 5 minutes until it turns a light peanut-butter brown. Browning the roux adds a nutty depth, and stopping at pale blond gives a lighter sauce.
- Add the water gradually. Pour in the water in three or four additions, whisking after each one. Adding it all at once makes lumps; adding it slowly keeps the sauce glossy.
- Add the heat and season. Stir in the chile Beetle sauce, the salt, and the sugar if you are using it. The sauce should taste slightly under-seasoned now, because it will concentrate as it reduces.
- Simmer for 20 to 30 minutes. Lower the heat and let it bubble gently, stirring every few minutes so nothing catches on the bottom. It is ready when a spoon drawn through the pot leaves a clean trail that stays open for a couple of seconds.
- Taste and adjust. Check for salt and bitterness. If it tastes flat, add a little more salt. If it is sharp, a small pinch of sugar rounds it out. If it is too hot for the table, add water a tablespoon at a time.
Stacked Enchiladas Ingredients
The assembly is deliberately short. Everything here is a layer, so the count matters more than the length of the list. For a 2.2 quart casserole dish serving 4 to 6, you need 12 corn tortillas, about 3 cups of sauce, and 3 cups of shredded cheese.
- 12 corn tortillas, 6 inch, from a package or made from masa harina
- 3 cups red chile sauce, homemade or improved canned
- 3 cups grated cheese, a mix of sharp cheddar and Monterey Jack is ideal
- 1 small white onion, diced fine
- 1 tablespoon lard or oil for the dish
- Optional: 1 pound cooked ground beef, or 2 cups of shredded cooked chicken
- Optional: 1 cup frozen corn, thawed
- For serving: chopped tomato, shredded lettuce, sour cream, guacamole, scallions, cilantro
Shred your own cheese if you can. Pre-shredded cheese contains anti-caking agents that keep it from melting smoothly, which is the usual reason a stack comes out of the oven chalky rather than glossy.
How to Build the Stack, Step by Step
Work at a steady pace, because tortillas dry out fast once the sauce touches them. Have everything measured and within reach before you oil the dish, and keep the tortillas in their package until the moment you need them.
- Heat the oven to 350F. Set a rack in the middle of the oven so the stack bakes evenly from the bottom up.
- Warm the sauce. If the sauce went cool while you assembled the filling, heat it until it steams. Cold sauce laid on cold tortillas makes the base of the stack pasty.
- Oil the baking dish. Rub 1 tablespoon of lard or oil along the bottom and up the sides of a 2.2 quart casserole dish.
- Pour the first sauce layer. Spread 1 cup of red chile sauce across the bottom of the dish and swirl it until the bare metal is gone.
- Add the first tortilla layer. Lay 5 or 6 tortillas flat over the sauce, overlapping them slightly to close gaps. Press gently so they adhere without tearing.
- Scatter cheese and onion. Add 1 cup of shredded cheese, then the diced onion, distributing both to the edges rather than the center.
- Repeat the layers. Add another cup of sauce, 1 cup of cheese, 5 or 6 more tortillas, and the remaining onion. Two or three full layers is right for a 2.2 quart dish; do not exceed the rim, since the sauce expands as it bakes.
- Fill the bare spots. Tear tortillas into pieces and press them over any exposed sauce so nothing is left uncovered. Bare sauce burns to a dark crust in the oven, and those crusts turn bitter.
- Finish on top. Pour the last of the sauce over the stack, spread the final cup of cheese to the edges, and add a light drizzle of oil to the cheese so it browns evenly.
- Bake at 350F for 30 to 40 minutes. Cover with foil for the first 20 minutes if the cheese is browning too quickly, then uncover for the last 10 to 20 minutes. An unbaked hot sauce usually needs the full 40 minutes.
- Rest before cutting. Take the dish out and let it stand 10 minutes. The sauce sets as it cools, and the stack holds its shape in squares instead of slumping onto the plate.
One option to consider is lightly frying the tortillas in a little oil before layering them. It takes about 5 minutes for a full batch, adds a toasted corn flavor, and gives the stack a firmer texture that holds up better to a heavy sauce. It is optional, and the dish is traditional without it.
How to Know When Stacked Enchiladas Are Done
The stack is done when the cheese is fully melted and blistered, the sauce is bubbling at the edges of the dish, and the center of the pan feels hot when you press it lightly through the foil. A thin skin should have formed on the surface of the sauce, which means it has reduced past the watery stage. If the cheese is still pale and the edges are quiet, give it five more minutes.
Choosing Your Chile Powder and Heat Level
Heat is the one variable people get wrong, and the fix is to measure it rather than guess. Pure New Mexican red chile powder is mild on its own, so the heat in this sauce comes from a second ingredient that you can dial up or down by the teaspoon. One commenter on a well-known stacked enchiladas recipe called it too spicy for their taste buds, which is a fair warning: New Mexican cooks build the heat deliberately, but the powder itself is not hot.
| Heat level | Ground red chile | Chile Beetle or hot sauce | Result |
|---|---|---|---|
| Mild | 2 tablespoons | 1/2 teaspoon | Earthy and sweet, no lingering burn |
| Medium | 3 tablespoons | 1 tablespoon | Warm at the back of the throat, family-friendly |
| Hot | 3 tablespoons | 2 tablespoons | Smoky heat that builds, good for adults only |
Sourcing matters if you want the real thing. New Mexican brands sold in the Southwest use pure ground red chile with no cumin, which is what gives the sauce its clean flavor. Outside New Mexico, look for pure New Mexican red chile in the spice aisle, and read the label for a single-ingredient list of dried New Mexican chiles. A blend labeled chili powder usually contains cumin, ancho, and pasilla, and it will taste noticeably different, more like a Tex-Mex sauce than a New Mexican one.
How Many Tortillas Do You Need?
Tortilla count follows the pan, and the pan follows the crowd. A 2.2 quart casserole dish holds three tortilla layers; a 9 by 13 inch pan holds four, which sets deeper and needs a longer bake.
| Servings | Pan | Corn tortillas | Red chile sauce | Shredded cheese |
|---|---|---|---|---|
| 4 to 6 | 2.2 quart casserole dish | 12 | 3 cups | 3 cups |
| 8 | 9 by 13 inch baking dish | 18 | 4 cups | 4 cups |
| 10 to 12 | Two 2.2 quart dishes | 24 | 6 cups | 6 cups |
| 20 or more | Three dishes plus a sheet pan | 36 | 9 cups | 9 cups |
When cooking for a crowd, build the stacks in separate dishes rather than one deep pan. A 9 by 13 inch pan at four layers is slower to heat through in the center, and the bottom layer ends up pale while the top browns.
Troubleshooting Stacked Enchiladas
Nearly every problem with this dish comes down to moisture, coverage, or heat. Here is what causes each one and what to do about it.
- Torn tortillas: The tortillas dried out while you layered. Keep them in the package, work quickly, and dip each one in warm sauce for a few seconds before placing it. Cool tortillas tear; slightly warm and damp ones flex without splitting.
- Bare spots and burnt edges: Any sauce that stays uncovered in the pan scorches. Tear a tortilla into pieces and press it over the gap before baking, as in step 8.
- Dry, cracked edges: The bake ran long or the pan is shallow. Cover with foil for the first 20 minutes and pull the dish the moment the cheese is melted and blistered rather than waiting for a dark crust.
- Soggy center: Too much sauce in the pan, or the stack was cut before it set. Spread sauce thin on each layer, cap the top so steam cannot condense back in, and rest the dish 10 minutes before cutting.
- Cheese clumping in strings: Cheese was too cold or shredded too coarsely. Shred it fine, let it sit at room temperature for 10 minutes, and shred a little cheddar into the Monterey Jack for a smoother melt.
- Bland sauce: Under-salt is the usual culprit, since the sauce reduces in the oven. Season the sauce a little heavier than seems right before you pour it, and check it again after the first 20 minutes of baking.
- Too hot for the table: Serve sour cream, Mexican crema, or plain yogurt alongside. Adding dairy at the table is easier than diluting a sauce you already built.
Make-Ahead and Freezing Stacked Enchiladas
This is one of the most forgiving dishes to prepare in advance, which is why it works well for holiday meals and Cinco de Mayo gatherings. The sauce keeps for 5 days in the refrigerator and freezes for 3 months, and it actually improves in flavor after a day as the chile mellows.
To make the stack ahead, assemble it fully up to the final sauce and cheese, cover the dish, and refrigerate for up to 24 hours. Bake from cold with an extra 10 minutes added to the cook time. If you want to freeze, bake the stack first, cool it completely, cover in portions, and freeze up to 3 months. Reheat covered at 325F with a splash of water or broth so the tortillas steam rather than dry out. Commenters on that same recipe said the dish tastes even better the next day, and they are right.
For a large gathering, the from-scratch sauce is the part worth doubling. Make the sauce ahead, then assemble the pans the morning of the meal and bake them an hour before guests arrive.
What to Serve With Stacked Enchiladas
Because the sauce is rich, the table usually wants acidity and something fresh. Pinto beans and posole are the traditional pairings, and either one can go under the stack as a bed. A green salad with a lime vinaigrette cuts the heat without diluting it.
Calabacitas squash, sautéed zucchini, or charred corn work well on the side. On top, set out sour cream, guacamole, chopped tomato, shredded lettuce, diced white onion, scallions, and cilantro, and let people build their own plate. For bread, a warm sopapilla with honey or piloncillo is the New Mexican finish.
Frequently Asked Questions
Can red chile sauce be used for enchiladas?
Yes, and it is the better choice. Red chile sauce is a chile-based sauce thickened with a flour roux, while most canned enchilada sauce is tomato-forward and acidic. Used in stacked enchiladas, red chile sauce soaks through the tortillas and becomes the dominant flavor of the whole dish.
What makes enchiladas stacked?
Stacked enchiladas are enchiladas built in layers rather than rolled. Corn tortillas go flat in an oiled casserole dish, then red chile sauce, shredded cheese, and diced onion are layered on top and repeated two or three times, finishing with sauce and cheese. The pan bakes at 350F and slices into squares like a lasagna.
What is the difference between enchilada sauce and red chile sauce?
Enchilada sauce is the general category name, and most jarred enchilada sauce is tomato-based with chile, salt, and sometimes flour. Red chile sauce is specifically a dried New Mexican chile bloomed in fat and thickened with a roux, with no tomato at all. The result is earthier, thicker, and less acidic, and its heat can be adjusted before cooking.
What to add to red enchilada sauce to make it better?
Add a little body and seasoning. Spoon in a flour roux for thickness, dried Mexican oregano and cumin for aroma, minced garlic, and a pinch of sugar to soften the acidity. Simmer the jarred sauce with those additions for about 15 minutes and it will taste much closer to a from-scratch red chile sauce.
Do you fry the tortillas for stacked enchiladas?
It is optional. Many cooks lightly fry the corn tortillas in a little oil before layering, which adds a toasted flavor and a firmer texture, and it takes about 5 minutes for a full batch. Traditional New Mexican versions layer the tortillas raw, and both methods work well.
How long do you bake stacked enchiladas?
Bake at 350F for 30 to 40 minutes. It is done when the cheese is fully melted and blistered, the sauce is bubbling at the edges, and a thin skin has formed on the surface. Covering with foil for the first 20 minutes keeps the cheese from browning too quickly.
How many tortillas do I need for stacked enchiladas?
A 2.2 quart casserole dish serving 4 to 6 needs 12 corn tortillas, 3 cups of red chile sauce, and 3 cups of shredded cheese. A 9 by 13 inch pan for 8 servings takes 18 tortillas, 4 cups of sauce, and 4 cups of cheese.
Can I make stacked enchiladas ahead of time?
Yes. Assemble the stack up to the final sauce and cheese, cover the dish, and refrigerate for up to 24 hours, then bake from cold with 10 minutes added. A fully baked stack can also be frozen in covered portions for up to 3 months and reheated at 325F with a splash of water.
Conclusion
Stacked enchiladas reward two things: a real red chile sauce and a little patience between layers. Bloom the chile in fat, simmer the sauce until it coats a spoon, and give every tortilla sauce to sit in, and the bake at 350F does the rest. Start with the 2.2 quart dish recipe above, then scale it pan by pan the next time you are cooking for a crowd.