
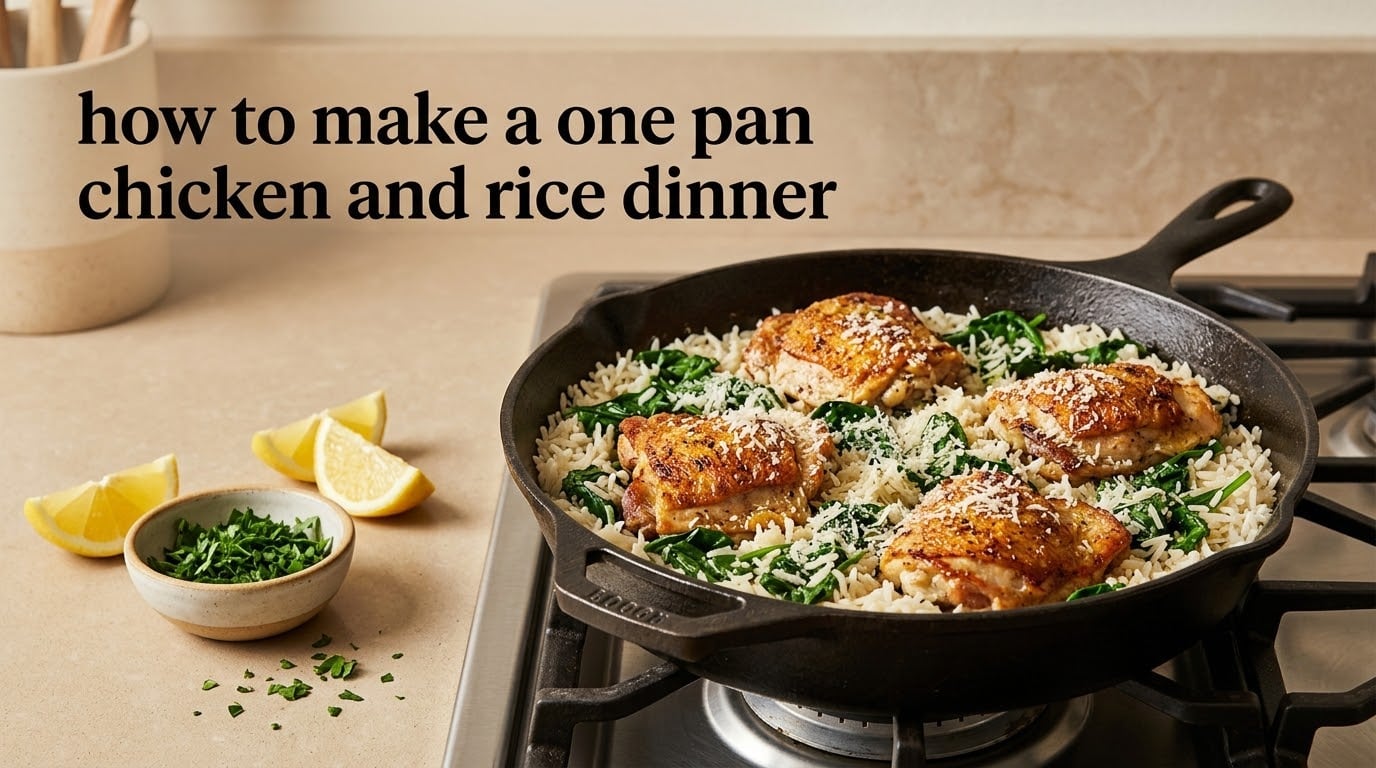
Learning how to make a one pan chicken and rice dinner is the single most useful kitchen skill for a weeknight, because it gives you protein, starch and vegetables in about 30 minutes with exactly one dish to wash. And yes, you can cook the raw chicken and the rice at the same time: the rice goes into the hot pan first and toasts, the liquid comes next, then the seasoned chicken sits on top and finishes in the covered pan until it reads 165°F. I make this roughly twice a week and it has replaced three separate pots in my kitchen.
Below is the method I actually use, with the exact rice-to-liquid math that most recipes leave out, plus a troubleshooting section for the two failures I hear about most: mushy rice and dry chicken.
Table of Contents
- Can You Cook Raw Chicken and Rice at the Same Time?
- Why One Pan Chicken and Rice Works
- What You Need
- The Rice To Liquid Ratio That Keeps Rice Fluffy
- How To Make A One Pan Chicken And Rice Dinner: Step-By-Step Instructions
- Stovetop Or Oven: Two Ways To Cook It
- Tips Before You Start
- Troubleshooting: Common Mistakes And How To Fix Them
- Flavor Variations And Swaps To Try Next
- Storage And Reheating
- Frequently Asked Questions
- Can you cook raw chicken and rice at the same time?
- How do I keep my one pan chicken and rice from turning mushy?
- How long should chicken and rice cook together in one pan?
- What are the most common mistakes when making chicken and rice?
- Is one pan chicken and rice healthy?
- How do I bake one pan chicken and rice in the oven?
- Wrapping Up
Can You Cook Raw Chicken and Rice at the Same Time?
You can, but the order matters and the chicken should not start in the pan raw. The rice toasts in fat first so the grains stay separate, the liquid comes to a gentle boil, and only then does the seasoned chicken go on top. The covered pan steams the chicken from above while the rice absorbs from below, so both finish in the same 15 to 20 minutes.
The sequence in short:
- Toast the rice in fat for 1 to 2 minutes before any liquid goes in
- Add broth and bring it to a gentle, barely-breaking boil
- Nestle the seasoned chicken on top, not submerged in the liquid
- Cover tightly and keep the heat low for 15 to 20 minutes
- Check that the chicken reads 165°F and the liquid is fully absorbed
You can skip the sear if you are short on time, and the dish still works. You lose a layer of flavor, but the covered steam does the cooking either way.
Why One Pan Chicken and Rice Works
- One dish, one wash. Everything cooks in a single skillet or Dutch oven, and you can serve it straight from that pan.
- About 30 minutes start to finish. Roughly 10 minutes of active work and 20 minutes of covered simmering.
- Balanced without planning. Chicken brings protein, rice brings the carb, and spinach, peppers or onion disappear into the pot so you do not need a side dish.
- Meal-prep friendly. Portions reheat well and hold up for three to four days in the fridge.
- Beginner-proof. There is only one heat source, one lid discipline rule and one temperature to check.
- Cheap to build. Rice, broth, onion, garlic and chicken thighs are pantry and freezer staples for most households.
One reviewer of a popular one-pan chicken and rice recipe complained that there was never enough rice, and another called a version edible but flat. Both are fixable with the same two moves: measure your rice properly and season in layers rather than once at the end.
What You Need
For the chicken
- 1.5 pounds boneless skinless chicken thighs (about 675 g), or 4 bone-in thighs
- 1 tablespoon olive oil
- 1 teaspoon kosher salt, plus more for the rice
- 1 teaspoon black pepper
- 1 teaspoon garlic powder
- 1 teaspoon Italian seasoning or 1 teaspoon smoked paprika
For the rice and liquid
- 1.5 cups long grain white rice, jasmine, or basmati (about 300 g)
- 2.5 cups low-sodium chicken broth or stock (about 590 ml)
- 2 tablespoons unsalted butter
- 1 small yellow onion, diced
- 3 garlic cloves, minced
- 1 teaspoon salt (use less if your broth is not low sodium)
For finishing
- 2 cups baby spinach
- 1/3 cup grated parmesan
- 1 tablespoon chopped fresh parsley or cilantro
- Fresh lemon wedges
The 4-ingredient version
Chicken thighs, long grain white rice, chicken broth and garlic. Everything above is optional, though the butter, parmesan and lemon are what keep it from tasting like plain protein over plain starch.
The Rice To Liquid Ratio That Keeps Rice Fluffy
Soggy rice is the number one complaint in the comment sections of every recipe on this topic, and it is almost always a liquid problem. Measure your rice, level it, and use the ratio below. Note that the chicken contributes a small amount of its own liquid, so this method runs slightly wetter than cooking rice in a pot alone.
| Rice type | Liquid per cup of rice | Notes |
|---|---|---|
| Long grain white | 2 to 2.25 cups broth | Most forgiving. Best first choice for this method. |
| Jasmine | 2.25 cups broth | Fragrant. A little more liquid than long grain. |
| Basmati | 2.5 cups broth | Rinse well, then soak 20 to 30 minutes to shorten the cook. |
| Brown | 3 to 3.5 cups broth | Cooks 45 minutes or more. Needs a stovetop-to-oven transfer. |
| Minute or quick-cook | 1.5 cups broth | Will not work as written. Finishes long before the chicken. |
Rice expands to roughly three times its dry volume, so 1.5 cups dry becomes about 4.5 cups cooked. That is why a 12-inch skillet, not a 10-inch one, is the right pan for this quantity.
How To Make A One Pan Chicken And Rice Dinner: Step-By-Step Instructions
Step 1: Season the chicken (2 minutes). Pat the chicken dry with paper towels and season all sides with the salt, pepper, garlic powder and Italian seasoning. Drying matters: wet skin or wet meat steams instead of browning, and browning is where the flavor comes from.
Step 2: Sear the chicken (6 to 8 minutes). Heat the olive oil in a 12-inch skillet over medium-high heat. Lay the chicken in and leave it alone for 3 to 4 minutes per side until deeply golden. Transfer it to a plate. This step is optional, but it is the difference between good and very good.
Step 3: Build the base (4 minutes). Drop the butter into the same pan, add the onion with a pinch of salt, and cook 3 to 4 minutes until soft and translucent. Add the garlic and cook 30 seconds more until fragrant. Scrape up the browned bits from the chicken as you stir; that is the flavor you seared for.
Step 4: Toast the rice (2 minutes). Add the rinsed rice and stir until every grain is coated in butter and onion. Cook 1 to 2 minutes until the edges look faintly translucent and the pan smells toasty. This is the step that keeps grains separate, and skipping it is why so many one-pan versions turn mushy.
Step 5: Add liquid and simmer covered (15 to 20 minutes). Pour in the broth and the remaining salt, stir once to combine, and bring to a gentle boil. Nestle the seared chicken on top. Cover with a tight-fitting lid, turn the heat to its lowest setting, and do not lift the lid for the full 15 minutes. You want a slow bubble, not a rolling boil, and every peek lets steam escape and stalls the cook.
Step 6: Rest, fluff and finish (5 to 10 minutes). Turn off the heat and leave the pan covered for 5 minutes. The residual steam keeps cooking the rice while the grains stop absorbing, which is why the rest matters. Then lift the lid, check that the liquid is absorbed and the chicken reads 165°F on an instant-read thermometer, fluff with a fork, and fold in the spinach, parmesan and parsley.
No pink spots and juices running clear is the visual cue, but the thermometer is the only real test. Chicken carries on cooking during the rest, so pull it the moment it hits 165°F if you are using breasts.
Stovetop Or Oven: Two Ways To Cook It
- Stovetop (30 minutes). The method above. Sear, toast, cover, simmer 15 to 20 minutes on low, rest 5 minutes. Best for a cool evening and a tight schedule.
- Oven (45 to 50 minutes). Sear and toast as written, then bring the broth to a boil, add the chicken, cover, and bake at 350°F for 35 minutes. Uncover and bake 10 to 15 more minutes to drive off steam and let the top brown.
- Casserole dish substitute. No ovenproof skillet? Use a 9×13 baking dish. Add 1/2 cup of broth to the stovetop steps before transferring, since a ceramic dish holds and gives back less moisture than metal.
The oven route is more forgiving on timing, which makes it the better choice when you are cooking brown rice or a large batch.
Tips Before You Start
- Use long grain white rice. Brown rice cooks far too long and minute rice cooks far too short. Neither works with the same 15 to 20 minute simmer.
- Rinse the rice. Two or three changes of water removes surface starch, which is the main reason grains clump into mush.
- Do not lift the lid early. Every peek releases steam and the cook slows. Set a timer instead.
- Use a pan with a tight lid and enough surface area. A 12-inch skillet or Dutch oven holds 1.5 cups of dry rice plus the liquid without crowding.
- Pound chicken breasts to an even thickness. Cut them into 2-inch strips and flatten to 3/4 inch, or the thin edges dry out before the thick parts cook through.
- Season in layers. Salt the chicken, salt the rice water, and taste the finished dish before serving.
- Keep the chicken above the liquid line. It steams from the trapped vapor, it should not boil in the broth.
Troubleshooting: Common Mistakes And How To Fix Them
| Symptom | Cause | Fix |
|---|---|---|
| Rice is mushy or gummy | Too much liquid, or the rice was not rinsed, or you lifted the lid | Use 2 to 2.25 cups broth per cup of rice next time, rinse well, and leave the lid closed |
| Rice is crunchy in the center | Liquid ran low or the pan was uncovered too long | Add 1/4 cup broth, cover, and simmer 5 more minutes on low |
| Chicken is dry | It stayed in the covered pan for the full 20 minutes | Pull it out at 165°F and rest it on top; or remove it mid-cook and lay it back on for the final 5 minutes |
| Chicken is still pink | Pieces were uneven, or the pan was crowded and the oven ran cool | Return to the pan, cover, and give it 5 more minutes before re-checking with a thermometer |
| It boiled over | Heat was too high once the liquid went in | Bring to a boil uncovered, then drop to the lowest setting before covering |
| Everything tastes bland | Seasoned only once, at the end | Salt the chicken, the broth, and the pan separately |
| Bottom of the rice burned | The pan was too small and the heat too high | Use a wider pan and lower the heat, or move the recipe to a 350°F oven |
One home cook on a top-rated recipe page described the fix that solved her dry chicken problem: lift the chicken out once it is pan-cooked, and set it back on for the last five minutes of the simmer. It is a two-minute change and it is the most useful trick in the comment threads on this dish.
On food safety: if you marinate the chicken, you can pour the used marinade into the pan and let it boil with the broth, but do not taste it raw. Several readers worried about this and the answer is the same, bring it to a full boil and cook it for at least a minute.
Flavor Variations And Swaps To Try Next
- Mediterranean. Add 1 teaspoon dried oregano and the juice of half a lemon with the broth. Finish with crumbled feta, a drizzle of olive oil and fresh dill.
- Mexican. Swap the Italian seasoning for 2 teaspoons chili powder, 1 teaspoon cumin and 1 teaspoon oregano. Add 1/2 cup diced tomato, squeeze lime over the finished dish, and scatter cilantro.
- Caribbean jerk. Use 2 teaspoons jerk seasoning, 1 teaspoon allspice, 1/2 teaspoon cayenne and a sliced scallion. Add 1/2 cup diced bell pepper.
- Indian. Add 1 teaspoon garam masala, 1 teaspoon cumin seed, 1/2 teaspoon turmeric and a thumb of grated ginger. Finish with cilantro and a squeeze of lime.
- Creamy parmesan. Use 2 cups broth plus 1/2 cup milk or half-and-half, and stir 1/2 cup parmesan in at the end instead of 1/3 cup.
- Broth swaps. Vegetable broth works for a vegetarian-leaning night, water plus a bouillon cube works fine, and a can of diced tomatoes plus water is a bright alternative some readers prefer.
- Cut swaps. Bone-in thighs add flavor and need 5 to 8 more minutes. Boneless breasts work if pounded thin. Avoid tenderloins, which are too small and too lean for this method.
- Vegetable swaps. Mushrooms, artichoke hearts, diced peppers and frozen peas all hold up in the covered steam. Add delicate vegetables like spinach at the end so they do not disappear.
Doubling the batch
Double every ingredient and move up to a Dutch oven or a 5-quart covered pot, not a 12-inch skillet. A crowded pan drops the temperature, the liquid evaporates faster and the rice under the chicken never cooks evenly. Give the second batch 5 extra minutes and check the liquid at the halfway mark.
Storage And Reheating
Cool leftovers within 2 hours and refrigerate in a sealed container for up to 3 to 4 days. Freeze in individual portions for up to 2 months if you are batch cooking.
To reheat, sprinkle a tablespoon or two of broth or water over the rice, cover loosely, and microwave on high for 90 seconds. Stir, then give it another 30 seconds. The splash of liquid is what keeps reheated rice from turning rubbery. Reheat only the amount you plan to eat, and never a second time.
Frequently Asked Questions
Can you cook raw chicken and rice at the same time?
Yes, as long as you add the chicken after the liquid comes to a boil and keep it above the water line. Toast the rice first, add broth, nestle the seasoned chicken on top, then cover and simmer on low for 15 to 20 minutes. The trapped steam cooks the chicken from above while the rice absorbs from below.
How do I keep my one pan chicken and rice from turning mushy?
Measure carefully and rinse the rice well. Use 2 to 2.25 cups of broth per cup of long grain white rice, toast the rice in fat for 1 to 2 minutes before liquid goes in, and do not lift the lid during the simmer. Mushy rice almost always means excess liquid, un-rinsed starch, or lost steam.
How long should chicken and rice cook together in one pan?
Plan on 15 to 20 minutes covered on the lowest heat after the broth reaches a gentle boil, plus a 5 minute rest. Boneless breasts cut thin may be done at 12 minutes, while bone-in thighs usually need 20 to 25. Check the chicken at 165°F rather than relying on the clock alone.
What are the most common mistakes when making chicken and rice?
The usual four are using brown or minute rice, skipping the rinse, lifting the lid mid-cook, and using uneven chicken pieces. Skipping the toast step is a fifth that makes grains clump. Each one is easy to avoid once you know what it does, and each is straightforward to correct.
Is one pan chicken and rice healthy?
It can be. With boneless skinless thighs, low sodium broth and a cup of spinach stirred in at the end, a serving lands near 40 grams of protein with a moderate carbohydrate count. The main lever is sodium, so pick low sodium broth and season the chicken with herbs instead of extra salt.
How do I bake one pan chicken and rice in the oven?
Sear the chicken and toast the rice on the stovetop as written, add broth, bring it to a boil, and nestle the chicken back on top. Cover and bake at 350°F for 35 minutes, then uncover and bake 10 to 15 more minutes to let steam escape and the top brown.
Wrapping Up
How to make a one pan chicken and rice dinner comes down to three things: toast the rice, measure the liquid, and leave the lid alone. Get those right and the pan feeds four in about 30 minutes, browns the chicken properly and keeps the grains separate every time. Start with long grain white rice and boneless thighs, keep a thermometer in the drawer, and adjust the liquid by a quarter cup from there. Once you make it twice, you will stop reaching for the rice pot entirely.