
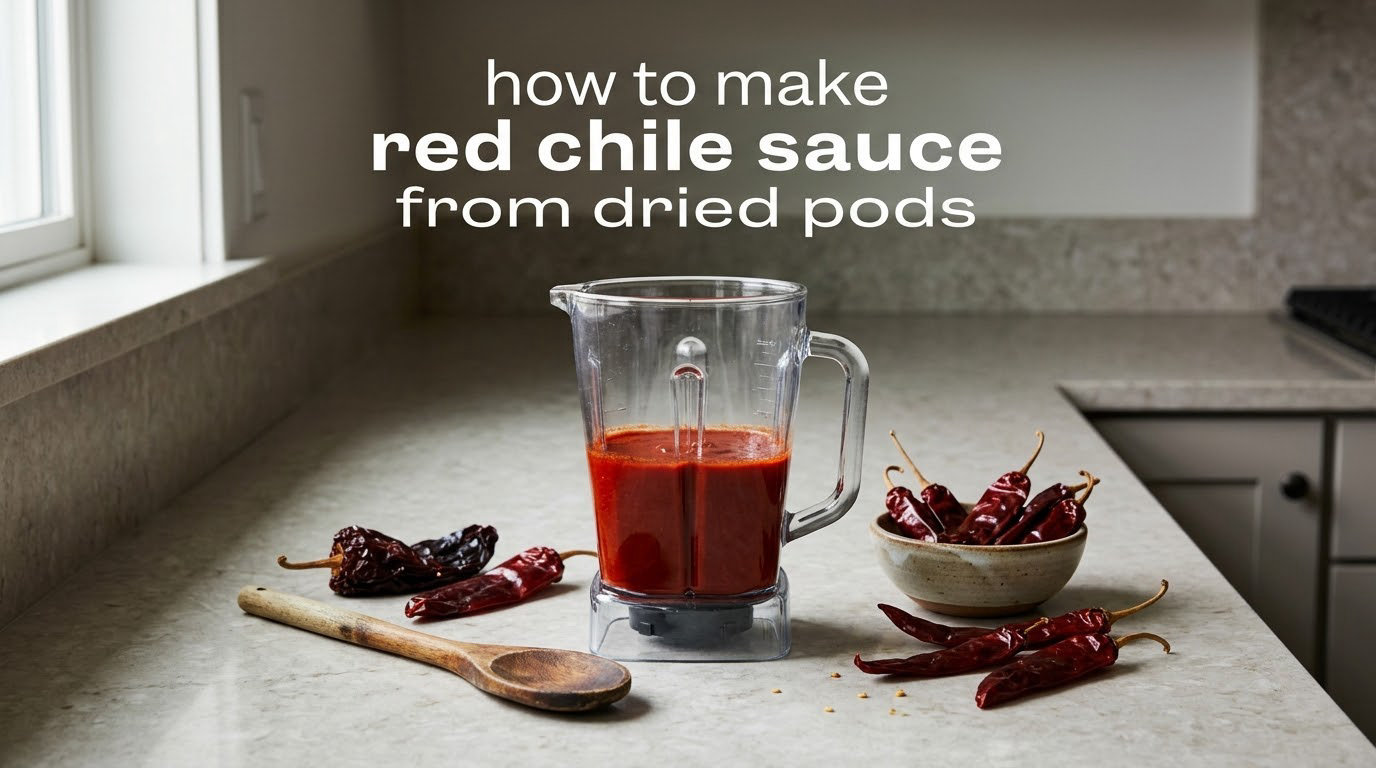
How to make red chile sauce from dried pods is simpler than most recipes suggest: stem and tear the pods, rehydrate them in water until soft, blend them smooth with a portion of that soaking liquid, and season with salt. A blender, a pot, and about 40 minutes stand between you and a bright red sauce that tastes nothing like the jarred version.
I make this sauce year-round, and the thing that surprises people most is how much of the flavor lives in the pods themselves. Drying preserves chiles through every season, so you are not limited to the weeks after a harvest. Last updated October 2026.
Table of Contents
- What Red Chile Sauce Is (and Why Pods Taste Better Than Powder)
- What You Need Before You Start
- How to Make Red Chile Sauce from Dried Pods
- Step 1: Stem, seed, and tear the pods (10 minutes)
- Step 2: Toast the pods if you want more depth (2 minutes, optional)
- Step 3: Rehydrate the pods (30 to 60 minutes)
- Step 4: Strain and reserve the liquid (5 minutes)
- Step 5: Blend in batches (5 to 10 minutes)
- Step 6: Season and adjust the consistency (5 minutes)
- Step 7: Strain again for a silk finish (2 minutes, optional)
- Three Ways to Rehydrate Dried Red Chile Pods
- Troubleshooting Your Red Chile Sauce
- How to Choose Your Chile Variety
- How to Store, Freeze, and Can Red Chile Sauce
- Ways to Use Your Red Chile Sauce
- Frequently Asked Questions
- How do I make red chili sauce from red chile pods?
- How long do you soak dried chile pods before blending?
- Do you need to remove the seeds from red chile pods?
- Why is my red chile sauce bitter or sour?
- Can I make red chile sauce without cooking it?
- Can I use guajillo or ancho instead of Hatch chile?
- How do I store red chile sauce, and can it be canned?
- Making Red Chile Sauce From Dried Pods Is a Small Weekly Habit
What Red Chile Sauce Is (and Why Pods Taste Better Than Powder)
Red chile sauce is a New Mexican condiment made from dried red chile pods rehydrated in water or broth, blended smooth, and seasoned with salt and often garlic, onion, and Mexican oregano. It is also called chile colorado, and it is the sauce behind huevos rancheros, enchiladas, carne adovada, and posole.
One quick note on spelling, because searches split between both. Chile is the Spanish word and the spelling New Mexican cooks use. Chili is the Anglicized version. Both are correct; the recipes and the flavor are identical either way.
The term you will see most often in the steps below is rehydrate, which simply means returning a dried ingredient to its hydrated, pliable state. Dried pods are brittle and brittle-smelling. After soaking or simmering they become soft, flexible, and fragrant, and that change is the whole technique.
So why bother with pods when a jar of ground chile powder costs less and takes no time? Flavor. Whole pods hold sugars and fruit notes that powder partly loses during drying and grinding, so a pod-based sauce comes out sweeter and less bitter. Cooks in New Mexico tend to describe the powder version as the California approach, and the pod version as the real thing. That is a matter of taste and tradition, not a rule.
There are two schools of sauce. The purist version is pods, water, and salt, nothing else, and home cooks on r/NewMexico describe it that way as the family standard. The seasoned version adds garlic, white onion, cumin, and Mexican oregano. Both are legitimate; the purist base is the one that lets you taste the chile.
What You Need Before You Start
Measurements for dried pods are frustrating because pods vary in size. Weigh them when you can, then use volume as a fallback.
- 4 ounces of dried red chile pods is roughly 35 to 45 pods, or about 4 cups of loosely packed pods. It yields approximately 3 to 4 cups of finished sauce.
- 6 cups of water or broth for simmering. Reduce to 4 cups for a thicker sauce, increase to 8 for a thinner one.
- 1 to 2 teaspoons of salt to taste, plus more for the soaking water if you like.
- Optional aromatics: 1 small white onion, 3 to 6 garlic cloves, 1 teaspoon Mexican oregano, 1 teaspoon ground cumin.
You also need a pot, a strainer, and one of these blending setups. A high-speed blender gives the smoothest result and is worth the splatter guard. A food processor works and requires more blending time. An immersion blender in the pot is the easiest to clean and skips batches entirely, though you will not get quite as fine a texture. If you have no blender at all, see the no-blender fix in troubleshooting.
A word on safety before you touch the pods. Chile dust irritates skin, eyes, and airways, and irritation can linger for hours. Wear disposable kitchen gloves, work over a surface you can wash down, avoid touching your face mid-process, and wash hands and utensils thoroughly afterward. If you have asthma or sensitive skin, take the gloves seriously rather than treating them as optional.
How to Make Red Chile Sauce from Dried Pods
Step 1: Stem, seed, and tear the pods (10 minutes)
Pull the stem off the top of each pod, then split the pod lengthwise and scrape out the seeds and the pale inner ribs. Removing seeds changes the color, not the heat: the capsaicin lives in the flesh, not the seed. Skipping the seeds only leaves a chunkier, more rustic sauce.
After seeding, tear each pod into 2 or 3 pieces. Smaller pieces rehydrate faster and blend more evenly, which matters a lot in the next step.
Step 2: Toast the pods if you want more depth (2 minutes, optional)
Readers on our forums swear by a light roast before soaking. Set the pods in a dry skillet or on a baking sheet at 250F and warm them just until they release a fragrance and darken slightly, roughly 1 to 2 minutes per side. Watch them constantly, because pods go from toasted to acrid fast.
This is optional. Skip it for a cleaner, sweeter sauce straight from the pod.
Step 3: Rehydrate the pods (30 to 60 minutes)
Put the torn pods in a pot and cover them by 2 inches with water. Bring to a boil, then drop the heat until the pot holds a steady low simmer. Simmer for 30 to 45 minutes, until the pieces are completely pliable and bend without resistance when you lift one with tongs.
Never boil hard. A rolling boil, or a bare simmer held for far longer than needed, turns the sauce bitter and dulls the color. You are looking for a lazy simmer with small bubbles at the surface.
Users in the r/NewMexico and r/spicy communities often skip the simmer entirely and cold-soak the pods in the refrigerator overnight with a weight on top to keep them submerged. The no-cook version keeps a brighter color and takes five minutes of active time in exchange for a night’s wait.
Step 4: Strain and reserve the liquid (5 minutes)
Lift the softened pods out and pour the soaking liquid through a fine-mesh strainer into a wide bowl or another pot. Do not discard that liquid. It carries flavor and body, and it is what you blend with.
Skim any foam or sediment off the top of the reserved liquid before using it. If you roasted the pods, a darker, smokier liquid results, and you may want to pour it off carefully and keep only the clearer portion.
Step 5: Blend in batches (5 to 10 minutes)
Put a third of the pods into the blender with roughly 1 cup of the reserved liquid. Blend on high until completely smooth, about 45 to 60 seconds, then pour the puree into a second pot. Repeat with the remaining thirds.
Reserving liquid is what keeps this step from failing. Blenders need roughly a cup of fluid per cup of solids; too little fluid and the blades stall, too much and the mixture turns into a hot, thin slurry that splashes. Overfilling the jar is the number one reason a first batch comes out chunky and thin.
Add aromatics in the last batch if you are making the seasoned version, blending the onion and garlic right in with the chile.
Step 6: Season and adjust the consistency (5 minutes)
Warm the combined puree in the pot and taste it. Add salt in small increments until the chile tastes savory and round rather than merely hot. Add a splash more reserved liquid for a thin sauce, or let it simmer for 5 to 10 minutes to thicken it to a ketchup-like consistency.
A final cook-down is a choice, not a requirement. Cooking the sauce down for 5 to 10 minutes until it coats a spoon deepens the flavor and thickens it for enchiladas, but it also darkens the red toward brick. Skip it if you want a bright red sauce for plating eggs.
Step 7: Strain again for a silk finish (2 minutes, optional)
Pass the finished sauce through a fine-mesh sieve or a nut bag. This catches the last flecks of skin and seeds and is the difference between homemade and diner-smooth. It is also the trick cooks recommend before freezing, because any remaining solids can make a thawed sauce watery.
Three Ways to Rehydrate Dried Red Chile Pods
Once the pods are softened, the choice is about time versus color. Here is how the three main methods compare.
1. Simmered method takes 30 to 45 minutes of stove time. It produces the deepest, most rounded flavor and a slightly darker red. This is the best method for enchiladas, tamale filling, and carne adovada, and it is the one most traditional recipes assume.
2. Overnight cold-soak, no-cook method takes 8 to 12 hours of waiting and about 5 minutes of actual work. Submerge the torn pods in cold water, refrigerate overnight with a weight on top, then drain and blend. You keep a noticeably brighter red color, lose nothing to over-cooking, and end up with a sauce that tastes fresher and slightly fruitier. This is the approach home cooks mention most often when they are short on time but not short on patience.
3. Roux-thickened method adds a flour-and-oil roux after blending for a thick, tomato-sauce-style texture that clings to meat. Stir 2 tablespoons of oil and 2 tablespoons of unbleached flour into a hot pan, cook the paste for a minute, then whisk in the puree a little at a time. You trade the pure chile flavor for body, and you gain a sauce that will not run off a plate.
Whichever method you pick, the rule is the same: save every drop of the soaking liquid, and blend with enough of it to keep the jars moving.
Troubleshooting Your Red Chile Sauce
Almost every disappointing batch of red chile sauce comes down to one of five problems. Here is what each symptom means and how to fix it.
Bitter sauce. The usual cause is over-cooking, either a hard boil during simmering or a cook-down that ran far past 10 minutes. A second cause is pods that are several years old, which taste bitter once rehydrated. To test pod age, soak a couple of pods in a cup of hot water for 20 minutes: if the water smells flat and vegetal rather than sweet and fragrant, replace them. If the bitterness is already in your sauce, dilution is your only fix. Add reserved liquid or broth a quarter cup at a time until it is drinkable, and sharpen it with a little salt and a splash of vinegar.
Sour sauce. Sourness comes from a simmer that ran too long and not from the chiles. If the pot boiled at a rolling boil, the chile bitterness turns the whole pot sour and dull. Make a new batch with a gentler heat, and pull the pot off the heat a few minutes before the pods are fully soft.
Thin, watery sauce. Too much liquid in the blender dilutes the sauce, and leftover solids are usually the reason. Simmer the finished sauce uncovered for 5 to 10 minutes to reduce it, then strain out any bits that settled to the bottom. Next time, start with less reserved liquid and add more only as needed.
Gritty, seedy sauce. You left the seeds and inner ribs in. The fix is passing the sauce through a fine-mesh sieve or a nut bag, which pulls out the coarse particles the blender could not catch.
Sauce that is far too hot. Heat concentrates as the sauce reduces, so a tablespoon that tasted right at 3 cups can be punishing at 1 cup. Dilute with reserved liquid or broth, or balance it with a little salt, a pinch of sugar, or a spoon of fat. Remember that New Mexican red chiles sit low on the heat scale compared to cayenne or habanero, so a hot batch usually means over-reducing rather than hot pods.
Sauce too dark or brown. You cooked it too long or toasted the pods too aggressively. The color cannot be restored, but the flavor is still good. For a lighter result, cold-soak the next batch instead of simmering.
No blender. A hand masher in a pot works, with more mashing than you would like, or boil the softened pods with a little liquid until they collapse and then strain. The texture will be rustic, not smooth, but the flavor holds up.
How to Choose Your Chile Variety
New Mexican red, also sold as Hatch red, is the traditional choice and the baseline for everything on this page. It has a mild to medium heat, sweet undertones, and the color that defines a real red chile sauce. Most home cooks use it as the default and do not experiment, which is a perfectly good approach.
Other varieties work, but they push the sauce in a specific direction. Guajillo is hotter and fruitier with a cleaner red. Ancho is mild and sweet with raisin-like depth, closer to a dried poblano. Pasilla brings smoky, tobacco notes and a darker red. If you have never made the sauce, use New Mexican red first, then experiment with a blend of two varieties once you know the baseline taste you are aiming for.
Whether the seeds reduce heat is a common question. The short answer is that capsaicin concentrates in the pod flesh, so removing seeds reduces heat only slightly. It makes a real difference in color and texture, which is why seeded sauce looks brighter and blends cleaner, but you can leave the seeds in if you like more heat.
One more note on tradition. Red chile is made differently from village to village and family to family in New Mexico, and the purist pods-water-salt version has as many defenders as any seasoned version. Treat any single recipe, including this one, as a starting point rather than the only correct answer.
How to Store, Freeze, and Can Red Chile Sauce
Refrigerate the sauce in a sealed container for up to 5 days. Some recipes claim a week works fine, but a homemade sauce with onion and garlic in it carries more risk than a simple salt-and-chile base, so treat the shorter window as the safe one.
For longer storage, freeze it. Pour the sauce into freezer bags or small containers, leave an inch of headspace, and lay the bags flat to freeze quickly. Frozen sauce keeps for several months and defrosts in the refrigerator overnight. For the smoothest texture after thawing, strain the sauce through a sieve before freezing.
Canning is the third option and the one sources rarely explain. A water-bath can is safe for this sauce because the high acid content of chiles lowers the pH enough to seal reliably, so a standard half-pint or pint jar with 10 pounds of pressure for 20 minutes at sea level works. Above 1,000 feet, adjust the processing time for your altitude, and use a tested canning recipe rather than scaling the sea-level time yourself. A reader on one of our forums reported exactly this 20-minute process and flagged the altitude adjustment as the part most people forget.
Ways to Use Your Red Chile Sauce
Red chile sauce is a weeknight ingredient, not a special-occasion one. It goes on huevos rancheros and fried eggs, thinned with a little water or stock. It is the base for enchiladas and for carne adovada, where the meat simmers in the sauce until it shreds.
Use it to finish posole, to spoon over mashed potatoes, or to add heat and color to a pot of beans. Home cooks also mention tamale filling, chile colorado burritos, grilled fish, beef wings tossed with melted butter, and a Bloody Mary base. Any of these turn a jar of homemade sauce into a week of useful cooking.
Frequently Asked Questions
How do I make red chili sauce from red chile pods?
Stem the dried pods, tear them into pieces, and cover them with water by two inches. Simmer gently for 30 to 45 minutes until the pieces are completely pliable. Lift out the pods, reserve the soaking liquid, then blend the pods in batches with a cup of that liquid each time until smooth. Season with salt, adjust the thickness, and serve.
How long do you soak dried chile pods before blending?
For the simmered method, 30 to 45 minutes at a low simmer is enough, until the pieces bend without resistance. For the no-cook method, soak the pods in cold water in the refrigerator for 8 to 12 hours with a weight on top to keep them submerged. Either timing works, and both rehydrate the pods fully before blending.
Do you need to remove the seeds from red chile pods?
Removing the seeds is about color and texture, not heat. The capsaicin lives in the pod flesh, so seeded sauce is only slightly milder, but it blends cleaner and gives a brighter red. Leaving the seeds in produces a thicker, rustic sauce with a few extra flecks, and it will not ruin the result.
Why is my red chile sauce bitter or sour?
Both usually trace back to heat and time. A rolling boil, or a simmer held far longer than 30 to 45 minutes, cooks bitterness out of the pods and turns the sauce sour and dull. Old pods also rehydrate bitter. Prevent it with a gentle simmer and fresh pods, and dilute an already bitter batch with reserved liquid a quarter cup at a time.
Can I make red chile sauce without cooking it?
Yes. Cold-soak the torn pods in water in the refrigerator overnight, drain, and blend with some of the soaking liquid. The no-cook method keeps a brighter red color and a fresher, fruitier flavor because nothing is heated. It also takes about five minutes of active time, which makes it useful when you want the color more than a deep cooked flavor.
Can I use guajillo or ancho instead of Hatch chile?
You can, and each shifts the sauce in a clear direction. Guajillo is hotter and fruitier with a cleaner red, ancho is mild and sweet with raisin-like depth, and pasilla adds smoky tobacco notes and a darker color. Start with New Mexican red for the traditional flavor, then try a blend once you know the baseline you want.
How do I store red chile sauce, and can it be canned?
Refrigerate the sauce in a sealed container for up to 5 days, or freeze it in bags or small containers with a headspace for several months. For canning, process half-pint or pint jars at 10 pounds of pressure for 20 minutes at sea level, adjusting the time for your altitude, and follow a tested canning recipe rather than scaling the time yourself.
Making Red Chile Sauce From Dried Pods Is a Small Weekly Habit
Learning how to make red chile sauce from dried pods comes down to three habits: rehydrate gently, save every drop of the soaking liquid, and blend in batches. Get those right and the rest is seasoning.
Start with the purist version, pods, water, and salt, so you learn what the chile actually tastes like. Once that becomes your baseline, add garlic and oregano, try the overnight cold soak for a brighter color, or thicken it with a roux when you want something that clings to a plate. Make a double batch and freeze half, because a jar of this sauce in the freezer is the difference between a weeknight enchilada dinner and a takeout night.