
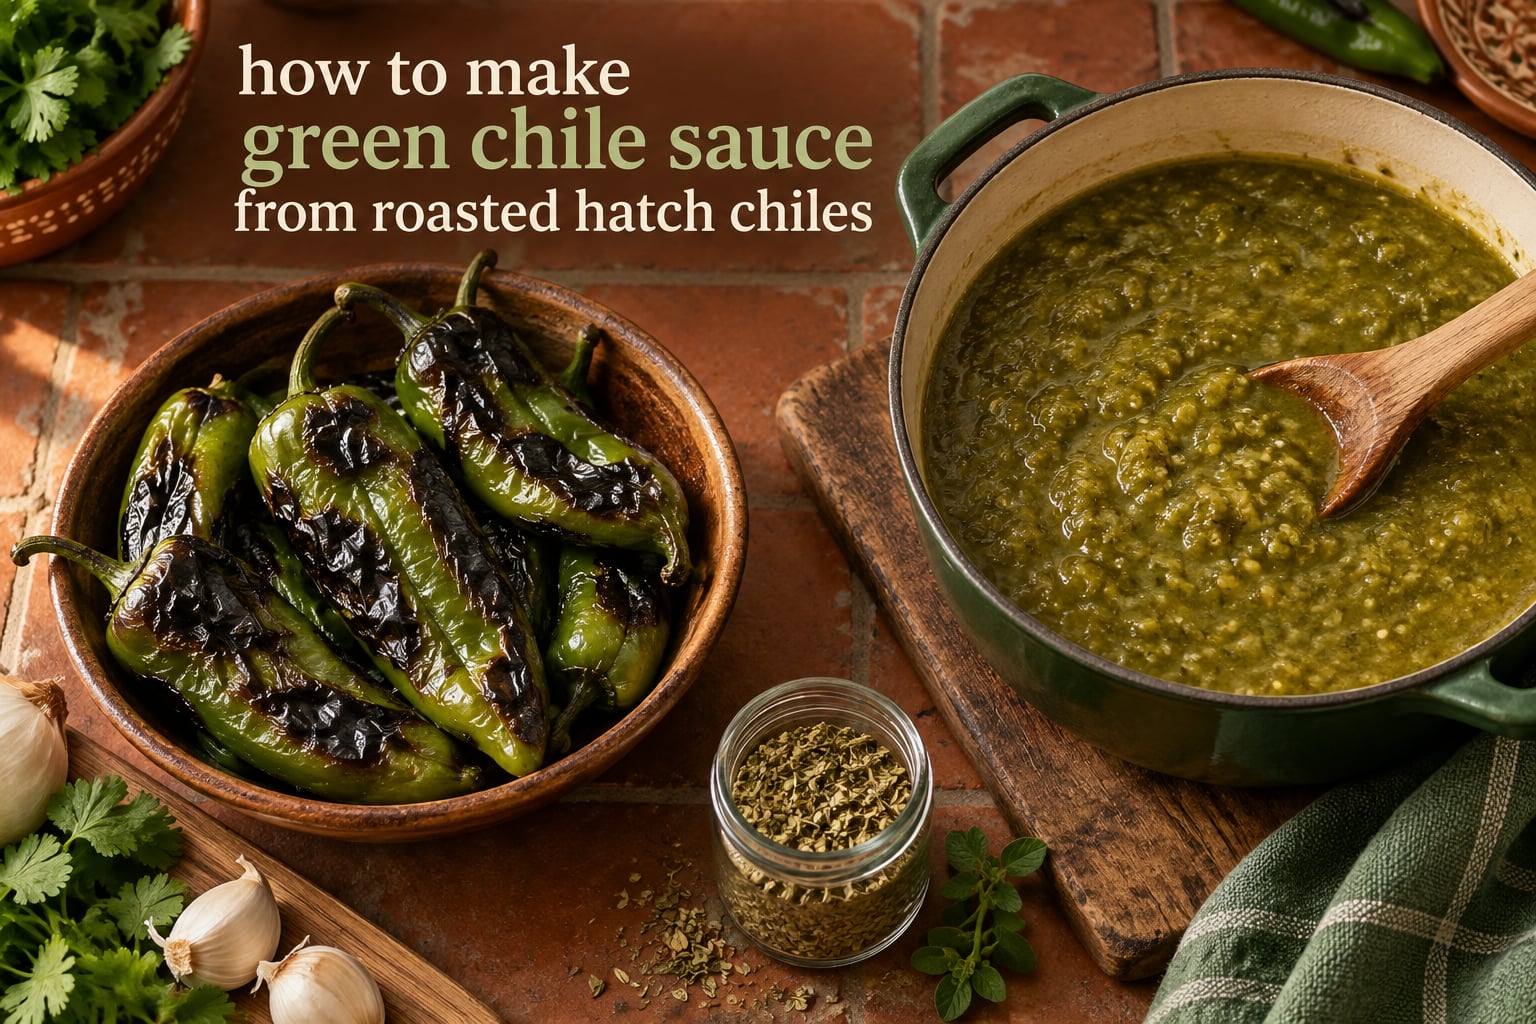
Roasted Hatch green chile sauce is a thick, smoky stew of fire-roasted New Mexico green chiles cooked down with onion, garlic, and a broth thickened with a cooked flour roux. It is the base for New Mexican enchiladas, smothered burritos, green chile queso, and about a dozen other dishes. This guide walks through the whole process, from choosing chiles at the right heat level to freezing a big batch at the end of Hatch chile season, which runs only about six weeks from early August to late September.
Learning how to make green chile sauce from roasted hatch chiles comes down to three things that people get wrong most often: not roasting long enough, not building enough flavor before the liquid goes in, and not adjusting the heat before committing a whole pound of peppers. Get those right and the rest is stirring.
If you want the measurements first, jump to the recipe. If you want to understand why each step exists, read straight through.
We tested this method across roughly a dozen batches over three summers, using mild NuMex 6-4 chiles for the family table and hotter Lumbre and Big Jim peppers for testing heat. The times and quantities below are what survived that process.
Table of Contents
- What Is Hatch Green Chile Sauce?
- What Are Hatch Chiles, and How Hot Are They?
- When Is Hatch Chile Season, and Which Form Should You Use?
- How to Roast Hatch Chiles: Gas Burner and Broiler Methods
- How to Peel, Seed, and Prep Roasted Hatch Chiles
- Classic Hatch Green Chile Sauce Recipe: Step by Step
- Six Flavor Variations to Try
- Ingredient Substitutions: Peppers, Broths, and Thickeners
- Troubleshooting: Why Your Green Chile Sauce Went Wrong
- Scaling the Recipe for Hatch Season Batch Cooking
- How to Store, Refrigerate, and Freeze Green Chile Sauce
- What to Serve With Hatch Green Chile Sauce
- Frequently Asked Questions
- What is roasted Hatch green chile sauce made of?
- How is green chile sauce traditionally made in New Mexico?
- Do you have to peel Hatch chiles after roasting?
- Should I remove the seeds from Hatch chiles?
- What peppers can I substitute for Hatch chiles?
- How do I thicken green chile sauce without flour?
- Can you water bath can green chile sauce?
- How long does homemade green chile sauce last?
- When is Hatch chile season?
- What is the secret to good enchilada sauce?
- Conclusion: Cook It, Then Let It Rest
What Is Hatch Green Chile Sauce?
Green chile sauce is not salsa. Salsa is raw, fresh, and served cold. Green chile sauce is a cooked, thickened preparation where the chiles have been blackened over open flame or under a broiler, peeled, seeded, and simmered until the flavors merge.
Traditionally, the sauce is a roux-based stew: oil or fat, flour, aromatics, broth, and a large quantity of chiles. It should coat a spoon and cling to the back of a tortilla. If it runs off like water, it is not finished.
The signature flavor is smoky and earthy, with a sweetness that comes from fire-roasting the peppers rather than from added sugar. The heat depends entirely on which variety you buy, and peppers from the same plant can vary.
Comparing Hatch chile varieties will help you pick the right pepper before you start.
What Are Hatch Chiles, and How Hot Are They?
A Hatch chile is a New Mexican chile grown in the Hatch Valley, a narrow stretch of land along the Rio Grande in southern New Mexico. Botanically it descends from the same species as the Anaheim pepper, and it looks like a bigger, blockier Anaheim. The chiles are harvested green and marketed fresh, and the name is now geographically protected, so a chile labeled Hatch should come from that valley.
Heat is measured in Scoville heat units, or SHU. A jalapeno sits around 2,500 to 8,000 SHU. Hatch chiles range from roughly 4,000 SHU at the mild end to more than 20,000 SHU for the extra-hot varieties, which puts them in the same range as a jalapeno to well beyond a serrano.
| Variety | Approximate heat | Best use in sauce |
|---|---|---|
| NuMex 6-4 | Mild, about 4,000 to 8,000 SHU | Family tables, large batches, anything served to guests |
| Joe E. Parker | Medium, about 8,000 to 10,000 SHU | The everyday all-purpose roasting chile |
| Sandia | Medium, about 8,000 to 12,000 SHU | Sauces that need a little more punch |
| Lumbre | Medium-hot, about 10,000 to 15,000 SHU | Enchilada sauce with noticeable heat |
| Big Jim | Extra hot, up to 20,000 SHU and above | Testing batches and hot sauce bases |
Before you commit a full pound, taste a small piece of raw pepper from each bag. If you buy more than one bag, sample from all of them, because heat varies within a single harvest. On the r/NewMexico forum, cooks who have burned a batch on too-hot peppers consistently recommend this thirty-second check before starting.
When Is Hatch Chile Season, and Which Form Should You Use?
Hatch chile season opens in early August and closes in late September. That is a very short window, which is why so much of the crop gets roasted and frozen within weeks of harvest. Outside that window, most cooks work from frozen or pre-roasted chiles, and the sauce is arguably better for it.
| Form | Flavor | Prep needed | Notes |
|---|---|---|---|
| Fresh, in season | Brightest, most grassy edge | Roast and peel | Buy by the pound at growers markets; peppers are firm and glossy |
| Frozen whole, unroasted | Nearly fresh | Thaw, then roast and peel | Best compromise outside the valley |
| Frozen, pre-roasted and peeled | Slightly softer, deeper | None | Dice straight into the pot; the flavor of the sauce is already there |
| Jarred, roasted | Softest, most cooked | None | Works fine; drain and check for added salt |
Frozen roasted chiles release water as they thaw, so hold back a quarter cup of your broth and add it after the chiles go in. That keeps the final consistency from turning loose. Cooks on r/CookingForBeginners who use pre-roasted bags report the sauce tastes even better the next day in the fridge, which is a fair reason to make it a day ahead.
How to Roast Hatch Chiles: Gas Burner and Broiler Methods
Roasting is the step that separates real green chile sauce from a raw salsa. You are not cooking the pepper through. You are blistering the skin until it blackens in patches, and the smoke does the rest.
Gas burner method
This is the traditional New Mexican approach, and it is the most flavorful. Set the burner to high and use tongs to hold each chile directly in the flame.
- Wash and dry the chiles thoroughly. Moisture steams instead of charring.
- Hold each chile in the flame with tongs, turning every 20 to 30 seconds.
- Look for blackened patches on all sides, not uniform black. Patches mean you stopped before the flesh burned.
- Roast 3 to 5 minutes per chile for medium peppers. Big Jim chiles are larger and need closer to 8 minutes.
- Move finished chiles to a bowl or a sheet pan. Do not pile them, or they steam each other.
Safety warning: roast outdoors or over a range hood, and never use a paper towel or cloth near the flame. Chiles blister and throw hot liquid, and tongs slip.
Broiler method
The broiler gives you a similar result with less tending. Heat the oven to high and move the rack about 4 inches from the element.
- Arrange the chiles on a foil-lined sheet pan.
- Broil 4 to 6 minutes, then flip with tongs.
- Broil another 3 to 5 minutes until the skins blister and darken.
- Move the pan to a cool burner and let the peppers cool 5 to 10 minutes before bagging them for the steaming step.
Watch the broiler closely. Chiles sit closer to the element than you think, and the sugars go from blistered to acrid in under a minute.
How to Peel, Seed, and Prep Roasted Hatch Chiles
Yes, you have to peel Hatch chiles after roasting. The blackened skin is papery and bitter, and it will not soften in the sauce. What you do not have to do is remove every seed.
Put the hot roasted chiles in a bowl, cover the bowl with a plate, and let them steam for 10 to 15 minutes. The trapped heat loosens the skins so they slide off with a light pull. Chiles that have sat a few hours are even easier to peel.
Now the seeding question, which comes up constantly in the Hatch chile Facebook groups. Most of the capsaicin lives in the white pith, not in the seeds themselves. Recipes that insist on removing all the seeds remove some heat, but the bigger loss is aroma and body.
- For a milder, smoother sauce, pull the seeds and the thick pith from the core.
- For more heat and a looser, brighter sauce, leave the pith in and remove only the seed clusters.
- For a hot sauce or a condiment where heat is the point, leave the whole chile intact.
Some cooks report that medium chiles peel more easily than extra-hot ones, because hotter peppers are usually thicker-walled and the flesh grips the skin after roasting.
Dice the peeled chiles into roughly half-inch pieces. Uneven dice means some pieces dissolve into the sauce while others stay whole, and you end up with a texture that is neither salsa nor stew.
Classic Hatch Green Chile Sauce Recipe: Step by Step
This is the base New Mexican recipe: a cooked roux, two broths for depth, and about a pound of roasted chiles. It yields roughly 4 cups and takes about an hour from peeled peppers to finished sauce.
Ingredients
- 2 pounds Hatch chiles, roasted, steamed, peeled, and diced
- 2 tablespoons vegetable oil or lard
- 1 medium white onion, diced
- 3 cloves garlic, minced
- 2 tablespoons all-purpose flour
- 2 cups chicken broth
- 1 cup vegetable broth
- 1 teaspoon Mexican oregano, crushed
- 1 teaspoon ground cumin
- Half a teaspoon salt, plus more to taste
- 1 tablespoon lime juice, added off the heat
Instructions
- Sweat the aromatics. Heat the oil in a heavy pot over medium heat. Cook the onion with a pinch of salt for 6 to 8 minutes until soft and translucent, then add the garlic for 1 minute. Do not brown the garlic.
- Cook the roux. Stir in the flour and keep stirring for 90 seconds to 2 minutes until the paste smells toasted and darkens slightly. This is the single step that separates a thin, disappointing sauce from a clinging one.
- Add the broths slowly. Pour in one cup of broth while whisking to loosen the roux, then add the second cup. Bring to a simmer and stir until smooth with no lumps.
- Add the chiles. Stir in the diced roasted chiles along with the oregano, cumin, and salt. Simmer uncovered for 20 to 25 minutes, stirring often, until the chiles have collapsed and the sauce coats the back of a spoon.
- Adjust the texture. If it is looser than you want, simmer another 5 to 10 minutes. If it tightened past the point you like, whisk in broth a tablespoon at a time.
- Finish off the heat. Take the pot off the burner, stir in the lime juice, taste, and add salt. The lime sharpens the chile flavor and keeps the sauce from tasting flat.
Time and yield
Prep is about 25 minutes once the peppers are peeled. Cooking takes 30 to 35 minutes. Yield is about 4 cups, or 8 servings as a topping.
Approximate nutrition per serving (1/4 cup)
About 60 calories, 3 grams of protein, 9 grams of carbohydrates, and 1 gram of fat. Sodium varies widely with the broth and salt you choose, so taste before you season.
Scaling this for a Hatch season batch gives you the quantities for 16 cups at once.
Six Flavor Variations to Try
Once the base recipe is dialed in, the same technique carries a long list of variations. Each one changes the profile without changing the method.
Classic New Mexican
The recipe above, finished with lime juice and nothing else. Oregano and cumin are the traditional accents. This is the version to smother a burrito in.
Smoky chipotle
Add 1 to 2 chipotle chiles in adobo sauce, minced, during the last 10 minutes of the simmer. Chipotle adds a woodsmoke depth that straight chile heat does not provide. Hold back extra salt, since adobo carries plenty.
Herb-forward
Stir in a half cup of chopped cilantro at the very end, off the heat. If you like the deeper, more pungent note, use culantro instead, which tastes different from cilantro rather than merely stronger.
Creamy queso-style
Stir in 4 ounces of cream cheese, or a cup of heavy cream, after the sauce comes off the burner. The chile base stays the same, but the result moves toward green chile queso and works as a dip for warm tortillas.
Caribbean sofrito profile
Mash 4 cloves of garlic with 2 tablespoons of dried Dominican or Greek oregano into a paste, then stir it into the sauce with a tablespoon of vinegar. The result reads as a bright, garlicky green chile rather than a chile-heavy one.
Tomatillo variation
Add 4 roasted tomatillos to the chiles in the final 10 minutes of the simmer. Tomatillo brings tartness and body and moves the sauce closer to a green salsa verde, which is useful if you want something less heavy.
Ingredient Substitutions: Peppers, Broths, and Thickeners
Pepper substitutes
Outside the valley, substitutes are often the only option. They will not taste identical, and it is worth saying so plainly.
| Pepper | Heat compared to Hatch | Result |
|---|---|---|
| Anaheim | Slightly milder | The closest botanical relative; good body, less punch |
| Poblano | Mild to medium | Works well, though some cooks find the flavor muddy |
| Serrano | Hotter | Use about half the volume; the flavor is sharper, not earthier |
| Jalapeno | Comparable | Familiar flavor, but a shorter roasting window |
Broth options
Broth is where a lot of homemade sauce turns out bland. Vegetable broth alone is the usual reason.
- Chicken broth adds the most depth. One cook on r/CookingForBeginners described vegetable broth as bringing a bit of blandness and switched to chicken bouillon, and the change was obvious.
- Pork or beef broth gives a heavier, darker sauce that suits burritos and red-adjacent dishes.
- Vegetable broth keeps the sauce vegan. Compensate with a spoon of tomato paste or an extra tablespoon of blended roasted chile.
- Water works, but reduce the salt and add a bouillon cube for body.
Thickening options
| Method | How to use it | Gluten-free |
|---|---|---|
| Flour roux | Cooked with the aromatics before broth goes in | No |
| Cornstarch slurry | Mix 1 tablespoon cornstarch with 3 tablespoons cold broth, whisk in during the final simmer | Yes |
| Reduction | Simmer uncovered 10 to 20 extra minutes | Yes |
| Pureed chile | Blend 1/4 cup of the roasted peppers and stir in | Yes |
The roux gives the most classic texture. The cornstarch slurry is the answer if you are avoiding gluten, and the reduction method costs nothing but time and evaporation.
Troubleshooting: Why Your Green Chile Sauce Went Wrong
This is the section cooks ask for most, and it is the one most recipes skip. Here are the six failures we ran into, and the fix for each.
The sauce is too thin
Two causes. First, the roux was not cooked long enough, which means it never absorbed enough fat to thicken. Second, the chiles released water as they simmered, especially frozen or pre-roasted ones. Fix it by simmering uncovered until it coats a spoon, or by whisking in a cornstarch slurry a tablespoon at a time.
The sauce is too thick
Usually over-reduced, or a full tablespoon too much flour. Whisk in warm broth a little at a time until it flows off the spoon slowly. A sauce that drips in a thin ribbon is the target.
The sauce tastes bitter
You roasted too long, or you left some blackened skin in. Blackened flesh is acrid; blackened skin is only a problem if it stays. Pull the peppers from the flame as soon as the skins blister, and peel thoroughly. Bitter sauce cannot be fixed afterward, so it has to be prevented.
The sauce tastes bland
Skip the roux step by accident, underseason, or rely on vegetable broth alone. Add salt in small increments until the chile flavor reads clearly, then add a splash of lime juice. A teaspoon of chicken bouillon dissolved in a cup of warm broth is a fast rescue.
The sauce is too hot
Add dairy if you are serving it as a dip, or dilute with broth and extra vegetables. For a heat that is still balanced rather than erased, stir in a roasted poblano, which brings volume and no significant heat.
The sauce separates when it cools
A starch-thickened sauce will split slightly as it cools, and this is normal. Whisk it hard over low heat for a minute, or in the microwave in 20-second bursts, and the emulsion comes right back. New Mexico cooks on r/NewMexico describe this as expected behavior with any flour-thickened chile sauce.
Scaling the Recipe for Hatch Season Batch Cooking
Most people buy a serious quantity of chiles during the six-week season and then wonder what to do with them. Cook a large batch and freeze it. Storage details are below.
| Yield | Roasted chiles | Fat | Flour | Broth total | Pot |
|---|---|---|---|---|---|
| 4 cups | 2 lb | 2 tbsp | 2 tbsp | 3 cups | 4 qt |
| 8 cups | 4 lb | 1/4 cup | 1/4 cup | 6 cups | 6 qt |
| 16 cups | 8 lb | 1/2 cup | 1/2 cup | 12 cups | 12 qt, or two 8 qt pots |
Scale seasoning by roughly two-thirds rather than double. Chiles vary far more than flour does, and an over-seasoned 16-cup batch is harder to fix than an under-seasoned one. Divide large batches into two pots, since a full 12-quart pot is heavy to stir and to lift off the burner.
How to Store, Refrigerate, and Freeze Green Chile Sauce
Refrigerate the sauce in a sealed container for up to 5 days, and expect it to taste better on day two as the flavors settle. Some cooks on r/NewMexico make it a day ahead on purpose.
For longer storage, freeze it. Cool the sauce first, leave the headspace, and use freezer bags or containers that leave room for expansion. For the flat-freeze technique cooks use during Hatch season, spoon the sauce onto a lined sheet pan in thin strips, freeze until solid, then bag the pieces. You break off what you need rather than thawing a whole block.
Water bath canning is not a safe option for this sauce. A flour-thickened, low-acid, low-salt green chile sauce is exactly the kind of preparation that can allow botulism to develop in a boiling water bath, which only reaches about 212 degrees Fahrenheit. A pressure canner reaches the 240 degree range that low-acid foods require, and it is the correct method. Follow a tested recipe from the National Center for Home Food Preservation rather than improvising, since processing time and pressure both matter for safety.
Do not improvise either method. Salted, acidified sauces follow different rules, and an unvalidated ratio is not a substitute for a tested recipe.
What to Serve With Hatch Green Chile Sauce
The sauce is a condiment, a base, and a smothering agent, and it gets used on more than tacos. Here are the ways it shows up most often.
- Enchilada sauce, the classic use, thick enough to coat tortillas before rolling
- Smothered burritos, piled high and drenched
- Breakfast burrito sauce, the way a New Mexico diner serves it over eggs and potatoes
- Green chile queso, stirred into melted cheese
- Green chile cheeseburgers, on a bun with cheese and chopped onion
- Eggs benedict, poured over poached eggs and English muffins
- Huevos rancheros, over fried eggs and tortillas
- Chilaquiles sauce, loosened with a little stock
- Nachos and quesadillas, dolloped and melted
- Rice, stirred in as a flavoring rather than a topping
- Beans and refried beans, mixed in for color and heat
- Soup and stew base, replacing canned broth
- Meat marinade, for pork, chicken, or beef
- Sandwich spread or burger topper
- Nacho topping on a sheet pan with melted cheese and pickled onions
One shortcut comes up often enough to be worth naming. For a fast smothered burrito sauce, many New Mexicans stir green chile with a can of cream of chicken soup and skip the roux entirely. It is not the same sauce, but it is ready in the time it takes to heat a pan.
Other cooks add ground beef, pulled pork, or shredded chicken straight into the finished sauce for a heavier version that works as a filling or a dip.
Frequently Asked Questions
What is roasted Hatch green chile sauce made of?
Roasted Hatch green chile sauce is a thick stew of fire-roasted New Mexico Hatch chiles, onion, garlic, and broth thickened with a cooked flour roux. Seasonings typically include Mexican oregano, cumin, and salt, with lime juice added off the heat. The roux is what makes it a sauce that clings rather than a thin salsa.
How is green chile sauce traditionally made in New Mexico?
Traditional New Mexican green chile sauce starts by fire-roasting whole Hatch chiles over a gas flame or under a broiler until the skins blister and blacken. The chiles are steamed in a covered bowl, peeled, and diced. Onion and garlic are softened in fat, flour is cooked into a roux, broth is whisked in, and the chiles simmer for 20 to 25 minutes until the sauce coats a spoon.
Do you have to peel Hatch chiles after roasting?
Yes, the blackened skin has to come off. It stays papery and bitter in the sauce and will not soften during simmering. After roasting, put the hot chiles in a covered bowl for 10 to 15 minutes, then pull the skins off while the flesh is still soft from the trapped steam.
Should I remove the seeds from Hatch chiles?
It depends on the heat level you want. Most of the capsaicin sits in the white pith rather than the seeds, so removing both cuts more heat and aroma than many recipes admit. For a milder sauce, pull the seeds and thick pith. For more heat and body, leave the pith and remove only the seed clusters.
What peppers can I substitute for Hatch chiles?
Anaheim peppers are the closest botanical substitute since Hatch chiles descend from the same species. Poblanos also work and some cooks prefer the result. Serranos and jalapenos can be used in smaller volumes, but the flavor skews sharper and less earthy. Substitutes will not taste identical, so adjust the seasoning.
How do I thicken green chile sauce without flour?
Whisk 1 tablespoon of cornstarch with 3 tablespoons of cold broth to make a slurry, then stir it into the simmering sauce and cook for 2 to 3 minutes until glossy. Simmering the sauce uncovered for 10 to 20 extra minutes to reduce also thickens it, as does blending a quarter cup of the roasted chiles and stirring them back in.
Can you water bath can green chile sauce?
No. A flour-thickened green chile sauce is low in acid and salt, which makes it unsafe in a boiling water bath that only reaches about 212 degrees Fahrenheit. Use a pressure canner, which reaches the 240 degree range, and follow a tested recipe from the National Center for Home Food Preservation for processing time and pressure. Freezing and refrigerating are safer options for most home cooks.
How long does homemade green chile sauce last?
In a sealed container in the refrigerator it keeps about 5 days, and the flavor usually improves after resting overnight. Frozen in a bag or container it keeps for several months. For a Hatch season batch, freeze the sauce flat in thin strips on a lined sheet pan, then bag the frozen pieces and break off what you need.
When is Hatch chile season?
Hatch chile season runs from early August to late September, about six weeks total. Outside that window, most cooks use frozen whole chiles, frozen pre-roasted and peeled chiles, or jarred roasted chiles. Frozen pre-roasted chiles need no prep, though you should hold back a quarter cup of broth to offset the water they release as they cook.
What is the secret to good enchilada sauce?
Cook the roux long enough, salt in layers, and finish with acid. The flour needs 90 seconds to 2 minutes in the fat to darken and smell toasted, which is what gives the sauce body. Add salt with the chiles and again at the end, then stir in lime juice off the heat so the chile flavor reads clearly rather than flat.
Conclusion: Cook It, Then Let It Rest
Roasting is the step that cannot be skipped, the roux is the step that cannot be rushed, and the lime juice at the end is the step most people leave out. That is the whole method behind how to make green chile sauce from roasted hatch chiles, and it works the same whether the chiles come fresh from the valley in August or from the freezer in February.
Roast a small batch first and get a feel for your burner. Once the technique is in your hands, cook a large one at the end of the season and freeze it in flat portions, and you will have green chile sauce within reach for months.