
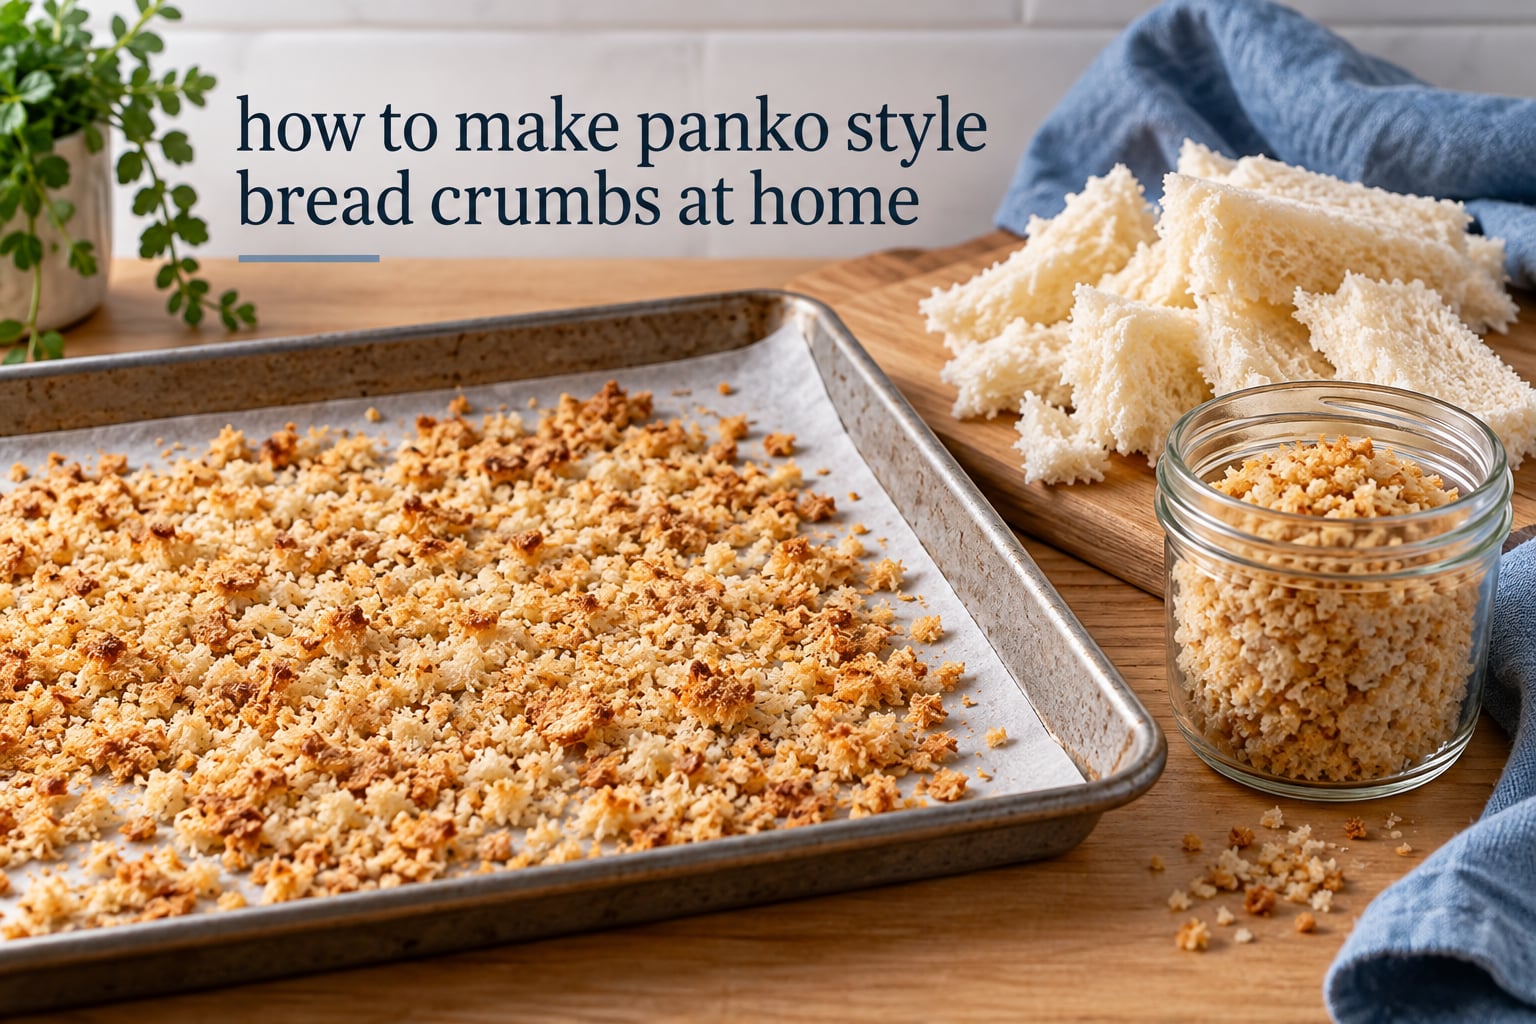
To make panko style bread crumbs at home, slice a loaf of white sandwich bread, cut off every crust, tear or pulse the soft interior into coarse pieces, spread them in a single layer on a baking sheet, and bake at 300°F (150°C), stirring every 5 minutes, until they are completely dry and snap rather than bend. Cool them fully, then crush to the flake size you want.
I make a batch whenever a loaf starts going stale, which in our house is every week or so. One loaf yields about 4 cups of crumbs, and those crumbs breading for a month of dinners. It costs pennies, it tastes fresher than a bag that has been sitting on a shelf since last year, and it quietly clears out the bread drawer.
The one step people find fiddly is the crust removal, and it is also the step that makes panko panko. Skip it and you have breadcrumbs. Do it and you have something lighter, flakier, and noticeably crisper. This guide walks through the full method, a no-appliance version that works just as well, alternative drying methods, and what to do when your crumbs come out chewy or powdery.
Table of Contents
- What Is Panko, and Why Does It Behave Differently From Bread Crumbs?
- What You Need: Ingredients and Equipment
- How to Make Panko Style Bread Crumbs at Home, Step by Step
- How to Make Panko Without a Food Processor
- Alternative Ways to Dry the Bread Without an Oven
- Yield: How Many Slices Make How Many Cups
- How to Tell the Crumbs Are Done
- Seasoned and Healthier Variations
- How to Store Homemade Panko and Bring It Back Crisp
- Troubleshooting Chewy, Soggy, or Too-Fine Crumbs
- What to Cook With Your Homemade Panko
- Frequently Asked Questions
- What is the difference between bread crumbs and panko?
- What are the ingredients in panko bread crumbs?
- How do I make breadcrumbs without a food processor?
- What can I use instead of a food processor if I do not have one?
- Can I use panko and bread crumbs interchangeably?
- How much panko equals a cup of bread crumbs?
- Why use panko instead of bread crumbs?
- Which breadcrumbs are best for schnitzel?
- What is a healthier alternative to panko bread crumbs?
- How long do homemade breadcrumbs last?
- Conclusion
What Is Panko, and Why Does It Behave Differently From Bread Crumbs?
Panko is Japanese-style bread crumbs made only from the soft interior of white bread. The crusts are cut away, the crumb is torn into coarse airy flakes, and nothing else is added. Standard bread crumbs are usually made from the whole loaf, crust included, and ground much finer.
That single structural difference explains almost everything people notice about panko. The flakes stay light, shatter instead of crunch, and leave air pockets in the coating. Air pockets mean the surface touches less oil, so fried foods hold their crunch longer instead of going soft under the sauce.
| Feature | Panko | Standard bread crumbs |
|---|---|---|
| Structure | Coarse, splintery flakes from crustless bread | Fine, dense granules from the whole loaf |
| Crust included | No, crusts are removed | Yes, usually |
| Crunch | Shatters, stays crisp through baking | Crunchy, can dull in sauce |
| Oil absorption | Low, air pockets absorb less | Higher, finer particles soak up more |
| Best for | Schnitzel, tonkatsu, katsu, chicken parmesan, air fryer breading | Meatballs, casseroles, stuffing, oven casseroles |
Home cooks on Reddit’s r/Cooking and r/food ask this constantly, and the honest answer is that panko is the coating for thin, flat, fried cutlets, while fine crumbs suit denser dishes where you want the coating to melt into the dish. A few cooks also point out that a traditional schnitzel uses only flour, and panko is really the tonkatsu and katsu choice. Both styles work, but they are not identical results.
What You Need: Ingredients and Equipment
Real panko has one ingredient, and the AI overviews for this query keep circling the same short list, so here it is plainly.
- 4 to 6 slices of white sandwich bread, or about half a loaf
- A baking sheet lined with parchment, or left bare
- A food processor with a standard blade, optional
- A box grater, a Ziplock bag and a meat tenderizer, or just your hands, as substitutes
Equipment glossary, in plain terms:
- Food processor blade: pulses the bread into crumbs. The fastest route by far.
- Shredding disk: makes larger, longer shreds, which dry more evenly and produce bigger flakes.
- Box grater: the coarse holes give you a uniform flake without any electricity.
- Ziplock bag plus meat tenderizer: the classic no-appliance hack. The bag keeps the crumbs contained while you pound the bread.
Use day-old or stale bread if you have it. Fresh bread has more moisture and takes longer to dry, though it works perfectly well. Sourdough and whole wheat loaves are also fine, and they give the finished panko a deeper, nuttier flavor.
How to Make Panko Style Bread Crumbs at Home, Step by Step
Budget about 30 minutes, most of it unattended in the oven. The process is the same on every reputable recipe page: prep, dry, crush.
- Slice and strip. Cut 4 to 6 slices from the loaf. Slice off every crust, all four sides, and discard them or save them for cracker crumbs. You want only the soft white interior.
- Tear or shred. Tear the slices into rough pieces the size of a large crouton, or pulse in a food processor until they look like coarse gravel. Stop while you can still see distinct pieces.
- Spread in a single layer. Scatter the pieces across a baking sheet with space between them. Crowding traps steam, and steam is why crumbs turn chewy.
- Bake at 300°F (150°C) for 10 to 15 minutes. Stir every 5 minutes so the center dries as fast as the edges. At 250°F (120°C) you will need closer to 20 to 25 minutes.
- Cool completely. Let the sheet sit on the counter for at least 20 minutes. Warm bread is soft bread, and crushing it warm gives you dust.
- Crush to coarse flakes. Pulse again for a second or two, or roll the bag under a rolling pin. Stop at the size of a small pea. For a lighter texture, leave it in larger shards.
The finished batch should shatter between your fingers. If a piece bends, put the whole tray back in the oven for another 5 minutes.
How to Make Panko Without a Food Processor
You do not need a food processor, and for a single loaf you probably do not need one. Home cooks report that tearing day-old bread, drying it low, then crushing it in a bag matches processor results every time.
- Strip the crusts off 4 to 6 slices and tear the interior into rough pieces.
- Dry the pieces exactly as above, on a baking sheet at 300°F (150°C), stirring every 5 minutes.
- Let them cool fully, then put them in a Ziplock bag and seal it.
- Smash the bag with a meat tenderizer, a mallet, or the flat bottom of a rolling pin. Work in short, firm taps, not swinging smashes, so the bag does not burst.
- For bigger, lighter flakes, grate the dried bread on the coarse holes of a box grater. Expect it to be a little slower but very even.
- For the softest option, rub the dried bread between your palms over a baking sheet, breaking it apart with your fingertips as it crumbles.
One warning from the forums: overwork it and you end up with flour. If the crumbs start turning powdery in the bag, stop and pick out the larger pieces instead of pounding further.
Alternative Ways to Dry the Bread Without an Oven
No competitor recipe covers these, and they are the options people ask for most. Each one produces the same finished panko, only on a different clock.
| Method | Temperature | Time | Notes |
|---|---|---|---|
| Oven, higher | 300°F (150°C) | 10 to 15 minutes | Fastest oven route, stir every 5 minutes |
| Oven, lower | 250°F (120°C) | 20 to 25 minutes | Safer, less risk of scorching, ideal for multigrain |
| Air fryer | 300°F (150°C) | 8 to 12 minutes | Shake the basket every 3 minutes, works in small batches |
| Skillet or toaster oven | Medium heat, no oil | 8 to 10 minutes | Toast the pieces dry, toss often, watch closely |
| No-cook stovetop dry | Low heat, no oil | 10 to 15 minutes | Sun-dry on a rack for 1 to 2 days on a dry day |
The air fryer is the most useful of these for small batches. Give it more time than you think at first, because the moving hot air browns the outside long before the centre loses its last of the moisture.
Yield: How Many Slices Make How Many Cups
Scale the recipe with this table. Volume is the number that matters when a recipe asks for a cup of panko.
| Bread | Approximate yield |
|---|---|
| 2 slices, crustless | 1 cup |
| 4 slices, crustless | 2 cups |
| Half a loaf, about 6 slices | 3 cups |
| Full loaf, about 12 slices | 4 to 5 cups |
Panko is fluffier than fine crumbs, so it takes more room. One cup of panko loosely packed covers roughly the same area as three quarters of a cup of standard bread crumbs. That is why a schnitzel dredged in panko often needs a second coat.
How to Tell the Crumbs Are Done
Most recipes tell you a time. Time varies with your oven, your bread, and how thickly you spread it, so judge by texture instead.
- Look: the color has gone from pale cream to a light straw gold, and there is no visible soft spot in the middle of the tray.
- Touch: a piece should feel dry and papery, never cool or slightly damp underneath.
- Snap: bend one piece. If it snaps cleanly, it is done. If it bends, it needs more time.
When in doubt, give it 5 more minutes. Overbaking is the easier mistake: panko goes from golden to bitter, and the difference is hard to undo.
Seasoned and Healthier Variations
Plain panko is the right starting point, because it lets you season each dish separately. Cooks on r/Cooking_ac prefer it to store-bought seasoned panko, where the seasoning settles at the bottom of the bag and never mixes evenly.
- Italian panko: two teaspoons Italian seasoning per cup, plus a pinch of salt and garlic powder.
- Spicy panko: one teaspoon smoked paprika, half a teaspoon cayenne, and a pinch of salt per cup.
- Whole wheat panko: made from whole wheat bread. Heavier, nuttier, dries faster, and adds real fiber.
- Sourdough panko: from day-old sourdough. Tangy flavor that pairs well with schnitzel and fish.
- Gluten-free panko: use a loaf labelled gluten free and check the bakery’s cross-contamination policy, since regular sandwich bread is almost always baked alongside wheat.
- Oat-based alternative: blitzed rolled oats toasted in a dry pan make a coarse, craggy coating with more fiber than white bread. The texture is nuttier and the color is darker.
Season after the crumbs are fully dry and before they cool completely. The oil in the seasoning helps the flakes clump into all the wrong places, so a light spray of cooking spray followed by a toss is steadier.
How to Store Homemade Panko and Bring It Back Crisp
Storage advice online contradicts itself, with some sources claiming a year in the pantry and others claiming three months. The reason for the gap is that commercial panko is baked to a lower moisture content and often carries stabilizers. Homemade panko has no such help, so it softens sooner.
- Counter: an airtight container in a cool, dark cupboard for up to 4 weeks. Beyond that, expect flavor to fade.
- Refrigerator: not worth it. Refrigeration pulls moisture into the flakes and softens them faster.
- Freezer: the honest answer for long storage. Freeze in a sealed bag or a freezer-safe container for up to 6 months.
To re-crisp softened panko, spread it on a baking sheet and return it to a 300°F (150°C) oven for 5 minutes, or 3 minutes in a hot air fryer with a shake halfway. Cool it fully before it goes back in the jar.
Troubleshooting Chewy, Soggy, or Too-Fine Crumbs
| Problem | Likely cause | Fix |
|---|---|---|
| Chewy or tough crumbs | Bread was not fully dry, or the pieces were too thick and the centre stayed moist | Spread in a single layer and give it another 5 minute bake |
| Fine, powdery crumbs | Over-pulsed in the food processor or pounded too long in the bag | Pick out the larger shards before the next use, and pulse in shorter bursts |
| Gritty, sandy coating | Crusts were left on, or some toasted pieces went over | Slice the crusts off carefully, and pull the tray out a minute early if the color runs |
| Unevenly dried | The pieces were crowded on the sheet and trapped steam | Use two sheets instead of one, and stir at the 5 minute mark |
| Goes soft in the coating | Crumbs were ground too fine, so they absorbed oil and lost their air pockets | Pulse to a coarser flake and let the coated food rest on a rack, not a plate |
One more variable worth naming: the moisture in the bread itself. A loaf baked the same day tends to hold more water than one that has sat for two days, so a fresh loaf can need an extra 5 minutes.
What to Cook With Your Homemade Panko
Panko earns its keep on thin, flat cutlets and on anything air fried, where a coarse flake survives heat better than a fine crumb.
- Chicken parmesan and baked chicken cutlets
- Schnitzel, especially with a mustard or lemon dredge
- Tonkatsu, katsu, and other fried pork cutlets
- Fish fillets and fish cakes
- Air fryer breaded items, where the airflow keeps the coating from softening
- Vegetable croquettes, zucchini chips, and egged eggplant
- Mac and cheese bites, where the flake size gives more crunch per bite
Whatever you coat, let the finished item rest on a wire rack for a minute or two before saucing. Steam trapped under the coating is the fastest way to undo all the work in this guide.
Frequently Asked Questions
What is the difference between bread crumbs and panko?
Panko is made only from the soft interior of white bread with every crust removed, then torn into coarse, airy flakes. Standard bread crumbs are usually ground from the whole loaf, crust included, into much finer granules. The coarse, crust-free flake is what makes panko lighter, absorb less oil, and stay crisp longer in fried and baked dishes.
What are the ingredients in panko bread crumbs?
Store-bought panko usually lists one ingredient: bread. A wheat flour and salt blend appears on some labels. Homemade panko needs nothing but white bread, which is why it tastes fresher and lets you control the bread type, from whole wheat to sourdough to gluten free.
How do I make breadcrumbs without a food processor?
Strip the crusts from 4 to 6 slices, tear the interior into rough pieces, and bake at 300 degrees F (150 degrees C) for 10 to 15 minutes, stirring every 5 minutes. Cool completely, then crush the dried bread in a sealed bag with a meat tenderizer, or grate it on the coarse holes of a box grater for larger flakes.
What can I use instead of a food processor if I do not have one?
The three reliable options are a box grater, which gives the most even flake, a Ziplock bag with a meat tenderizer or rolling pin, which is fastest for a single batch, and your hands, rubbing the dried bread between your palms over a baking sheet. All three work on bread that has been dried first.
Can I use panko and bread crumbs interchangeably?
In a pinch, yes, since both are dried bread. The results are not the same: panko gives a lighter, flakier coating that absorbs less oil, while fine crumbs give a denser, softer crust. Use them interchangeably in meatballs and casseroles, and reach for panko when the crispness of a fried cutlet is the whole point.
How much panko equals a cup of bread crumbs?
Because panko is flakier, one cup of panko loosely packed covers roughly the same area as three quarters of a cup of standard bread crumbs. Two slices of crustless bread make about 1 cup of panko, and a full loaf makes 4 to 5 cups.
Why use panko instead of bread crumbs?
The coarse flake leaves air pockets in the coating, so the surface touches less oil and stays crisp through baking or frying. That matters most for schnitzel, tonkatsu, katsu, and chicken parmesan, where a fine crumb coating tends to absorb oil and turn soft under sauce.
Which breadcrumbs are best for schnitzel?
Coarse panko is the most common choice for a crunchy schnitzel, and it holds up well under frying. Plenty of cooks point out that a traditional Austrian schnitzel uses only flour dredging, and that panko is really the tonkatsu and katsu breading. Both work, so follow the style you are actually chasing.
What is a healthier alternative to panko bread crumbs?
Whole wheat panko adds fiber and dries faster, and sourdough panko brings a deeper flavor. For the biggest change, blitz toasted rolled oats in a dry pan for a coarse, darker, higher fiber coating. A gluten free labeled loaf also works, though you should check the bakery’s cross-contamination policy.
How long do homemade breadcrumbs last?
In an airtight container in a cool cupboard, about 4 weeks. For longer storage, freeze them for up to 6 months, because homemade batches carry more residual moisture than commercial panko and soften faster. To re-crisp, bake at 300 degrees F (150 degrees C) for 5 minutes and cool before storing.
Conclusion
To make panko style bread crumbs at home you only need bread, a low oven, and about 30 minutes: strip the crusts, tear or pulse the interior coarse, bake it dry at 300°F (150°C) with a stir every 5 minutes, cool it fully, and crush it to flakes. A loaf gives you 4 to 5 cups that will outlast the bread they came from.
Make a batch this week from whatever is going stale in the bread drawer. Start the oven before you clear the counter, since the drying step needs the oven to yourself for fifteen minutes.