 |
| Momofuku Milk Bar Birthday Cake |
Happy 2nd Birthday to Tortillas and Honey! Two years ago I decided to create my own food blog and enter the world of blogging! These past two years have been a tremendous experience-- I've grown so much as a blogger, writer, photographer, and as a person. I've also met some absolutely wonderful fellow bloggers who are supportive and creative and genius. I am so glad that I decided to partake in this adventure, and thank you for coming along with me on this little journey of mine!
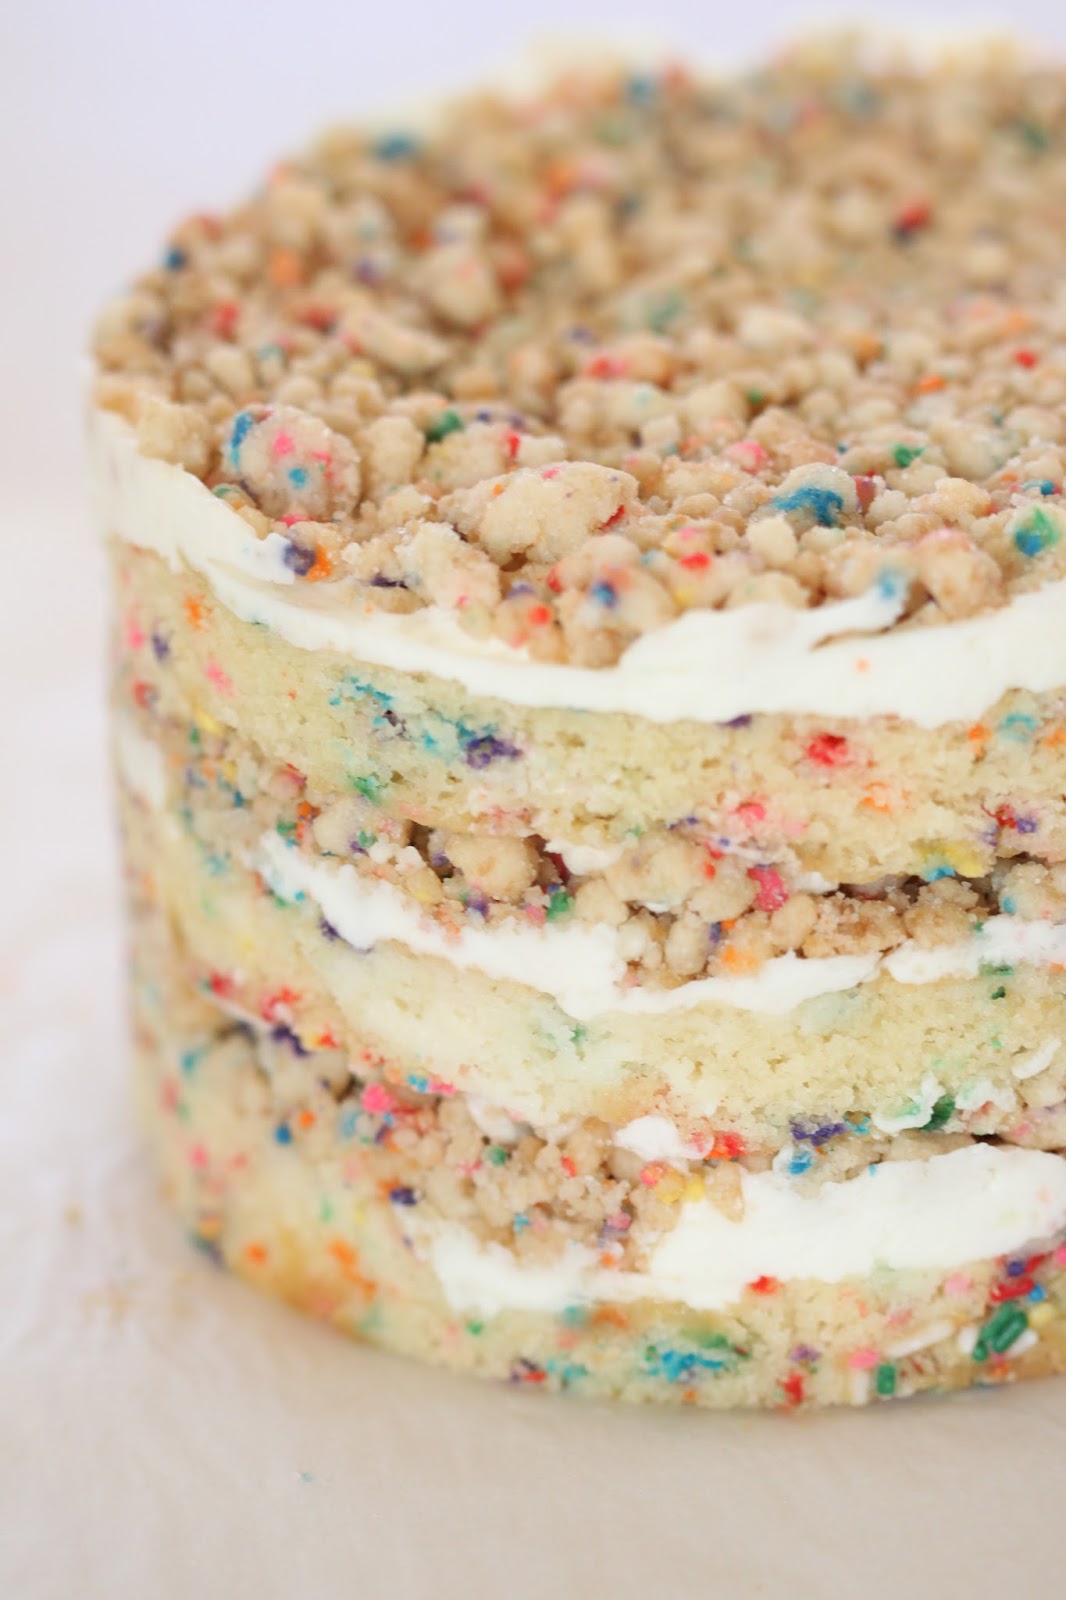
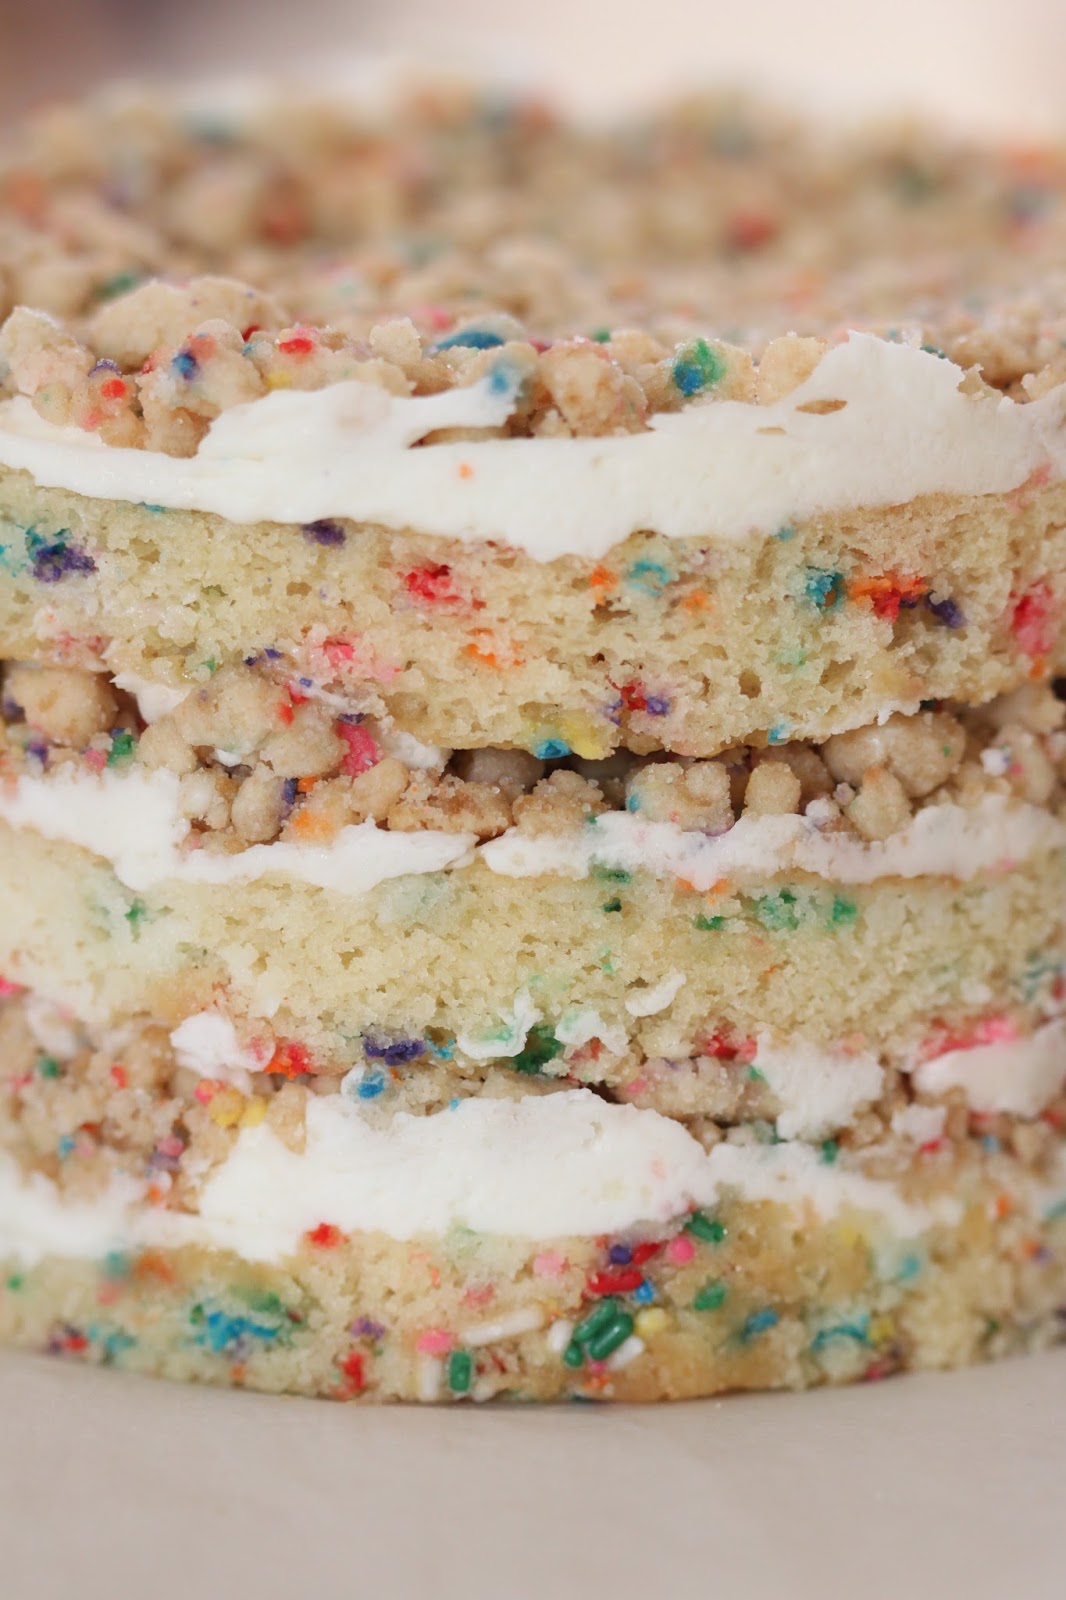
To celebrate, I am posting a perfect recipe to celebrate the blog's birthday-- Momofuku Milk Bar's Birthday Cake. This is one of my favorite cake recipes ever! I've only recently discovered the genius of Milk Bar creator Christina Tosi, but have been hearing about her and Milk Bar for years. I finally decided to just buy her cookbook, and it has quickly become one of my favorite cookbooks of all-time. Her recipes and desserts may seem a little intimidating, but she breaks down the steps for you that that it's easy to understand and her recipes are easy to prepare. And the end result is, well, impressive. Right? This is one of the most impressive desserts I've every made. Totally made me feel like a little rock star!
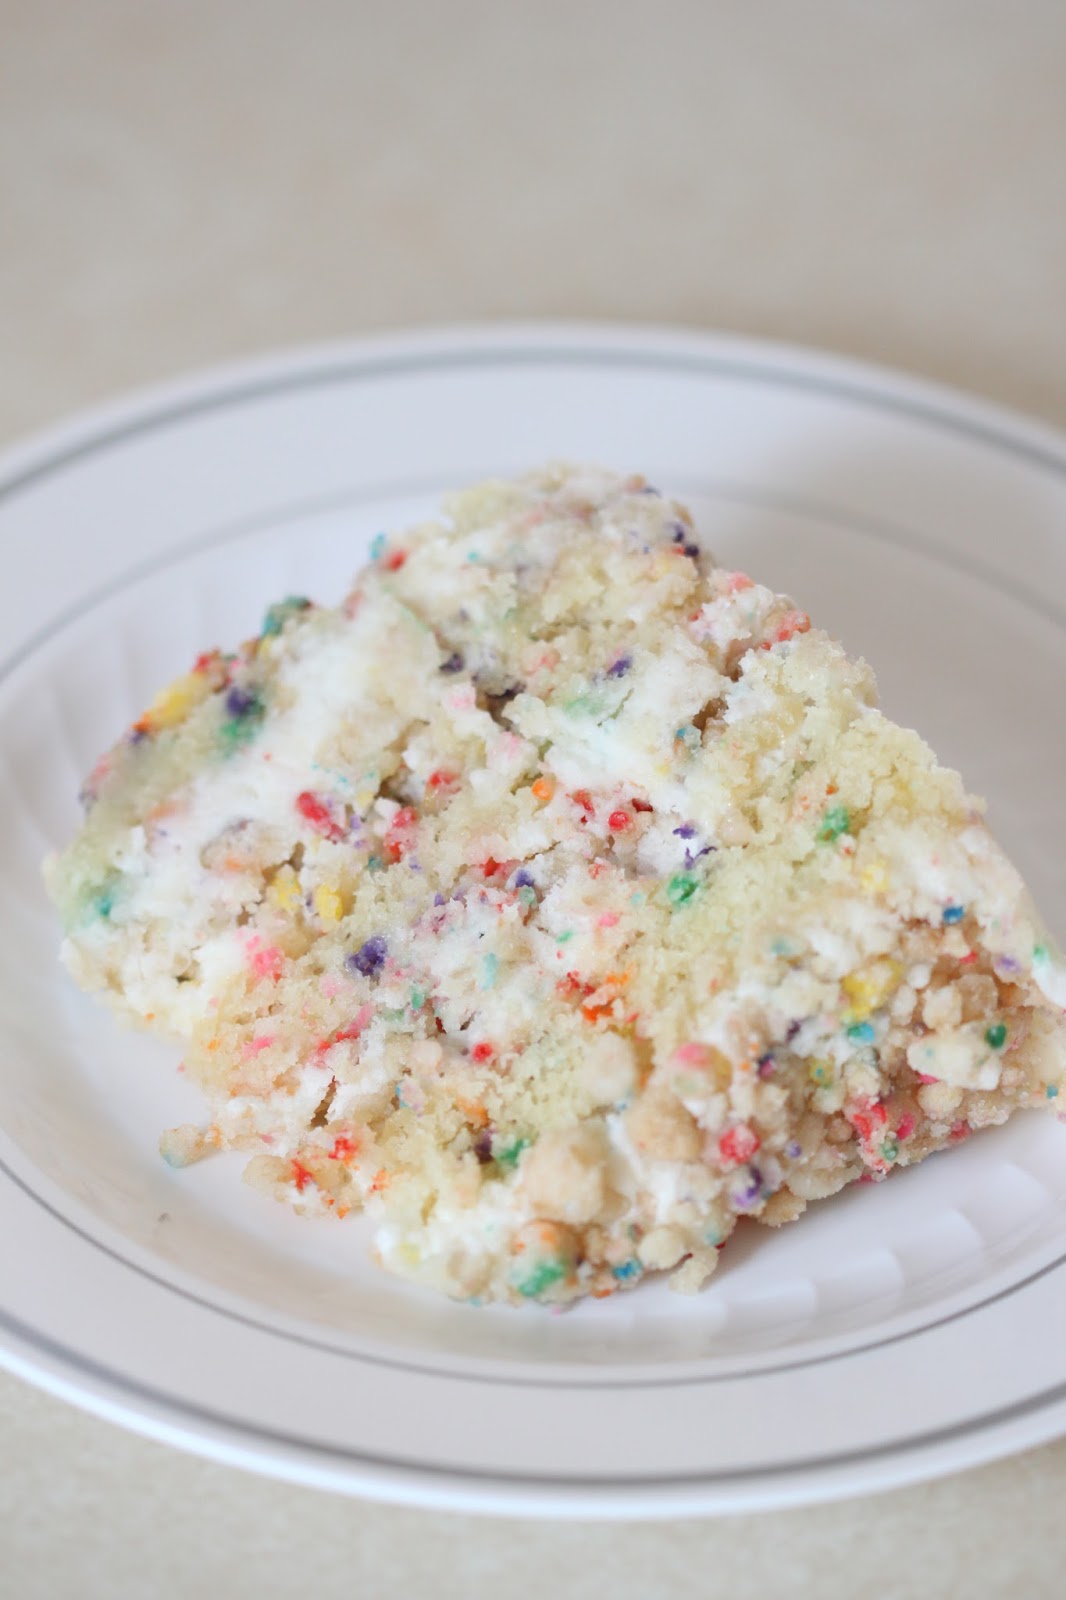
If it looks like it may be too sweet, it's actually not. The cake itself isn't too sweet and the crumb has a little salty bite which helps to cut the sweetness a little bit. The crumb doesn't get soggy, so you get a little crunch with every single bite which I absolutely love.
Another thing that you can do with this cake is change up the colors of the sprinkles. If you want a holiday themed cake, use holiday colored sprinkles (red and pink for Valentines, red and green for Christmas, etc.) or you can just change the colors for whatever you're celebrating (pink or blue for baby showers, NFL team colors).
This is a great celebratory cake. If you can't buy one from the bakery in New York, definitely give the homemade version a try.
Birthday Cake
from Momofuku Milk Bar
makes 1 (6-inch) layer cake; 5 to 6 inches tall; serves 6 to 8
1 recipe Birthday Cake (recipe below)
1 recipe Birthday Cake Soak (recipe below)
1 recipe Birthday Cake Frosting (recipe below)
1 recipe Birthday Cake Crumb (recipe below)
Put a piece of parchment or a Silpat on the counter. Invert the cake onto it and peel off the parchment or Silpat from the bottom of the cake. Use the cake ring to stamp out 2 circles from the cake. These are your top 2 cake layers. The remaining cake “scrap” will come together to make the bottom layer of the cake
Layer 1, the bottom
Clean the cake ring and place it in the center of a sheet pan lined with clean parchment or a Silpat. Use 1 strip of acetate to line the inside of the cake ring.
Put the cake scraps in the ring and use the back of your hand to tamp the scraps together into a flat even layer.
Dunk a pastry brush in the birthday cake soak and give the layer of cake a good, healthy bath of half of the soak.
Use the back of a spoon to spread on-fifth of the frosting in an even layer over the cake.
Sprinkle one-third of the birthday crumbs evenly over the top of the frosting. Use the back of your hand to anchor them in place.
Use the back of a spoon to spread a second fifth of the frosting as evenly as possible over the crumbs.
Layer 2, the middle
With your index finger, gently tuck the second strip of acetate between the cake ring and the top ¼ inch of the first strip of acetate, so that you have a clear ring of acetate 5 to 6 inches tall—high enough to support the height of the finished cake. Set a cake round on top of the frosting, and repeat the process for layer 1 (if 1 of you 2 cake rounds in jankier than the other, use it here in the middle and save the prettier one for the top).
Layer 3, the top
Nestle the remaining cake round into the frosting. Cover the top of the cake with the last fifth of the frosting. Give it volume and swirls, or do as we do and opt for a perfectly flat top. Garnish the frosting with the remaining birthday crumbs.
Transfer the sheet pan to the freezer and freeze for a minimum of 12 hours to set the cake and filling. The cake will keep in the freezer for up to 2 weeks.
At least 3 hours before you are ready to serve the cake, pull the sheet pan out of the freezer and, using your fingers and thumbs, pop the cake out of the cake ring. Gently peel off the acetate and transfer the cake to a platter or cake stand. Let it defrost in the fridge for a minimum of 3 hours (wrapped well in plastic, it can be refrigerated for up to 5 days.
Birthday Cake
makes 1 quarter sheet pan
4 Tbs. (1/2 stick, 55g) butter, at room temperature
1/3 c. (60g) vegetable shortening
1 1/4 c. (250g) granulated sugar
3 Tbs. (50g) light brown sugar, tightly packed
3 eggs
1/2 c. (110g) buttermilk
1/3 c. (65g) grapeseed oil (canola oil)
2 tsp. (8g) clear vanilla extract
2 c. (245g) cake flour
1 1/2 tsp. (6g) baking powder
3/4 tsp. (3g) kosher salt
1/4 c. (50g) rainbow sprinkles
Pam or other nonstick cooking spray (optional)
2 Tbs. (25g) rainbow sprinkles
Heat the oven to 350°F.
Combine the butter, shortening, and sugars in the bowl of a stand mixer fitted with the paddle attachment and cream together on medium-high for 2 to 3 minutes. Scrape down the sides of the bowl, add the eggs, and mix on medium-high for 2 to 3 minutes. Scrape down the sides of the bowl once more.
On low speed, stream in the buttermilk, oil, and vanilla. Increase the mixer speed to medium-high and paddle for 4 to 6 minutes, until the mixture is practically white, twice the size of your original fluffy butter-and-sugar mixture, and completely homogeneous. Don’t rush the process. You’re basically forcing too much liquid into an already fatty mixture that doesn't want to make room for the liquid. There should be no streaks of fat of liquid. Stop the mixer and scrape down the sides of the bowl.
On very low speed, add the cake flour, baking powder, salt, and the 50g (¼ cup) rainbow sprinkles. Mix for 45 to 60 seconds, just until your batter comes together. Scrape down the sides of the bowl.
Pam-spray a quarter sheet pan and line it with parchment, or just line the pan with a Silpat. Using a spatula, spread the cake batter in an even layer in the pan. Sprinkle the remaining 25g (2 tablespoons) rainbow sprinkles evenly on top of the batter.
Bake the cake for 30 to 35 minutes. The cake will rise and puff, doubling in size, but will remain slightly buttery and dense. At 30 minutes, gently poke the edge of the cake with your finger: the cake should bounce back slightly and the center should no longer be jiggly. Leave the cake in the oven for an extra 3 to 5 minutes if it doesn't pass these tests.
Take the cake out of the oven and cool on a wire rack or, in a pinch, in the fridge or freezer (don’t worry, it’s not cheating). The cooled cake can be stored in the fridge, wrapped in plastic wrap, for up to 5 days.
Birthday Cake Soak
makes about 60g (1/4 cup)
1/4 c. (55g) milk
1 tsp. (4g) clear vanilla extract
Whisk together the milk and vanilla in a small bowl.
Birthday Cake Frosting
makes about 430g (2 cups)
8 Tbs. (1 stick, 115g) butter, at room temperature
1/4 c. (50g) vegetable shortening
2 oz. (55g) cream cheese
1 Tbs. (25g) glucose (if you can't find, use 2 teaspoons of additional corn syrup to the amount of corn syrup below)
1 Tbs. (18g) corn syrup
1 Tbs. (12g) clear vanilla extract
1 1/4 c. (200g) confectioners’ sugar
1/2 tsp. (2g) kosher salt
pinch (0.25g) baking powder
pinch (0.25g) citric acid (I couldn't find this, so I left it out)
Combine the butter, shortening, and cream cheese in the bowl of a stand mixer fitted with the paddle attachment and cream together on medium-high for 2 to 3 minutes, until the mixture is smooth and fluffy. Scrape down the sides of the bowl.
With the mixer on its lowest speed, stream in the glucose, corn syrup, and vanilla. Crank the mixer up to medium-high and beat for 2 to 3 minutes, until the mixture is silky smooth and a glossy white. Scrape down the sides of the bowl.
Add the confectioners’ sugar, salt, baking powder, and citric acid and mix on low speed just to incorporate them into the batter. Crank the speed back up to medium-high and beat for 2 to 3 minutes, until you have a brilliant stark white, beautifully smooth frosting. It should look just like it came out of a plastic tub at the grocery store! Use the frosting immediately, or store it in an airtight container in the fridge for up to 1 week.
Birthday Cake Crumb
makes for 275g (2 1/4 cups)
1/2 c. (100g) granulated sugar
1 1/2 Tbs. (25g) light brown sugar, tightly packed
3/4 c. (90g) cake flour
1/2 tsp. (2g) baking powder
1/2 tsp. (2g) kosher salt
2 Tbs. (20g) rainbow sprinkles
1/4 c. (40g) grapeseed oil (canola oil)
1 Tbs. (12g) clear vanilla extract
Heat the oven to 300°F.
Combine the sugars, flour, baking powder, salt, and sprinkles in the bowl of a stand mixer fitted with the paddle attachment and mix on low speed until well combined.
Add the oil and vanilla and paddle again to distribute. The wet ingredients will act as glue to help the dry ingredients form small clusters; continue paddling until that happens.
Spread the cluster on a parchment- or Silpat-lined sheet pan. Bake for 20 minutes, breaking them up occasionally. The crumbs should still be slightly moist to the touch; they will dry and harden as they cool.
Let the crumbs cool completely before using in a recipe or scarfing by the handful. Stored in an airtight container, the crumbs will keep fresh for 1 week at room temperature or 1 month in the fridge or freezer.


HAPPY BLOGAVERSARYYY!!! Omg you did SUCH a fab job on this cake! It looks perfect!!
ReplyDeleteGreat looking cake! I helped my friend make this and there are quite a few steps, but it does look cool at the end. :) And, happy blogiversary!
ReplyDeleteWhat a great cake to celebrate with! I've been wanting to try this cake ever since I bought that cookbook. Sadly I have yet to bake a single thing from it. Failure.
ReplyDeleteHappy birthday, hon! Send me cake! :D
ReplyDeleteHappy Happy blog anniversary! This cake is perfect for the celebration. So so beautiful. You ahev convinced me I need to buy that cookbook :)
ReplyDeleteHappy blog birthday!! What a perfect way to celebrate! This cake looks absolutely amazing, I am so impressed! I love MilkBar - I literally can't pass it without stopping in and buying something...it is a good thing it is not near my apartment!
ReplyDeleteWow, Renee -- your cake looks spectacular! I'm going to need you to ship one up to Chicago stat! ;-)
ReplyDeleteHappy belated blogiversary! :-)